Want to add a Stripe donate button in WordPress for your fundraisers? This guide will show you how to do it in a few simple steps!

Approximate read time: 5.5 minutes
Stripe is one of WordPress's most popular payment gateways for accepting donations.
And getting a working Stripe donation button on your website will make it much easier for visitors to help your fundraiser, nonprofit, or any other donations you have.
So, in this guide, we’ll show you how to make a Stripe donate button with Formidable Forms, one of the best form builders and Stripe payment plugins.
Let’s get started.
How to create a Stripe donate button for your WordPress site
To accept Stripe payments and donations on your website, you'll need a donation form.
This is why we recommend Formidable Forms.

With its simple drag-and-drop builder, you can create a simple Stripe donation form in a few minutes. Plus, with some of its advanced features, you can make a Stripe donation button and form that shine.
But we’ll get to that in a bit.
The first thing you need to do is head over to our pricing page and pick up our Business plan. With it, you get all the features you need to create your Stripe donation button and form.
Once you have that installed and activated, we’ll start with four easy steps:
Step 1: Connect your Stripe account to Formidable
To get started, go to your WordPress dashboard and go to Formidable → Global Settings. Then scroll down and click Stripe.
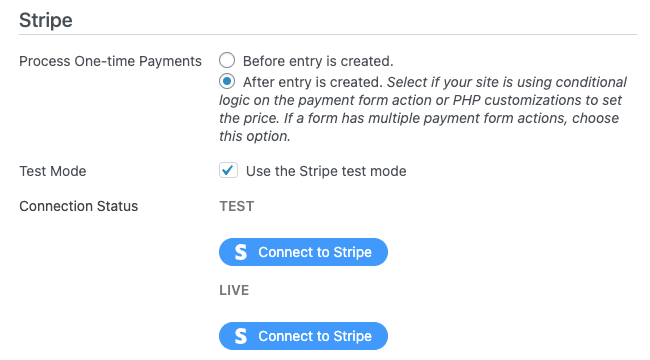
You can customize your payment settings for when you want it to process the Stripe payment. Then you can click the Connect to Stripe button under LIVE.
Follow Stripe’s instructions to connect your account and your Stripe API keys set up. Stripe will guide you through the process without worrying about a complicated setup.
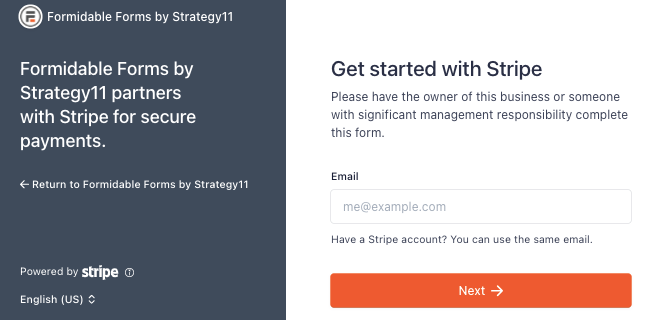
Once everything is ready to go, you’re ready to create your form!
Step 2: Create your donation form
Head to your WordPress admin dashboard and go to Formidable → Forms.
At the top of the page, select Add New. You can create a blank form and start from scratch or choose from one of our 225+ pre-made form templates. There are even several donation templates with Stripe built in if you want to make things easy.

For our example, we’ll use a blank form so you can see the process from the beginning. Once you choose your form, give it a name, and click Create.
This will take you to our drag-and-drop form builder to begin creating your form.
Choose whatever fields you want and simply drag them to your form, then customize the title and description.
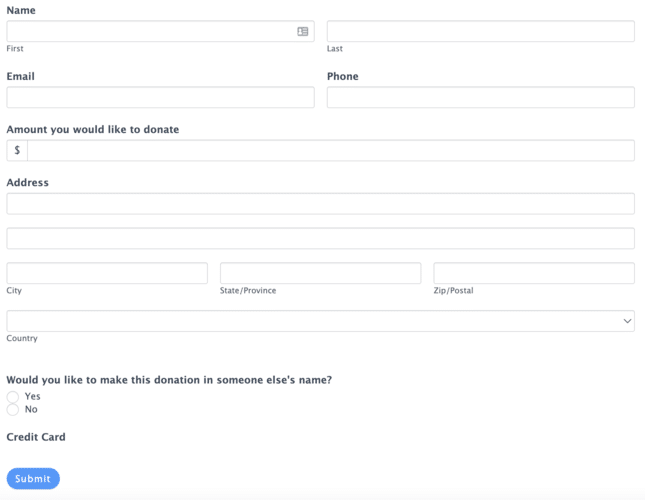
Now that your form is created, we want to make sure your form is set up to properly process credit cards with Stripe.
So, click Update to save your changes, and then click Settings.
Under the Actions & Notifications tab, click the Collect a Payment button to add your Stripe action.
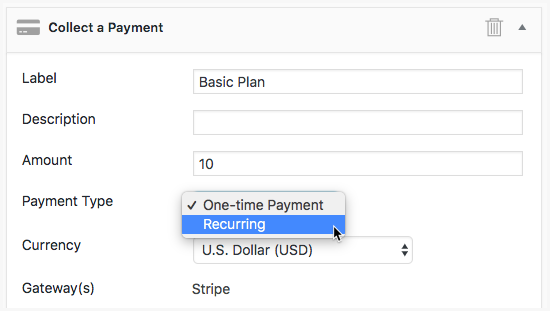
You can change the payment type (single or recurring donations), the currency, when to process the payment, or set a fixed donation amount.
Feel free to customize these settings based on your needs. For our example, the default options are just fine.
Click Update to save your changes.
Add a form landing page (optional)
You can also add a landing page for your form.
So, when visitors click your button, they’ll go straight to your form’s landing page.
To add this, click the Form Landing Page and Generate Landing Page.
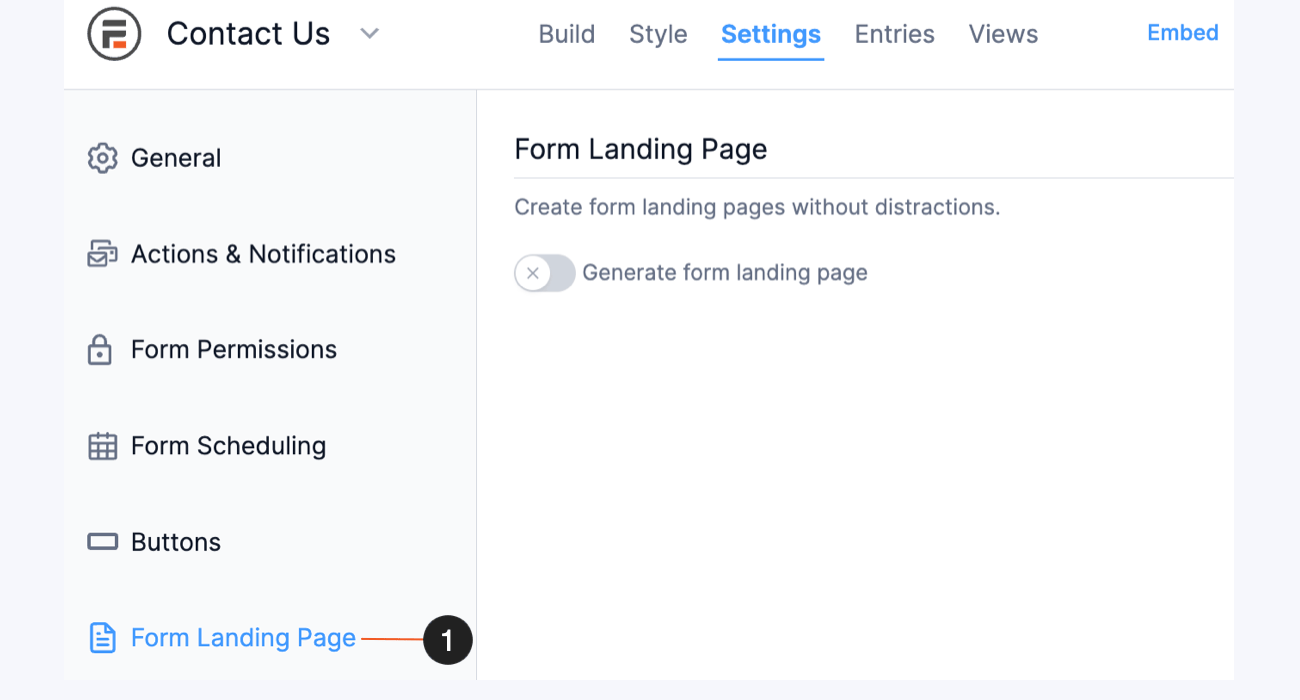
The plugin will create a URL based on your form’s name, but you can feel free to customize this how you want.
Keep this URL handy for when you need it later.
Step 3: Create your Stripe donation button
You have two options for this step.
You can add a simple button on your post or page and link to your form’s landing page. Or, you can create your customized button in Views.
We’ll show you how to do both.
Create a simple WordPress donation button
Go to your WordPress post/page where you want to show your button.
Add a new WordPress block, and search Button.
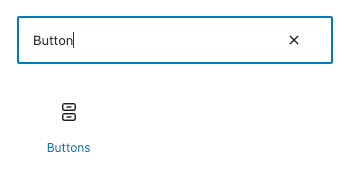
Click on your Button block, and choose the Link option. Paste your form’s landing page or the URL to which you want to direct your visitors in this field.
Hit enter, customize your button text if you want, and you’re good to go!
Just update the page, and your button is ready.
Now, if you want something more advanced, check out Formidable Views ?
Create a customized donation button with Formidable Views
Formidable Views is where Formidable sets itself apart from other donation plugins.
Using Formidable Views, you can easily create a button on your website that people can click, and then they’ll see your Stripe donation form.
To do this, click the Views tab at the top of the page.
From this menu, select Add New at the top of the page. It gives you the option of what kind of view you’d like to create with some pre-built templates.
For your button, you can select Grid to make things simple. Give your View a name, then click Create a view.
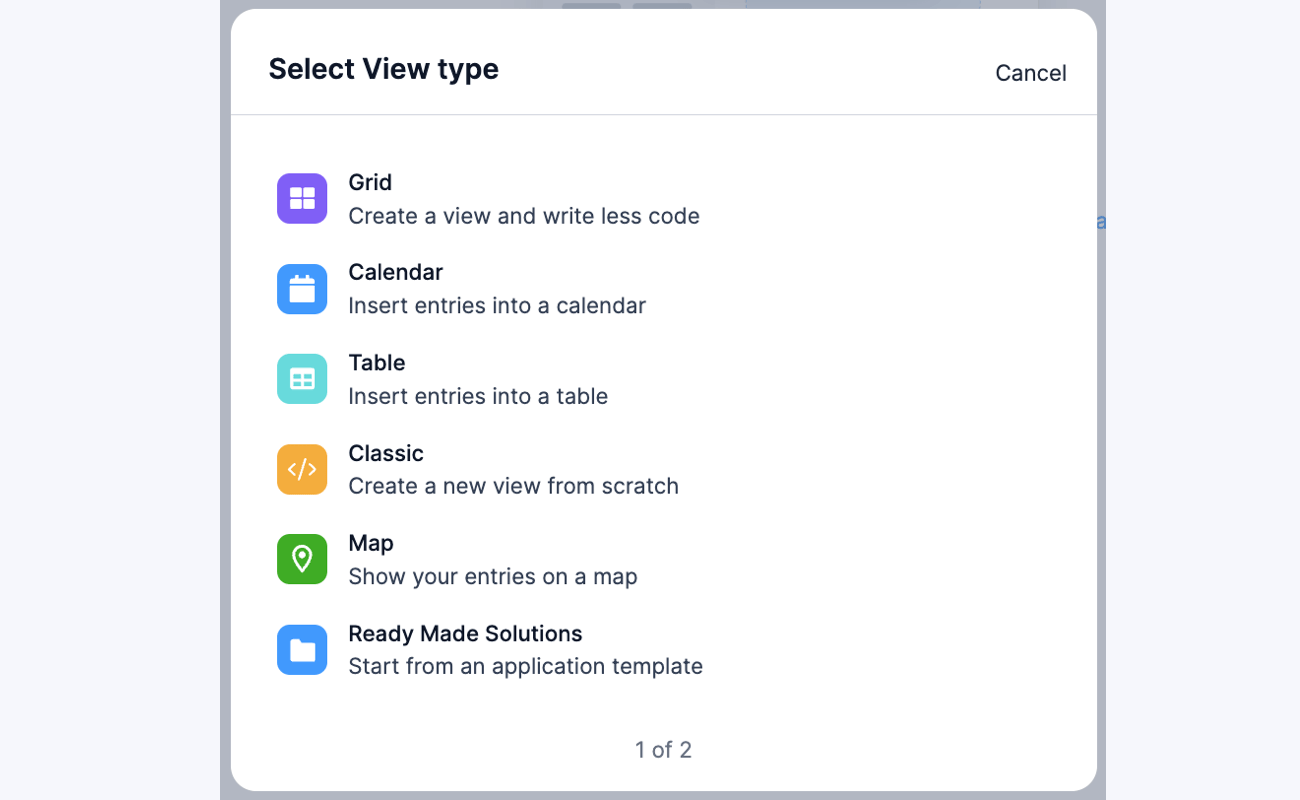
Now you’re in our View Builder. But don’t get overwhelmed. It’s more straightforward than it appears.
To get started, click the Start adding content to get started link below the blue button.
This will take you to where you can start customizing your View. So, click the top empty blank below the + button, and it’ll take you to our Visual/Text Editor.
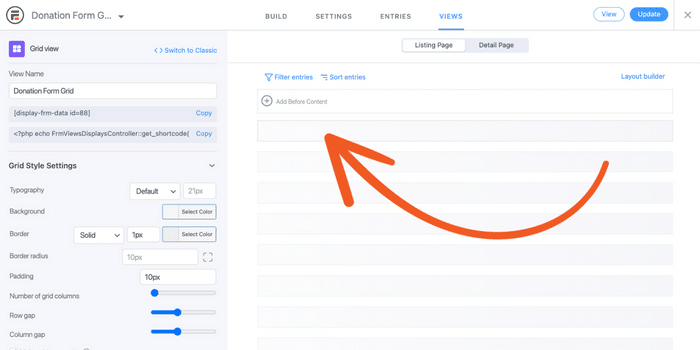
You can get creative here if you know a bit of HTML, CSS, or Javascript.
For example, we love a charity called Save the Children. So, why not raise some money for them?
Heading into our Views builder, we entered the following code:
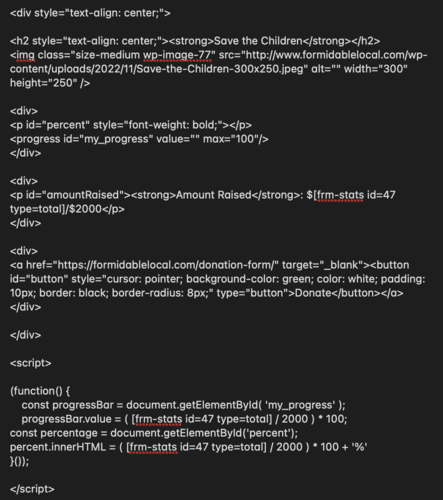
Don’t worry if you don’t understand this code. You don’t have to know how to code to create something extraordinary in Views.
Now, every time someone donates to the form, it automatically updates to show the current total and a progress bar toward the goal!

All donors have to do is click the donate button to go to your form’s landing page to make a donation!
This is just a tiny example of what you could do.
Formidable Forms is much more than a simple form builder. It’s also an excellent application builder.
Step 4: Display your button and form
If you set up a simple button in the previous step, you’re already set.
But, if you want to show your form on its own or the View you built, you still need to display it.
So, we’ll break this down by how to display your form and how to display your View.
How to display your form
Go to the post or page you want to display your form and add a new WordPress block.
Next, search Formidable and choose the Formidable block.
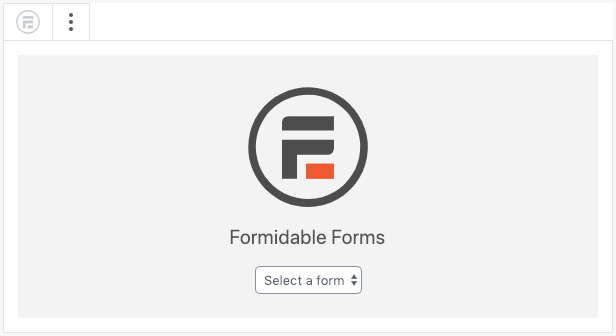
Here, you can choose your form from the dropdown menu. Now, update your page, and your form is on your page.
How to display your View
In the editor where you created your View, copy the shortcode listed in the top left.
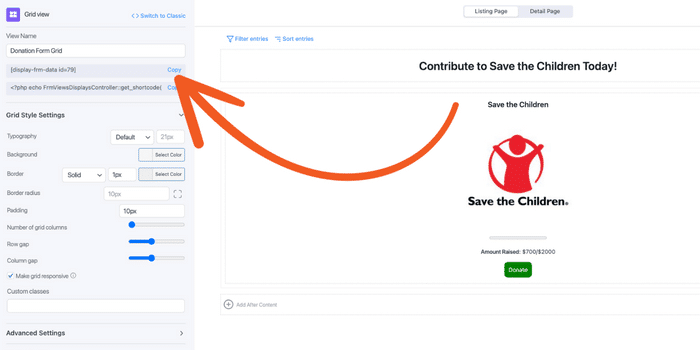
Next, go to the post or page where you want to display your View and add a new WordPress block. Then, search Shortcode and add the block.
Paste your shortcode into your block and update your page; your View will be shown on your page!
What donation ideas do you have for Formidable Forms?
As you can see, you can keep it simple or use your imagination and create something unique!
The choice is yours!
There are many Stripe WordPress plugins to choose from, but none offer the flexibility of Formidable. And this step-by-step guide showed you how to add a Stripe donate button to your WordPress site using Formidable.
So, don’t wait any longer! Grab Formidable Forms and get started with your donations today!
And make sure to follow us on Facebook, Twitter, and YouTube for more WordPress donation tips and tricks!
 How To Accept Stripe Membership Payments in WordPress
 Authorize.net vs Stripe: Which Is Right for Your Site?
 How To Make a WordPress Form with Payment Gateways
Leave a Reply