Learn the easiest way to send emails to multiple addresses in WordPress. Follow our step-by-step guide to streamline communication processes today!
Approximate read time: 6 minutes
Sending an email to multiple addresses in WordPress is much easier than you think.
And knowing how to send emails efficiently can save loads of time on email marketing. Just imagine being able to send newsletters, updates, or welcome emails to multiple people without having to enter any custom code.
That's exactly what I'll show you today.
Send Emails to Multiple Addresses Now!
In this post, I'll explain how to use WordPress to send emails to multiple addresses using WordPress. I'll cover the basics and share tips and tricks to ensure the emails reach the audience's inbox, not their spam folder.
So, with that said, let's dive in.
Why send emails to multiple addresses in WordPress
Sending emails to multiple addresses in WordPress can save time and effort on email campaigns.
This is especially useful for freelancers, agencies, or businesses that need to keep clients and subscribers informed and engaged with minimal headaches and work.
So here are some ways this can make a big difference:
- Newsletters and updates: Keep subscribers up-to-date with the latest news, blog posts, and special offers by sending a mass email.
- Event invitations: Planning a webinar, workshop, or event? Easily send invites to an entire guest list at once.
- Customer announcements: Inform customers about new products, services, and updates.
- Automated responses: Use automated emails to welcome new subscribers, confirm orders, or follow up on customer questions.
Using a simple solution, you can streamline communication, save time, and maintain consistency across all messages. It's a simple (but powerful) way to keep an audience engaged and informed.
How to send emails to multiple addresses in WordPress
The best way to send emails to multiple addresses in WordPress is using Formidable Forms.
It's the most advanced WordPress form builder, and its form actions make it easy for anyone to control how they use their data. Whether sending emails, sending them to an email service (like Mailchimp), or using Zapier to connect with a Customer Relationship Management (CRM) platform.

But the real star is Formidable's repeater actions, which I'll show you today. So, it's just a few steps to get started:

Step 1: Install and activate Formidable Forms
The first step is to set up Formidable Forms on the WordPress website.
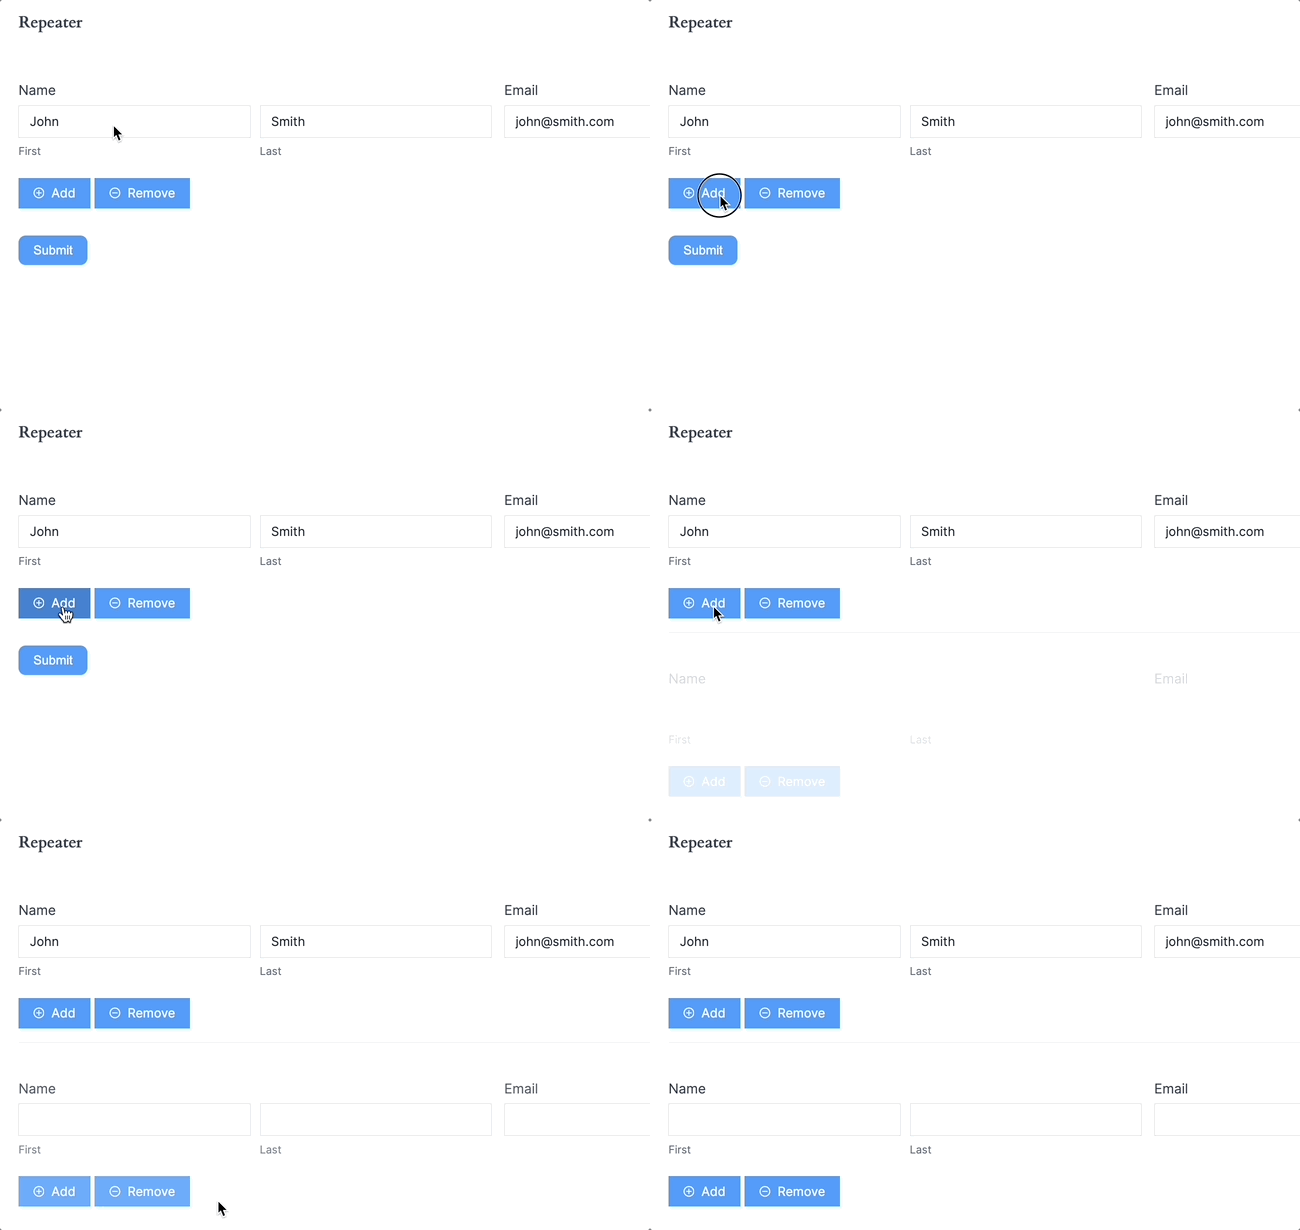
Repeater fields allow anyone to add a group of fields any number of times. For example, users can add as many names, emails, or other fields as they want.
This feature is available in Formidable's Basic plan and above. So grab a Formidable Forms Pro plan to get started. Then, if there's any trouble, our KnowledgeBase docs can help you install and activate Formidable Forms in a few minutes.
Step 2: Create a form
Now that Formidable Forms is ready, I'll show you how to use repeater actions with a hotel booking form.
First, I'll go to Formidable → Forms and click the Add New button.

Formidable Forms has tons of pre-built WordPress form templates to get started faster. But I'll create one from scratch to show exactly how it works. So I'll click Create a blank form.
The plugin will open the drag and drop WordPress form builder, where I can start customizing my form.
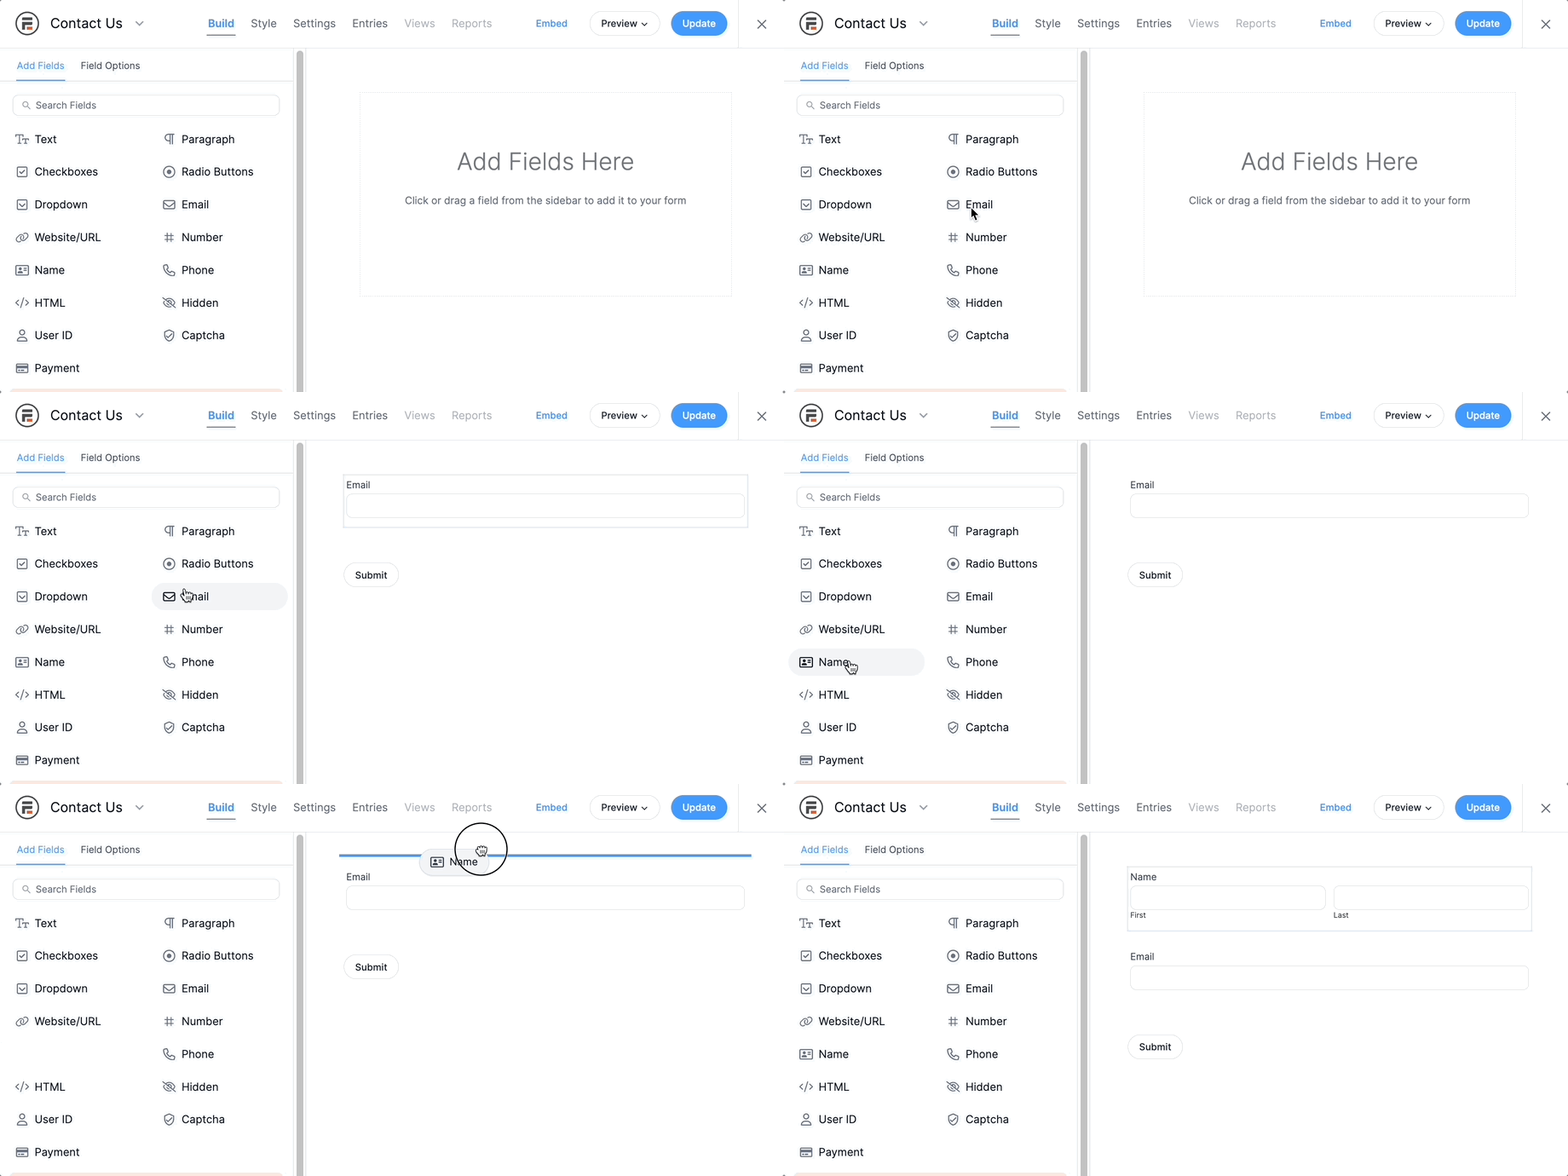
Since this is a basic booking form, I'll add a few different fields, including:
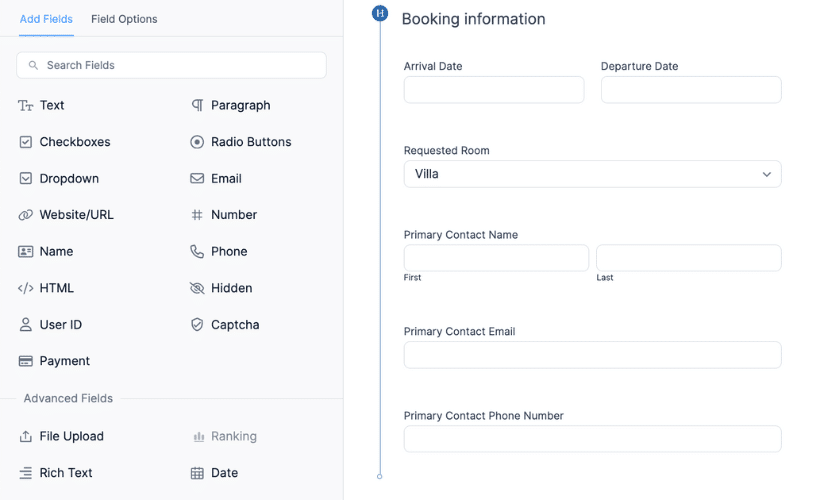
- Header section: This will contain the booking information
- Two date fields: For arrival and departure dates
- Dropdown field: For the requested room
- Name field: For the primary contact's information
- Email field: Primary contact's email
- Phone field: Primary contact's phone number
So, once I add those fields, my form will look something like this:
Next, I'd like to add a section where they can add the guest's names and their emails. That way, a confirmation email can be sent to all the guests for their records instead of just the primary contact.
This is where I'll use a Repeater field. I'll add it and label the section Guests so it's clear. Then, within that field, I'll add a Text field for the guest's name and an Email address field for receiving the email.
So, if the customer wants to add more guests, they can do it simply by clicking the Add button:
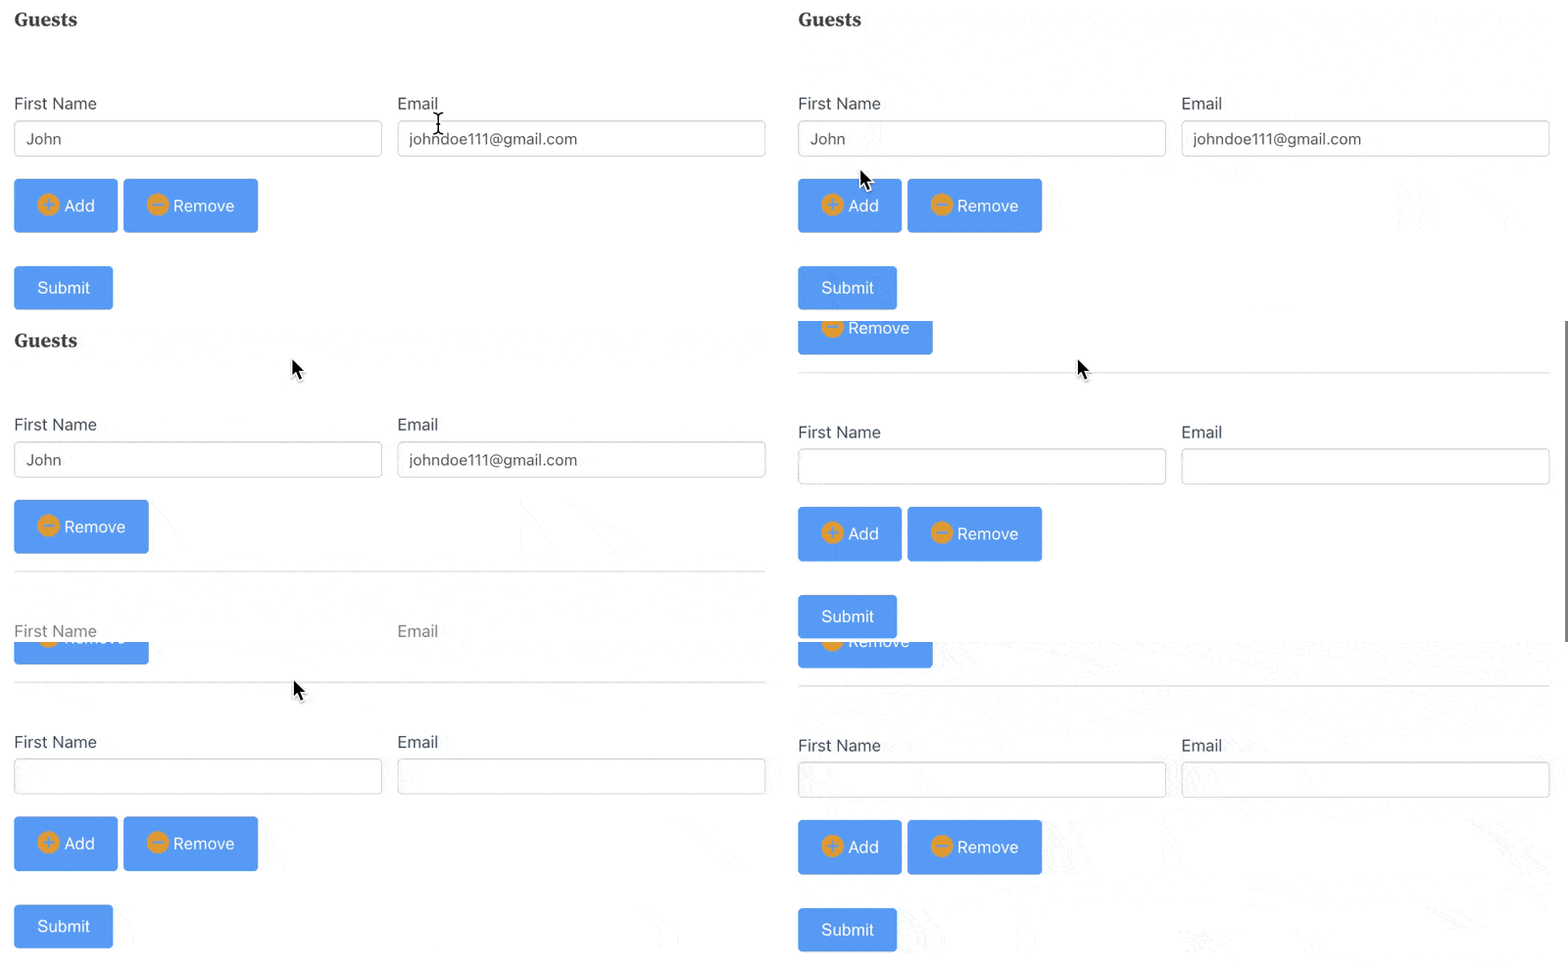
Now, the customer can add as many guests as they need and add the email addresses so they all receive the message.
Next, I'll set up the repeater actions to ensure the emails get sent properly.
Step 3: Set up the form repeater actions
First, I'll go to Settings → Actions & Notifications, where I'll see the Send Email notification action.
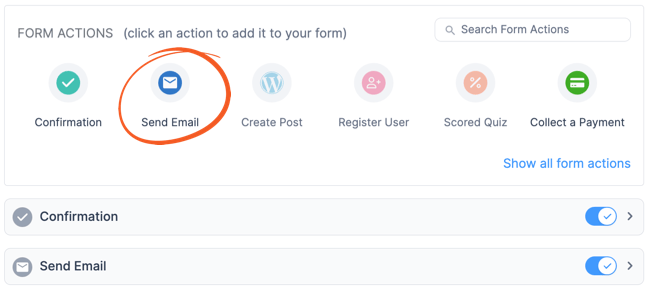
Under the action, a few options exist to customize the email and how it's sent. But I want to focus on the Run this action for dropdown menu.
Normally, people use the CC field or BCC (blind carbon copy) field. But the repeater field simplifies this process because I don't need to enter the emails manually.
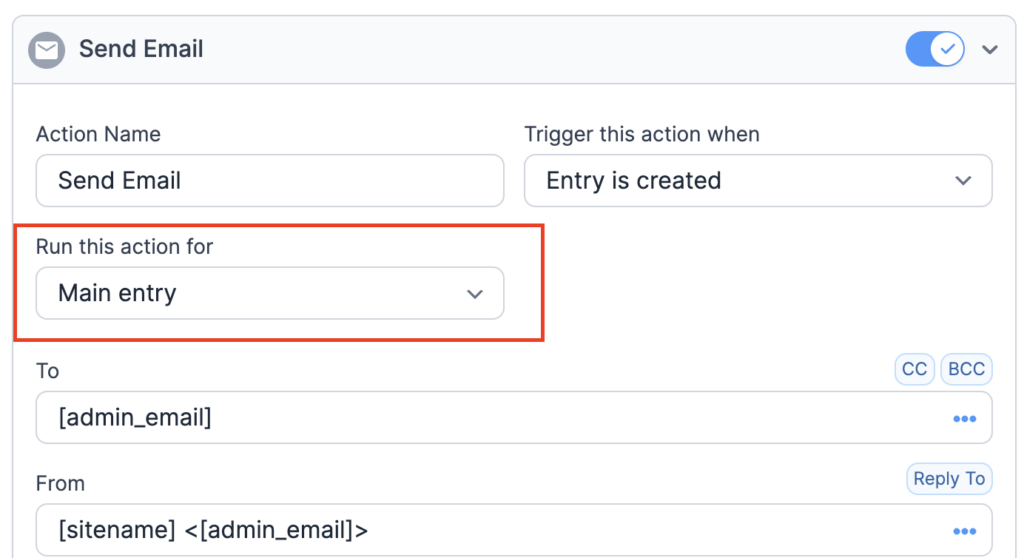
I can keep it as the Main entry, but that will only send it to the primary email listed. Instead, I'll click the dropdown and choose the repeater field, which I labeled Guests.
I'll also change the send To email address field to be the primary contact's email so they receive a copy as well. To do this, I can delete the [admin_email] shortcode and add the shortcode for the Primary Contact Email and Guest Email, which are [196] and [200] on my form.
This code will change depending on your form and its shortcodes.

Next, I can customize the Subject line and the email Message box to include the information about the customer's reservation.
Again, I can use the form shortcodes so it automatically populates the correct information:
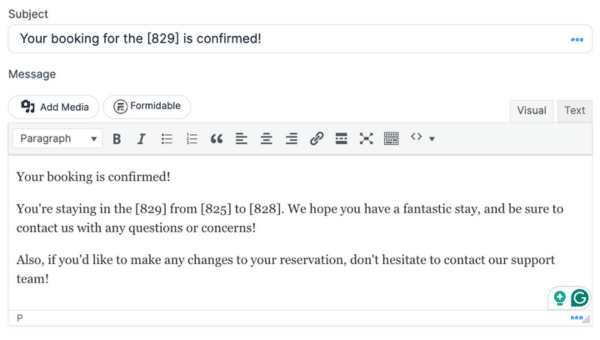
Now, each guest will get an email confirming their booking and no extra workarounds are required on my end.
Note: If you have any trouble with this section, check out our Knowledgebase docs for help.
Step 4: Publish the form
Last is the easy part: publishing the form on my site so users can fill it out!
So, I'll go to the post/page where I want my form and add a new WordPress block. Next, I'll search for and add the Formidable Forms block.
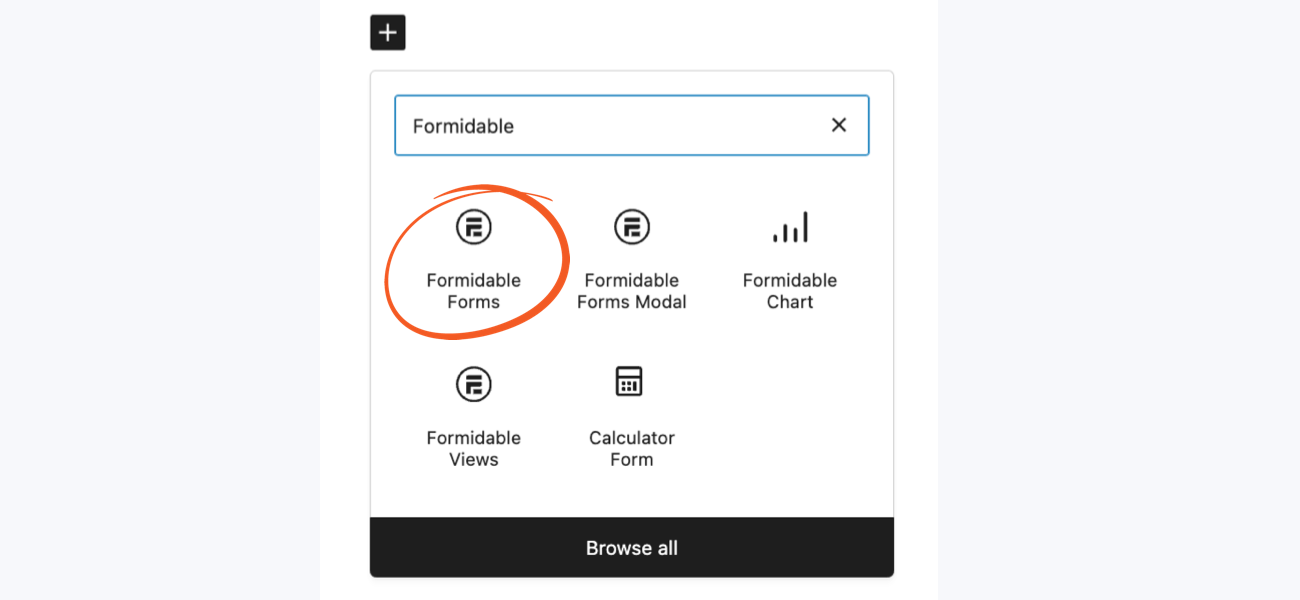
Then, I'll choose my booking form from the dropdown menu, which will show on the page. Last, I'll update/publish the page or post and my form is live!
Create a contact form with multiple recipients
This guide showed the basics of how to send to multiple email addresses. But this is just the beginning.
There's so much more Formidable Forms can do. So, I recommend checking out our guide on creating a contact form to send an email with multiple recipients to learn more. Or if you want to make sure your emails stay out of the spam folder, check out our guide on using an SMTP plugin for better email success.
And if you're ready to start, grab a Formidable Forms Pro plan now! You can even try it risk-free for 14 days.
And don't forget to join our community on Facebook, Twitter, and YouTube for more WordPress tips and tricks!
 How To Update Repeater Fields in ACF [The Easy Way!]
 How to Show Business Hours on Your WordPress Website
 The Gravity Forms Repeater Alternative - That Works!
Leave a Reply