You don't need to use custom code to integrate OptinMonster and Formidable Forms. Here's how to optimize your opt-in forms in a few simple steps.

Maximizing the effectiveness of your opt-in forms
Whoever said “email marketing is dead” was dead wrong. It’s alive and well. The question of the effectiveness of email marketing isn’t one we’ll be tackling here. But here’s a simple question: how are your opt-in forms doing? Are they dull and uninspiring? Are they converting your visitors to subscribers?
This post is going to show you how to use OptinMonster and Formidable Forms together to maximize your opt-in forms. For purposes of demonstration, we've used the MailChimp Add-On.

There are several tools out there to maximize the effectiveness of opt-in forms. The ever-popular OptinMonster makes design and configurability of opt-in forms a snap. We get asked about it a lot. Users want to know if Formidable Forms plays well with OptinMonster. The answer is, of course, yes. (Formidable plays nicely with everyone, even monsters munching on envelopes!)
It’s very simple to optimize your opt-in forms through integration of OptinMonster and Formidable Forms. No custom code is needed.
If you aren’t currently an OptinMonster account holder, check out the comprehensive review by Joe Fylan to see if OptinMonster is right for your site.
Why integrate OptinMonster and Formidable Forms?
Integrating Formidable Forms with OptinMonster requires a few extra steps than if you were simply integrating OptinMonster with your Email Marketing Provider. Essentially, Formidable integrates via a custom HTML integration versus a standard email provider integration with OptinMonster.
Formidable Forms becomes the middleman between OptinMonster and your Email Marketing Provider. As far as middlemen go, sometimes they enhance the transaction; sometimes they cost you more. In this instance, Formidable Forms as the middleman opens up your options and capabilities in so many ways. It doesn’t cost you any more (if you already use Formidable) but it enhances what you can do with your opt-ins.
All of the power of Formidable Forms behind your opt-in
When you integrate Formidable Forms with your OptinMonster opt-in, you’ll have all the power of Formidable available to you. You’ll have more control over your form style and form data.
Take form fields for instance. Unless you are custom coding your OptinMonster form from scratch, OptinMonster’s default field settings include only fields for name and email address. Custom HTML integration via your Email Marketing Provider (i.e. MailChimp, Campaign Monitor or MyEmma) is available, but then you are limited to the form design restrictions allowed by your Email Marketing Provider (unless you use custom code).
With a Formidable Forms integration, you can add or change opt-in fields, have complete control over your form styling, and use your OptinMonster popup for more than simple email opt-ins. You can do this all without custom code.
You have the ability to register users, collect payments, send autoresponders and anything else Formidable handles, all within a well-timed popup.
Here are the simple steps to integrate your Formidable Forms with OptinMonster. We’ve integrated an OptinMonster popup form on our FormidableForms.com website and taken screenshots to show you what the process looks like.
Step one: create an OptinMonster account
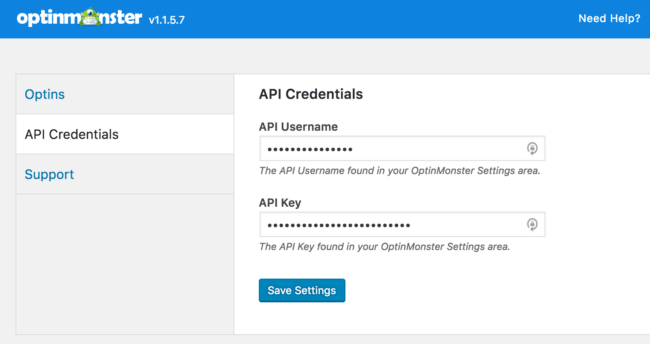
Start by creating an OptinMonster account if you don’t already have one. You’ll also need to have the OptinMonster WordPress plugin downloaded and activated on your site. Add your new API Credentials into the fields in your plugin on your site as shown below.
Step two: create your OptinMonster opt-in
Create your opt-in within your OptinMonster account. OptinMonster’s website gives a handy step-by-step instruction post.
Choose your theme
Complete custom CSS is an option within OptinMonster. But for purposes of this blog post we will be working with an OptinMonster templated theme.
We decided to use the “Transparent” lightbox theme. This is how it looks in OptinMonster before customization. You can see the form field area for the theme. Our Formidable Form that we are about to create will need to fit inside this OptinMonster templated theme area.

We created our own image to replace the smart bedding image and uploaded it into OptinMonster. This is accomplished in the Setup area of your OptinMonster editing dashboard.
Now it’s time to create the form in Formidable that you plan to integrate.
Step three: create your form in Formidable Forms
Create your form in Formidable Forms. Make sure you have your Email Marketing Provider integrated with Formidable Forms. The Email Marketing Provider that we use is MailChimp. Screenshots reflect the Formidable Forms MailChimp plugin.
Set up your Form Style
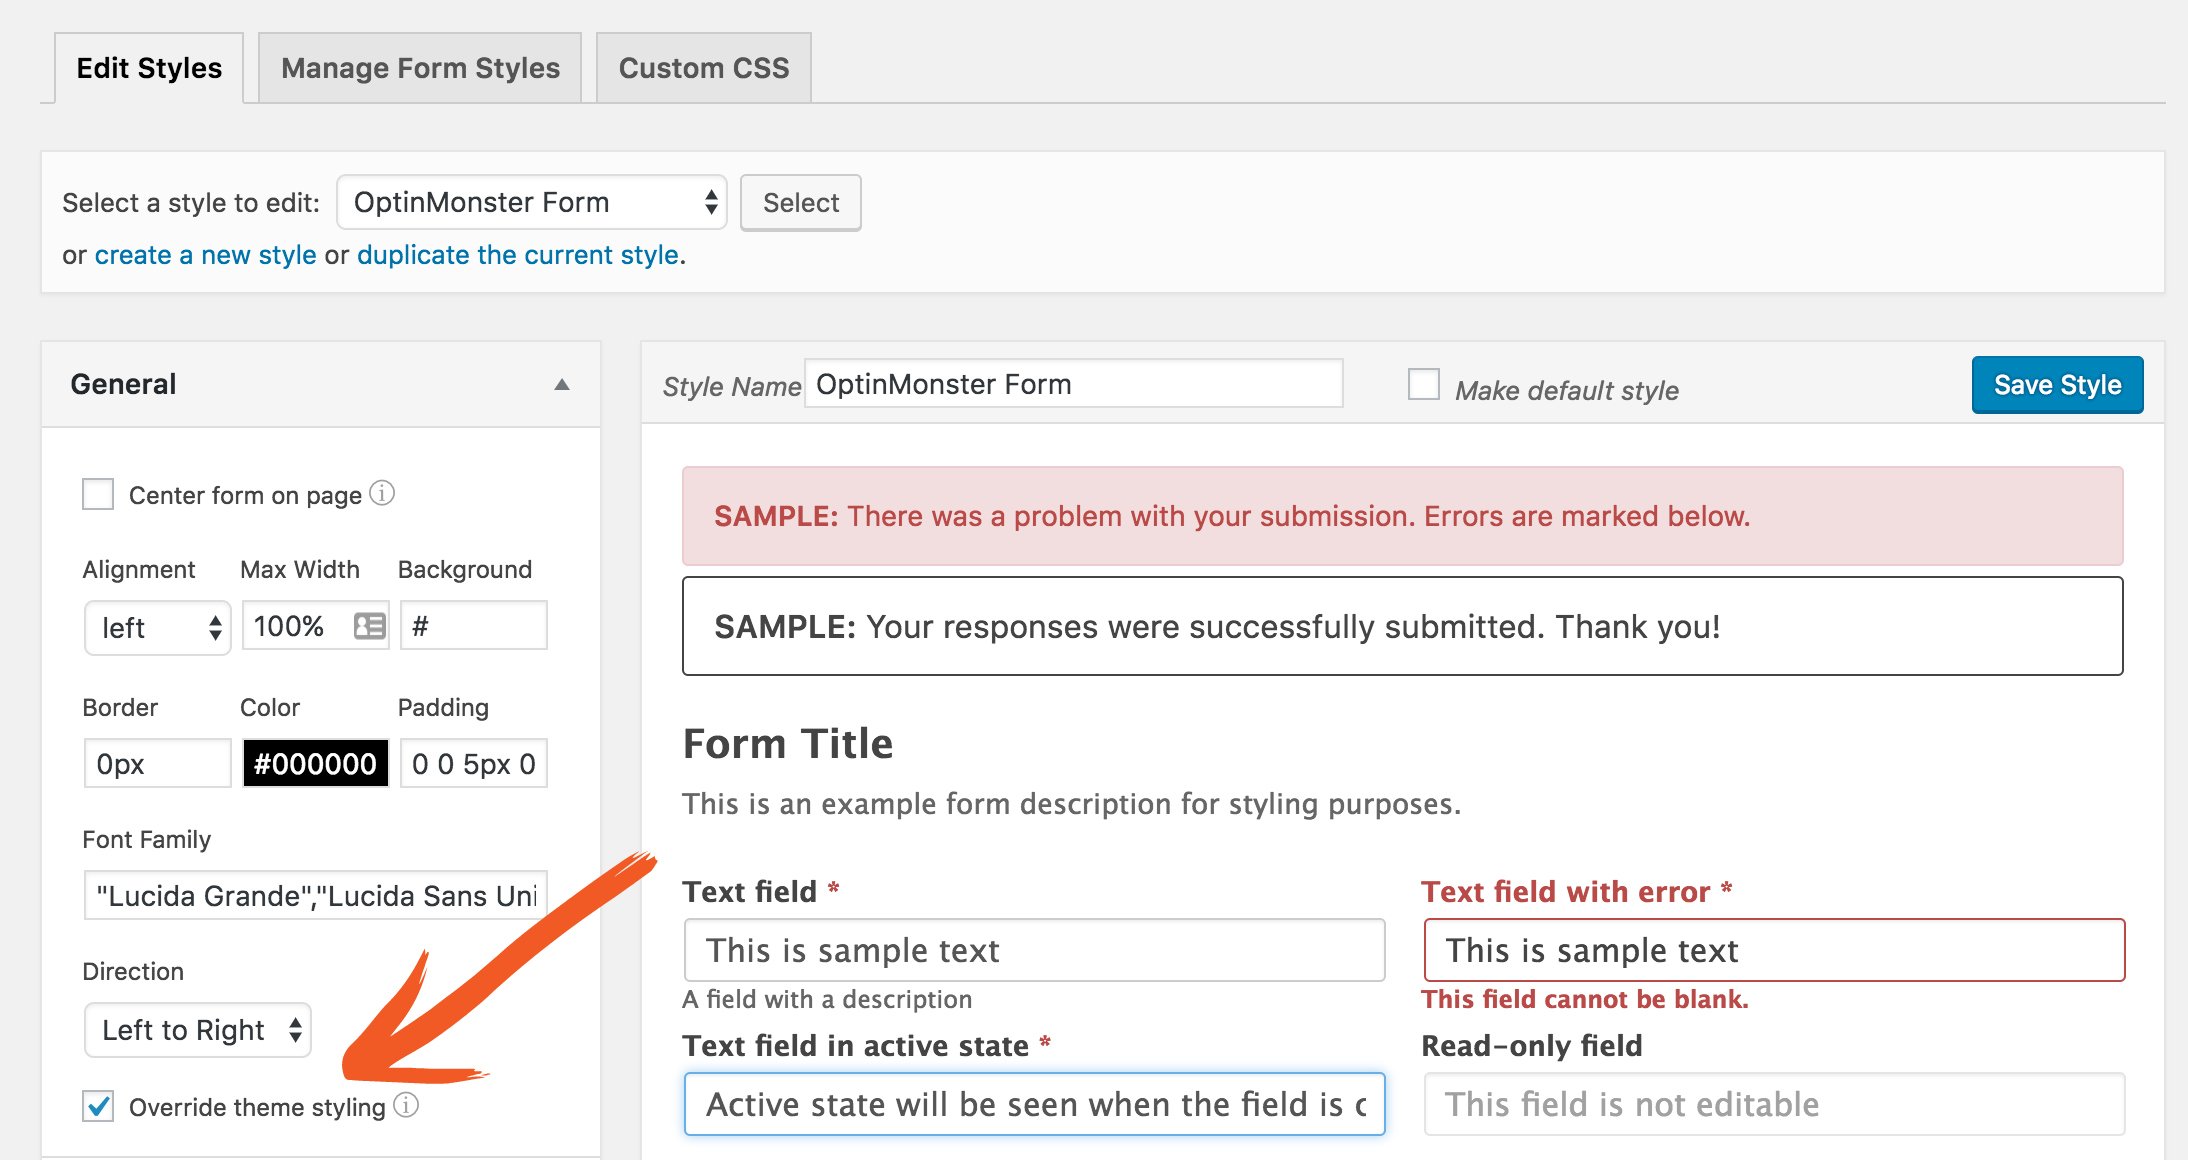
The default Formidable style will fit in the templated theme area of your OptinMonster opt-in. We just created a new style so we could change color and font size. We named our style “OptinMonster Form” and we chose the colors and field settings we wanted.
To have your Submit button match the width of your fields, set the Submit button width to 100% in the Formidable Style you are using.
Override theme styling
In order to allow your form styling to override OptinMonster’s theme styling, make sure to check Override Theme Styling in the general section of Formidable’s Edit Styles. If we didn’t do this, we would still have the green Submit button in our chosen theme. We instead want orange to match the colors of our website.
Set up your fields
Create your form in Formidable’s Build tab. Our opt-in for demonstration purposes is an email opt-in and we’ve chosen not to ask for a name.
What fields should your form contain? That’s up to you. With a Formidable Forms integration, you have expanded field options. For an email opt-in, you obviously need an email field. Whether or not you use a name field (or first name field and last name field) is up to you. Do you personalize your emails to subscribers? If so, you may want to use at least a first name field.
Set up your form action
Send your new opt-ins to your Email Marketing Provider by setting up your form action. MailChimp users accomplish this with an Add to MailChimp Form Action.
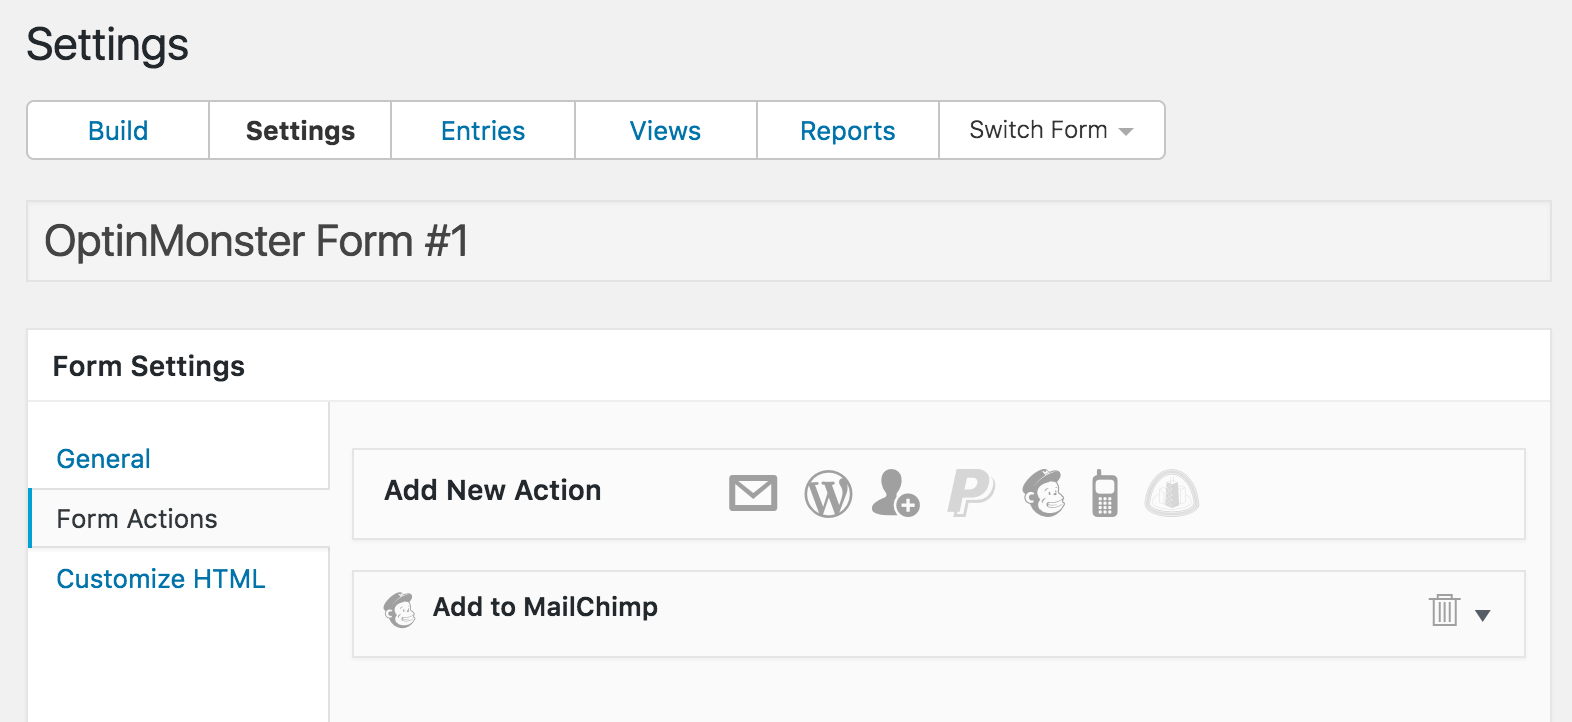
Inside your Add to MailChimp Form Action, you can choose which list to map your sign-ups to. Formidable shows whatever your MailChimp account list settings are.
Map your opt-ins
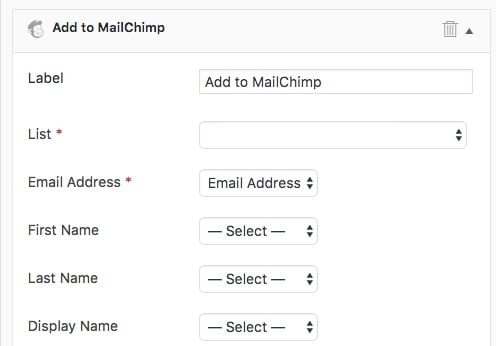
Map your opt-in sign ups to a list (and a group if you’d like) that you have set up in your Email Marketing Provider account.
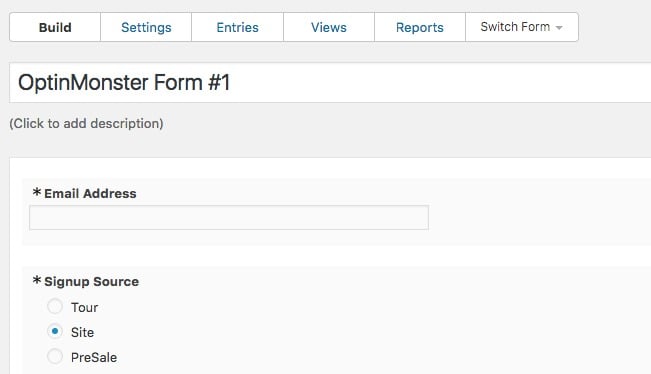
As you can see here, we’ve set up a field that maps our sign-ups to a group we have set up in MailChimp. The group is called “Signup Source: Site” Each submission will automatically map to this group in MailChimp. This is an option to us since we have this group already set up in MailChimp. For more help with this, click here.
The mapping field “Signup Source” is set as a hidden field.
Set up AJAX
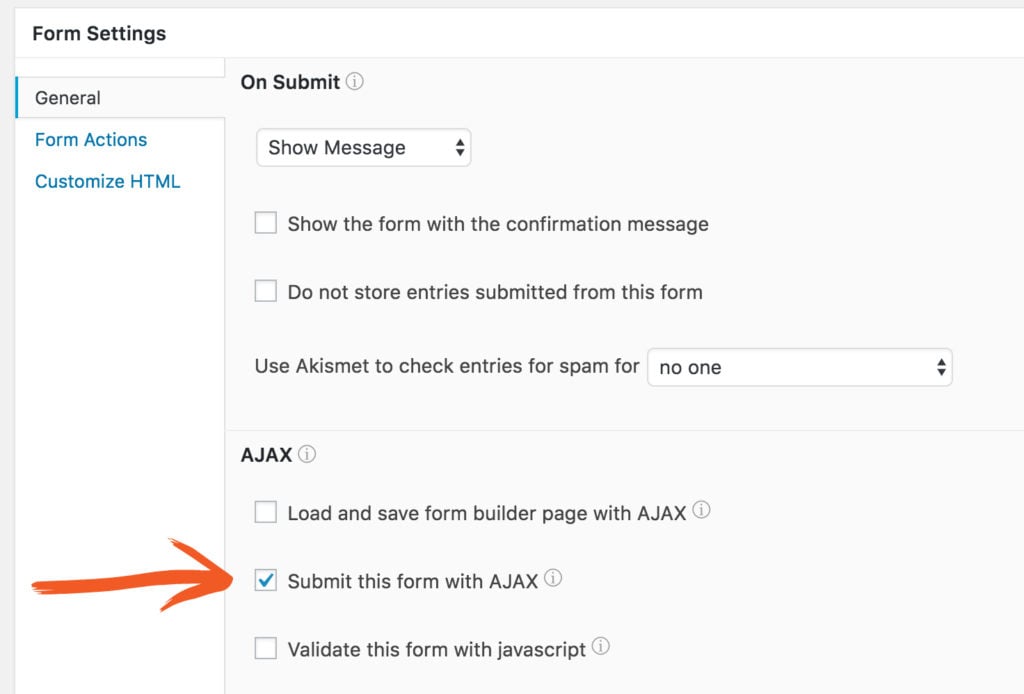
In your Form Settings, be sure to check Submit this form with AJAX in your General settings. This will allow your form submission to submit without an entire page refresh. This is important so that your success message will show immediately in the opt-in window after submission. If you don’t check this, your success message will create a refreshed page. A refreshed page brings the pop up open again. That would skew your conversion rates and provide a less than great experience for your visitor.
Add om-trigger-conversion CSS class to custom HTML of Formidable Forms submit button
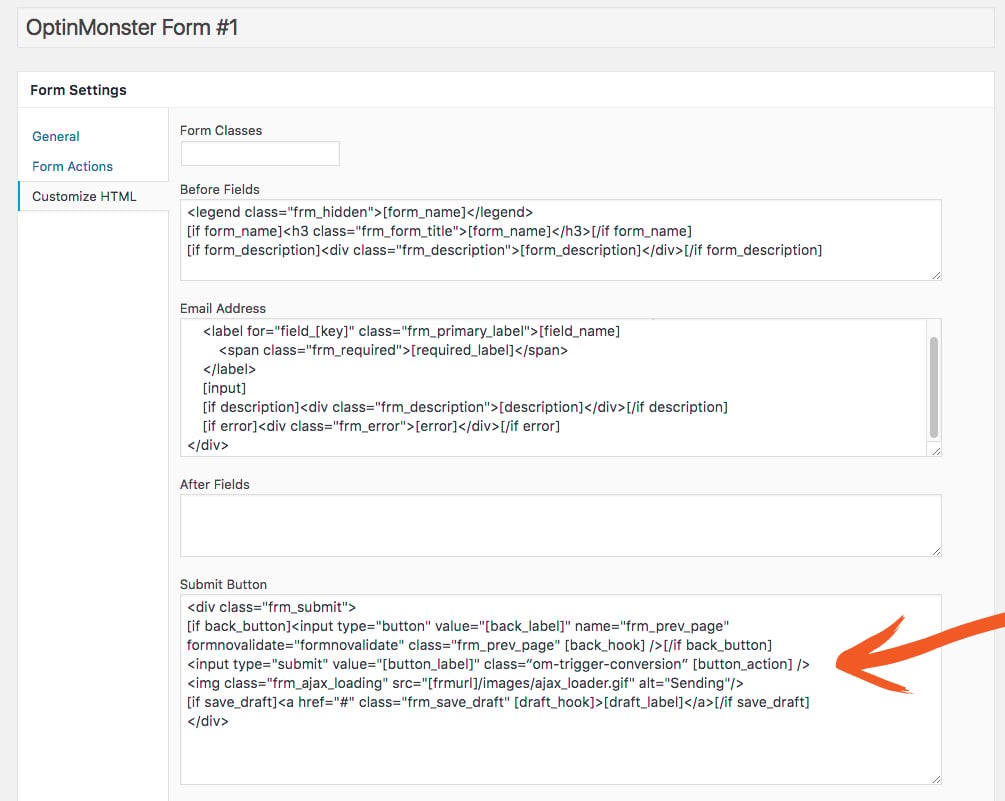
In the Customize HTML form settings, you’ll need to add some custom HTML to your Submit button. This is a CSS class provided by OptinMonster required for the integration. It ensures that you can track conversions.
You need to change the HTML in the Submit button box from:
<input type="submit" value="[button_label]" [button_action] />
to:
<input type="submit" value="[button_label]” class=“om-trigger-conversion” [button_action] />
Set up your success message
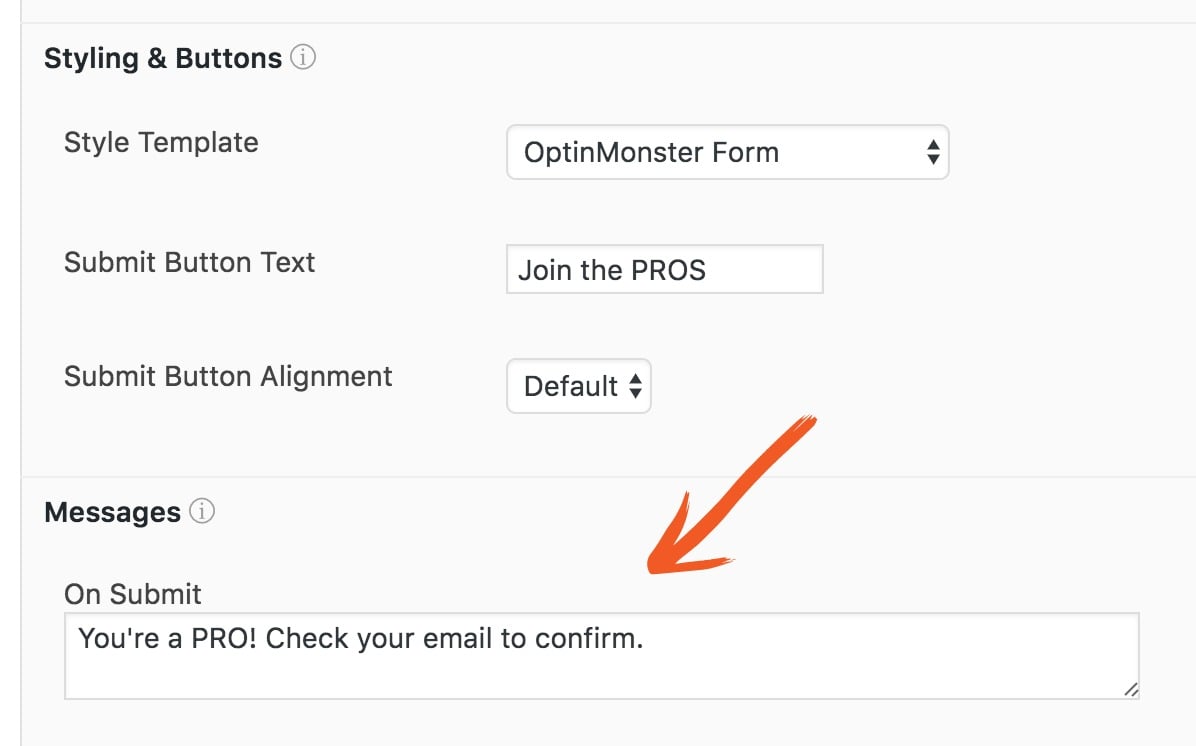
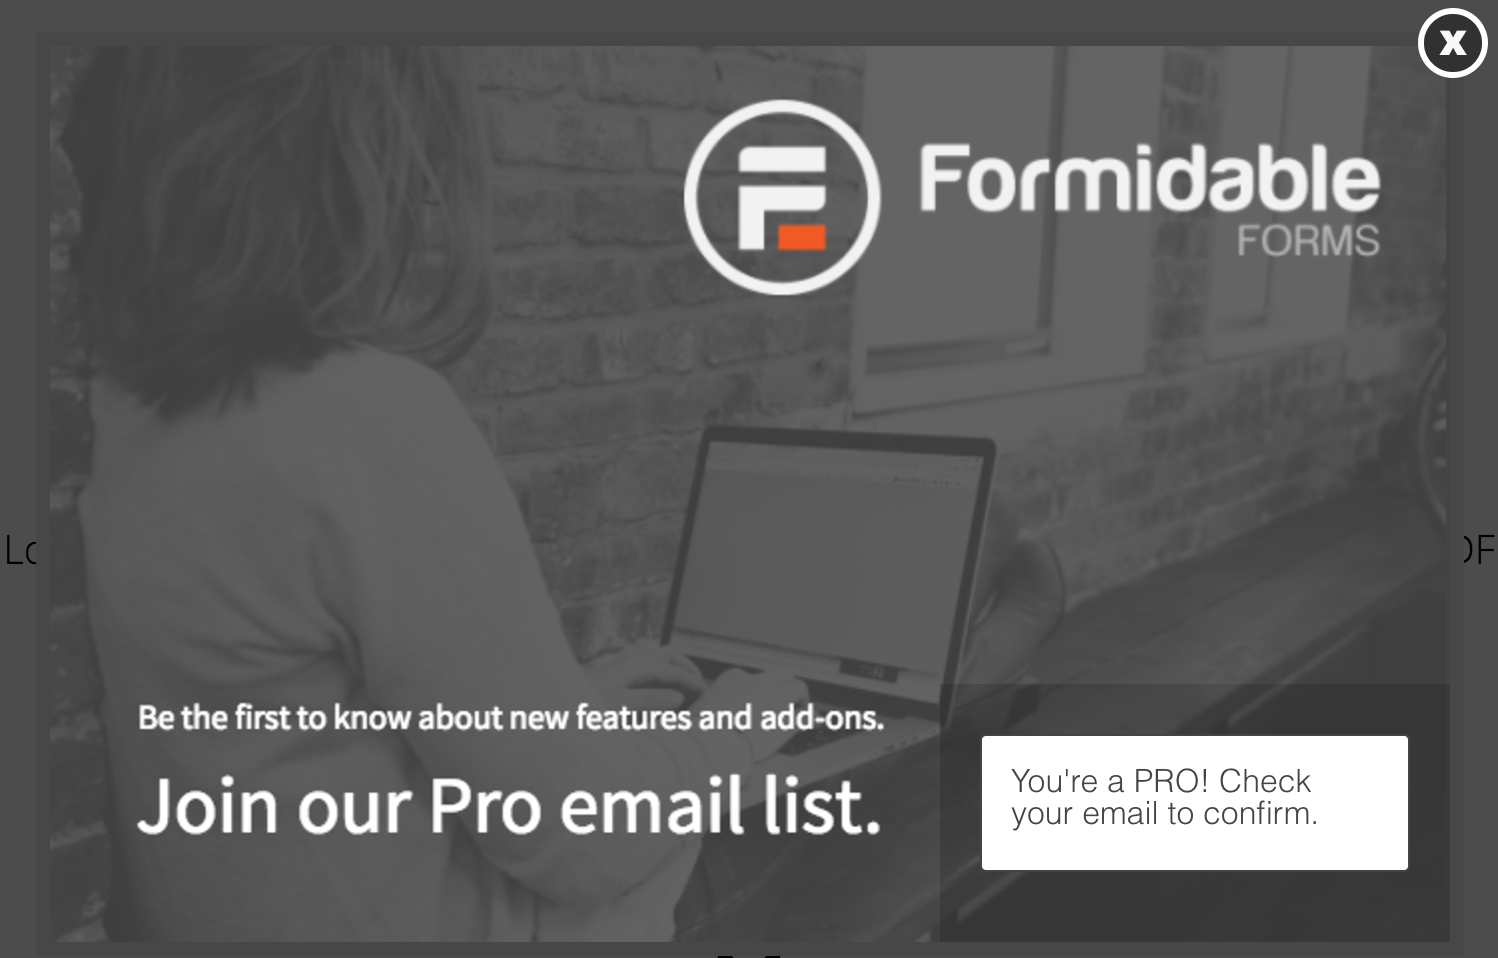
Whatever you want your opt-in form to show for successful opt-ins, you’ll need to set up in the Messages section of your General Form Settings. With custom HTML integration in OptinMonster, the success settings are disabled in OptinMonster and dependent upon what you’ve set up in Formidable. Styling for your success message can be done in the Styles section of Formidable. Our success message reads “You’re a PRO! Check your email to confirm.”
Here's how it looks live after submission by a new subscriber.
Step 4: Integrate Formidable Forms with OptinMonster within OptinMonster dashboard
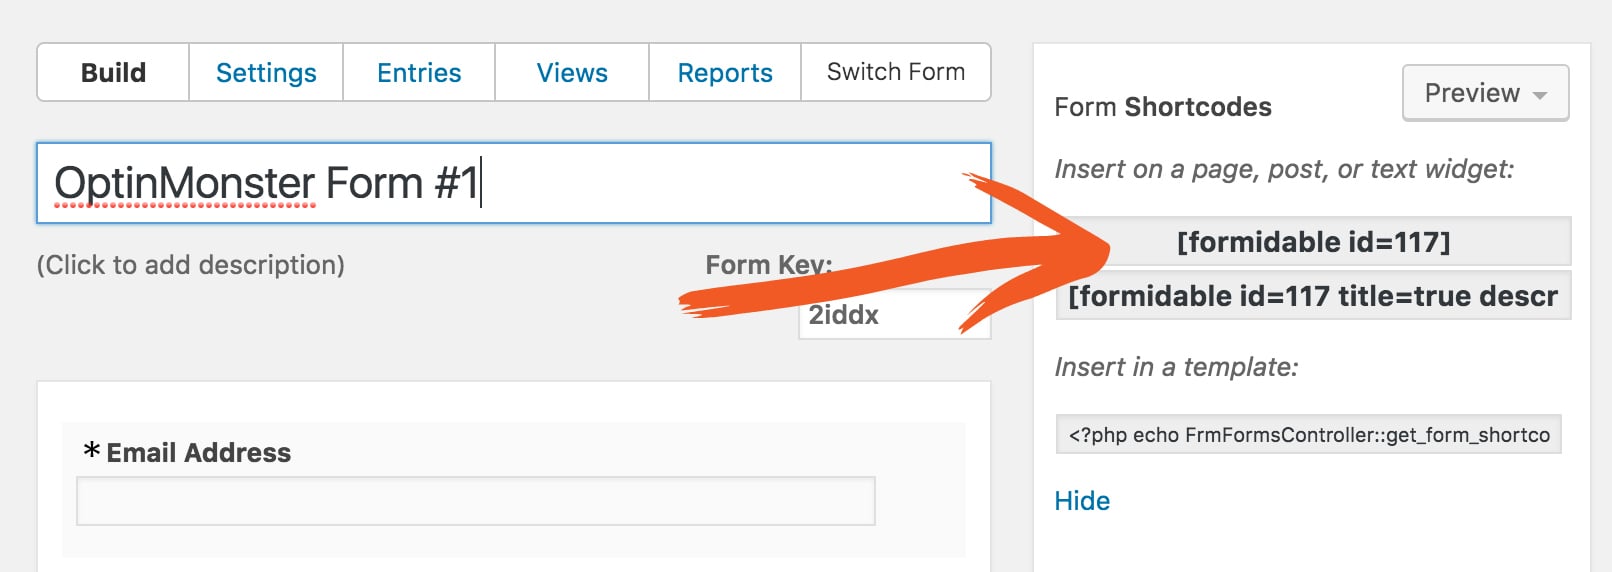
We’re about to go back to your OptinMonster opt-in editing dashboard and prepare your custom integration. This part is easy. Before you leave the form you just created in Formidable, grab your form shortcode as shown below by copying it onto your clipboard.
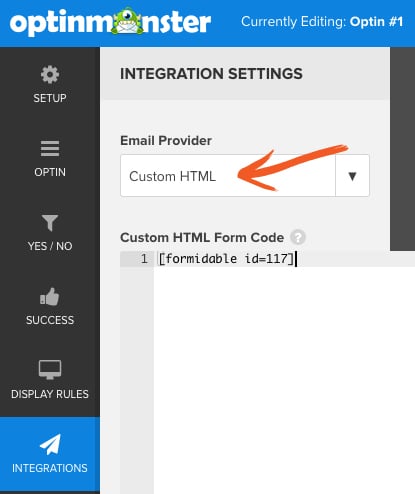
Go to your OptinMonster editing dashboard. Choose “Custom HTML” as Email Provider and paste your form shortcode into the first line of Custom HTML Form Code.
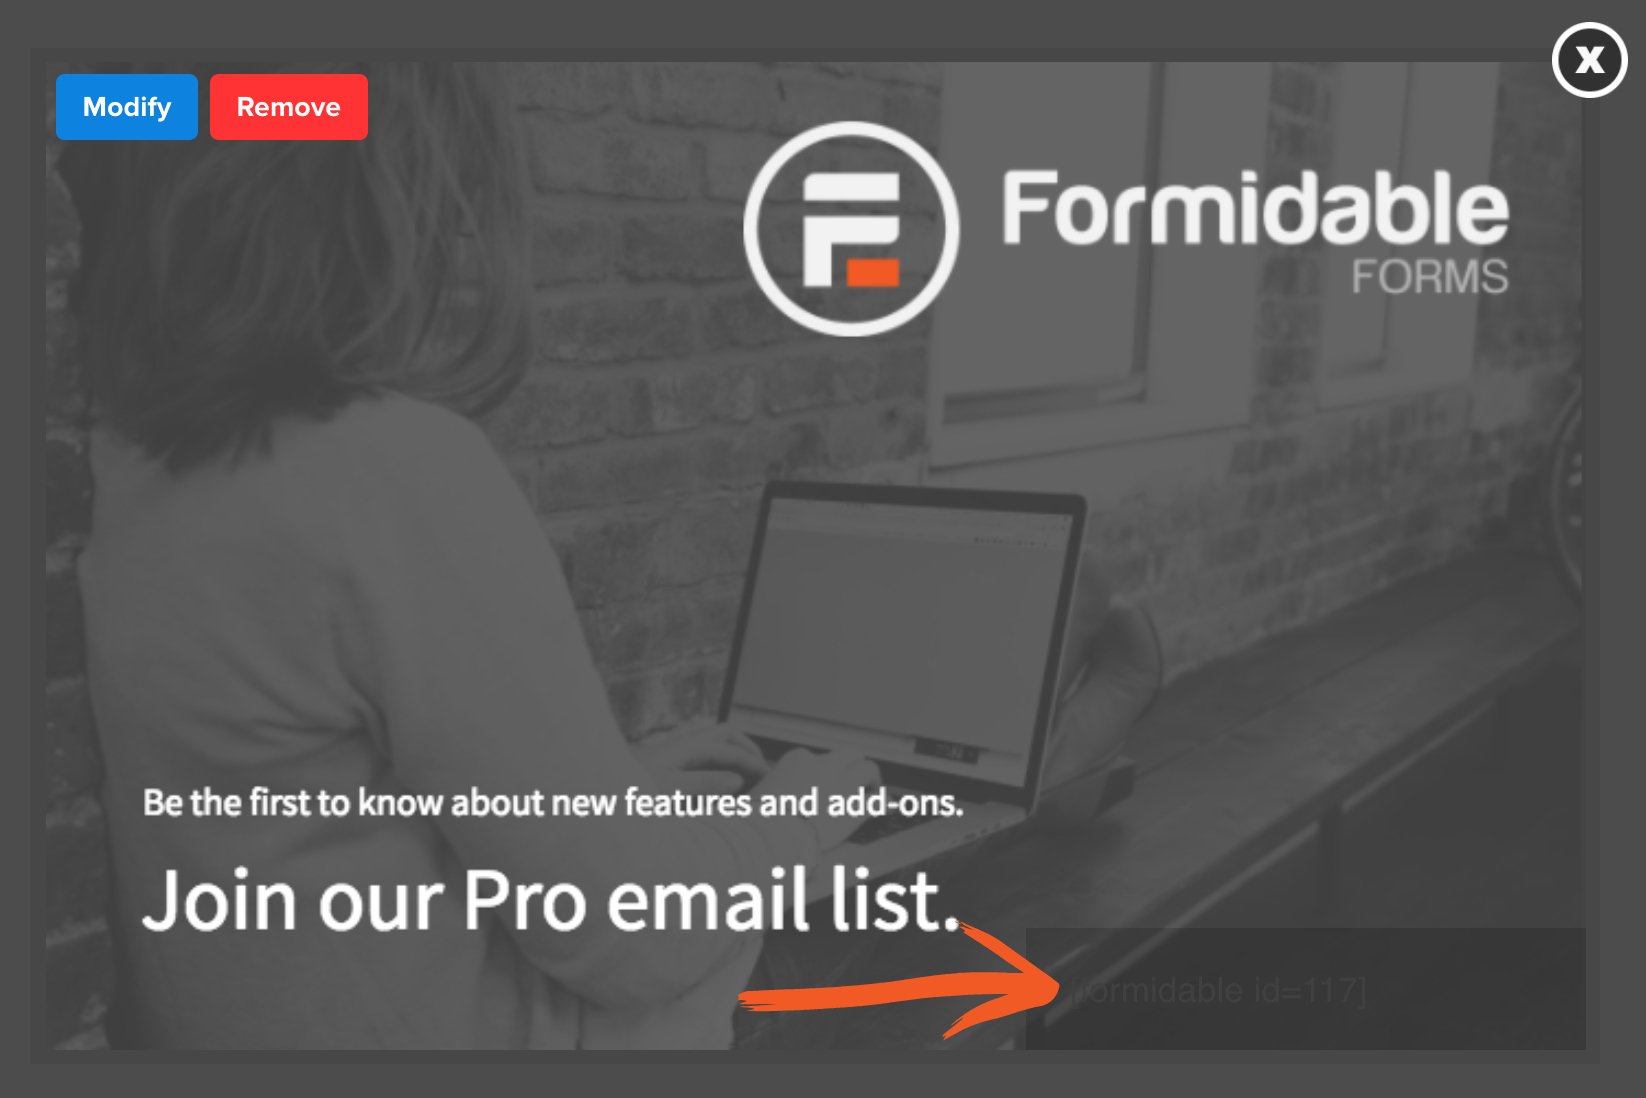
Once you have added your shortcode, you can see that the shortcode appears in the templated theme area. You won’t be able to see the actual form until it’s seen in testing on an actual WordPress page. For now, just know that you need to see your form shortcode in the form area in OptinMonster.
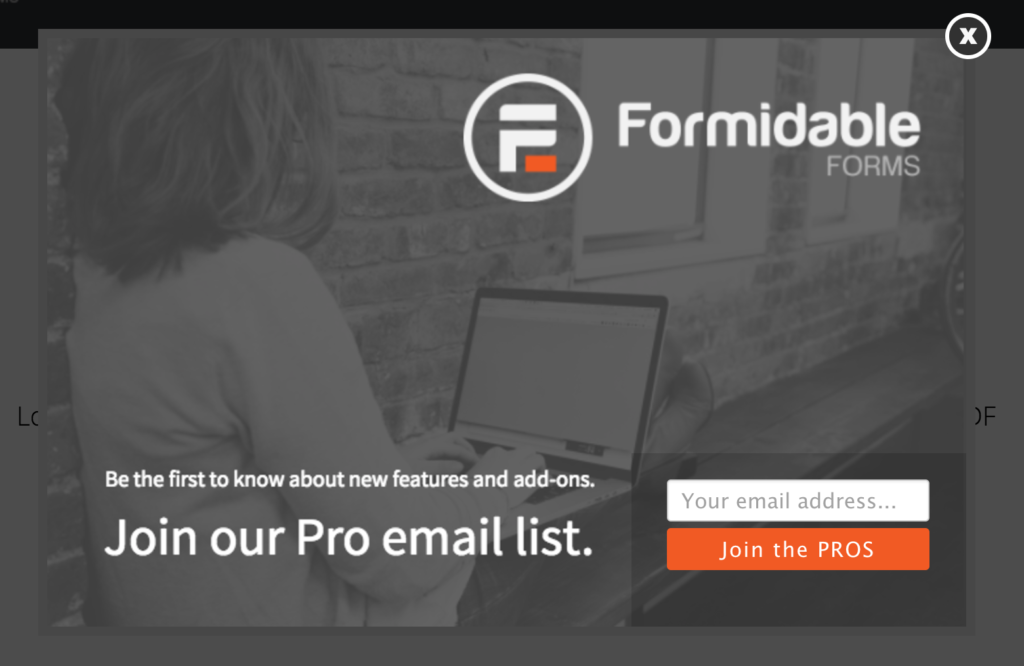
Once live, our opt-in shows the actual form styling we have set up in Formidable.
Include custom CSS if necessary
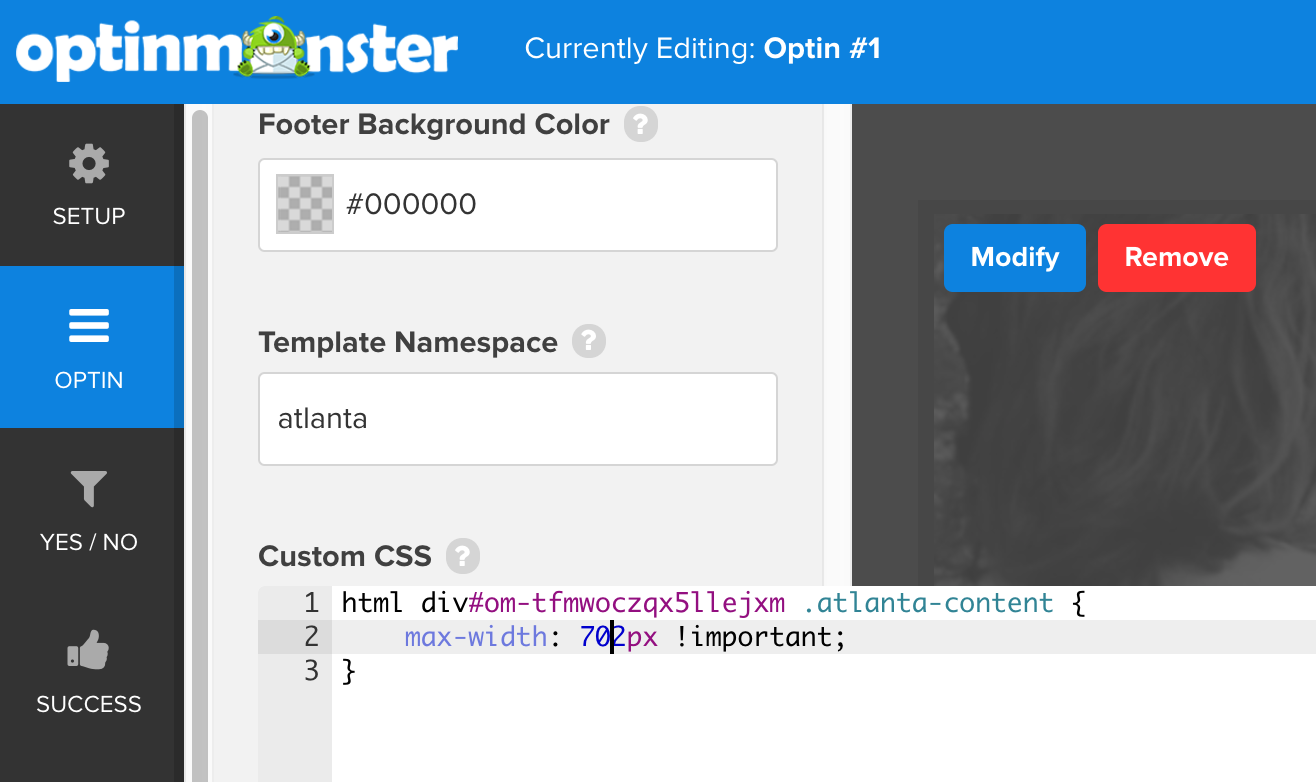
We actually ran into a small issue with our image, even though it was sized correctly according to OptinMonster specs. It was causing the image to not quite stretch as far as it needed across the theme template, leaving a sliver of white space on one edge of the opt-in. We added custom CSS code to stretch it an additional two pixels, which fixed the problem. See below for where any custom CSS will go.
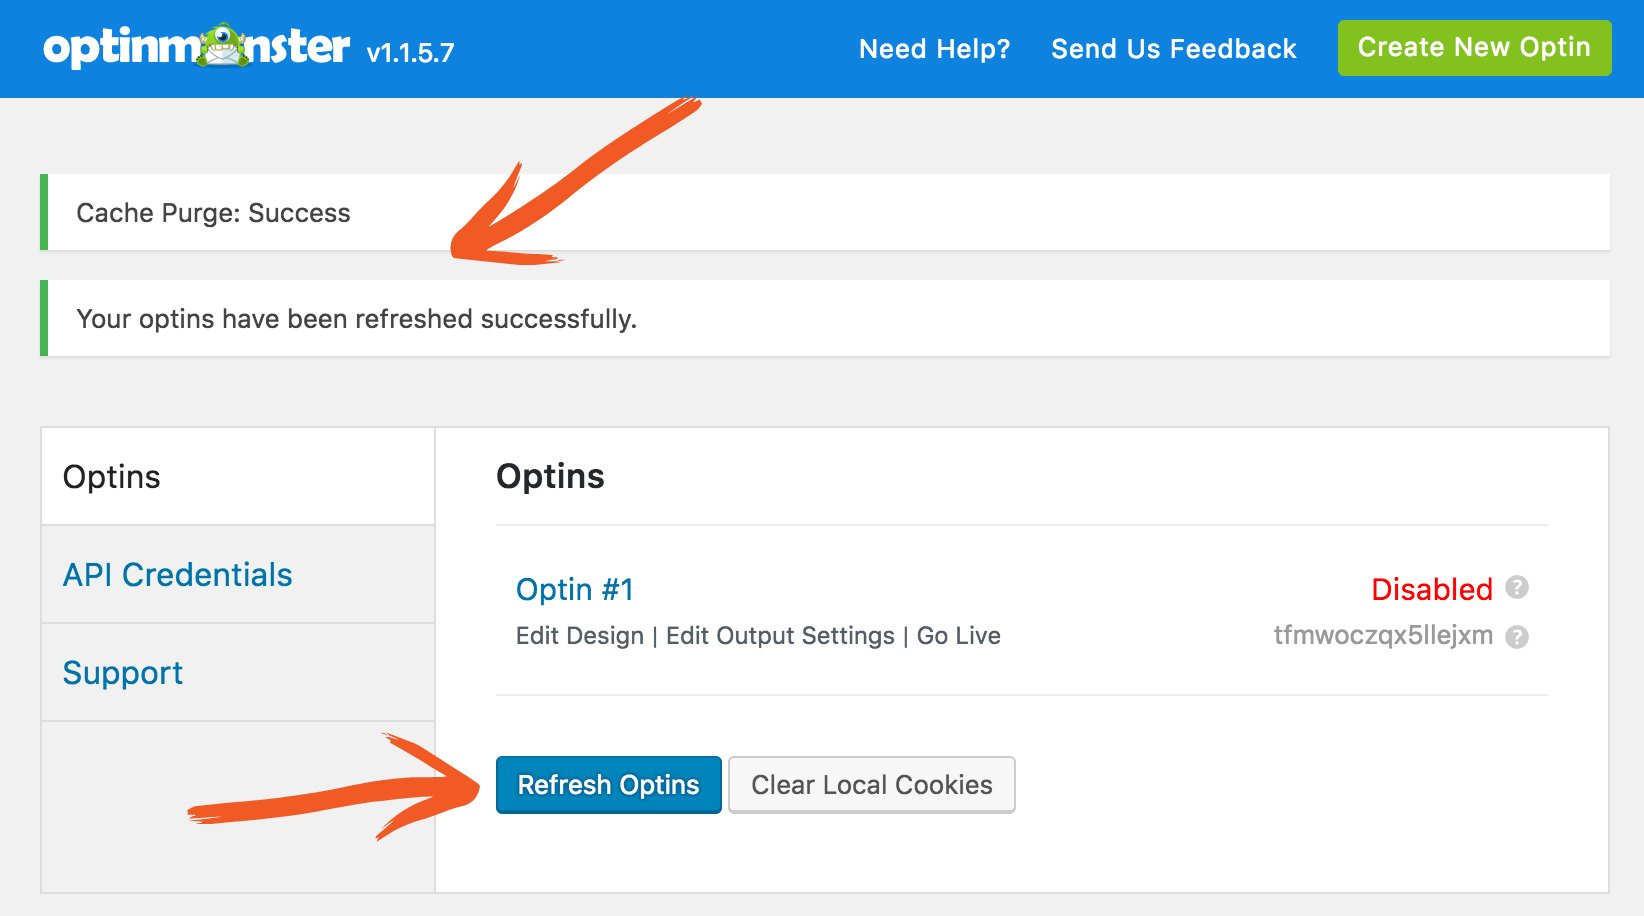
CRITICAL STEP: Refresh Optins within your plugin settings
In order for all your changes and integration to show live on your website, you need to Refresh Optins within your plugin settings. Refreshing will take in all your changes. You won’t be able to see your opt-in without doing this critical step.
Step 5: Test and configure your opt-in
Your integration with Formidable Forms is complete! You’re now ready to test your opt-in. Find step-by-step instructions for testing here.
Override cookie settings for testing
When it comes to testing, you’ll need to override your browser’s cookie settings. We found Google Chrome’s Incognito setting worked really well for this. Incognito allowed us to view the opt-in over and over again on our testing page until we had it formatted just right.
Decide timing and placement for your opt-in
Once you are satisfied that your opt-in is displaying and functioning properly, decide the timing and placement of your opt-in. This is found in the Display Rules section of your OptinMonster editing dashboard. Additional output settings are found in the Optins tab of your OptinMonster plugin settings.
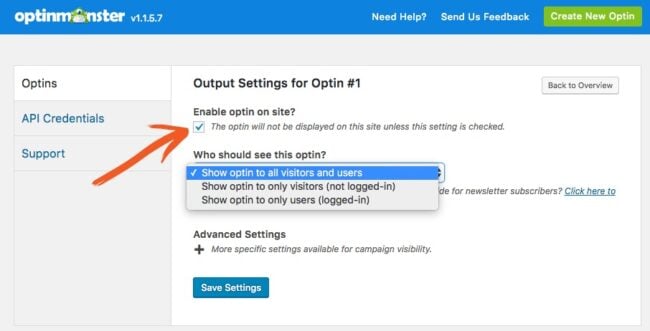
CRITICAL STEP: Enable Optin on your site.
This is done in the Output Settings area of the OptinMonstor plugin on your site. Check the box: Enable optin on site.
Step 6: Go live
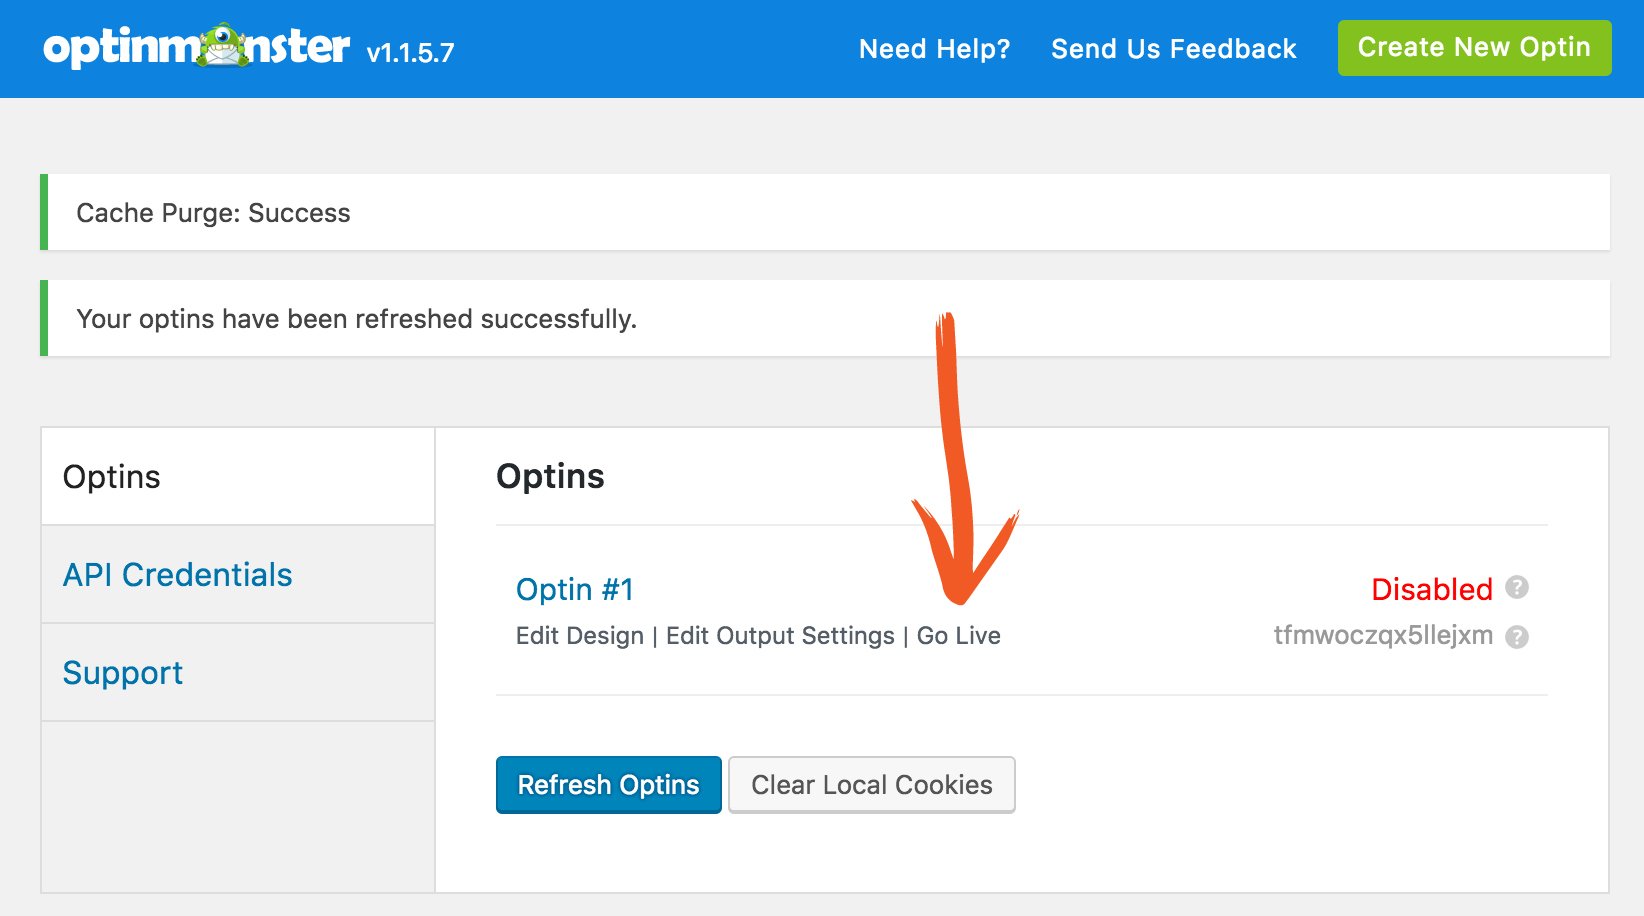
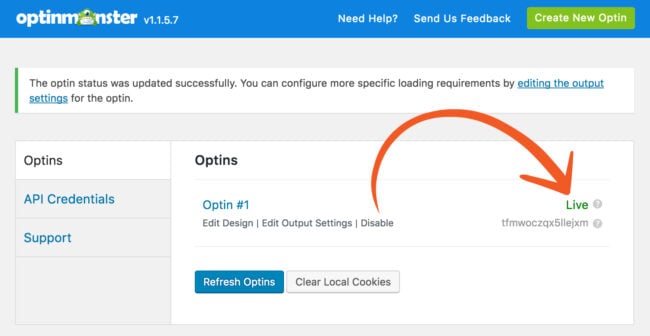
Finally, you are ready to go live! Click Go Live in your OptinMonster plugin settings. You should see the red Disabled change to green Live.
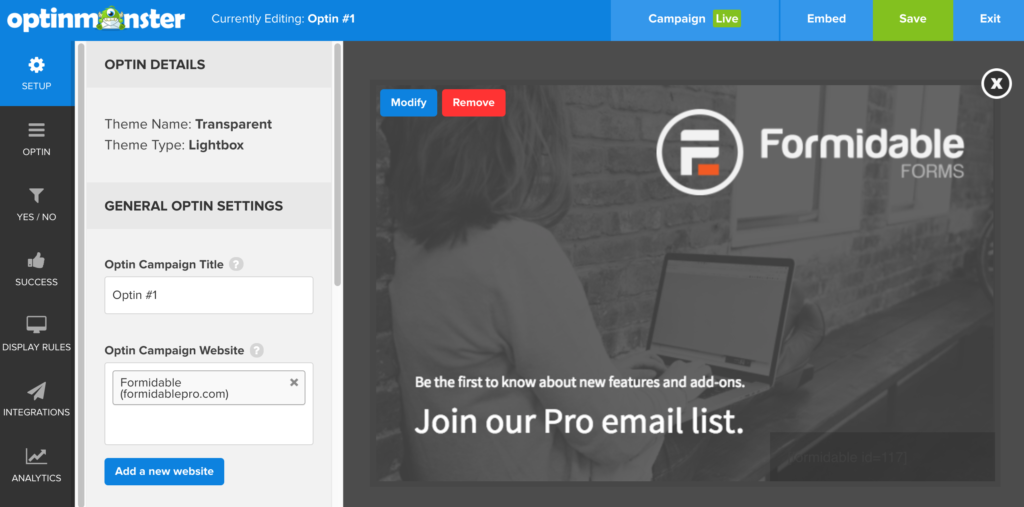
Make sure it shows a green Live in the top blue bar of your OptinMonster dashboard also.
That’s all there is to it! Options for your opt-ins and popups are limitless when you integrate with Formidable Forms. For example, here's how to create popup surveys in WordPress to collect feedback from your site visitors and improve sales.
Let us know how you’re using the integration!
Not using Formidable Forms yet? Get started with the most powerful WordPress forms plugin today.

Leave a Reply