Learn how to set up email autoresponders in WordPress with this simple guide. Automate responses and save time on email management.
Approximate read time: 9 minutes
Imagine this: A visitor fills out a form on your website, and seconds later, they get a friendly email in their inbox.
It could be a thank you note, a reminder, or helpful guide. And it's all sent automatically while you focus on other tasks. Sounds pretty nice, right?
Setting up email autoresponders in WordPress is an easy way to do it.
In this step-by-step guide, we'll show you how to create custom autoresponders to save hours of work and delight website visitors.
Let's get started.
Why use email autoresponders in WordPress?
Autoresponders are convenient, but they're also incredibly powerful.
For example, they can improve communication with subscribers by sending a friendly welcome email or improving sales by delivering an upsell email. But that's just the start. Here are a few of the benefits:
- Engage your audience: Respond instantly with helpful emails to show you care.
- Looks more professional: Timely and consistent emails build trust with visitors.
- Nurtures leads: Keep leads top of mind by sending personalized email campaigns to them.
- Simplify your workflow: Set it up once then let it run — no coding or checkups required.
So, let's show you how to get an autoresponder email in WordPress in a few easy steps.
How to schedule WordPress email autoresponders
The easiest way to set up an email autoresponder in WordPress is by using Formidable Forms, the most advanced WordPress form builder.
With its Form Action Automation, setting up an autoresponder and customizing it to your liking only takes a few steps. So, use the button below to grab a Formidable paid plan (autoresponders are included in the Elite plan) and get started.
Once you have it, then it’s a few easy steps:
For our example, we have a business called Good Air, Good Life, where customers can buy the best air filters for their houses.
We want to keep our customers coming back to us for business. And we thought one of the best ways to do that is by setting up an autoresponder that sends an email reminding customers to replace their air filters.
Let's dive in.

Step 1: Install and activate Formidable Forms and the add-on
First, let's get Formidable Forms installed and activated.
Open your WordPress dashboard and go to Plugins → Add New. Next, search for Formidable and click the Install and Activate buttons.

This installs the free online form builder, which is needed for the Pro version.
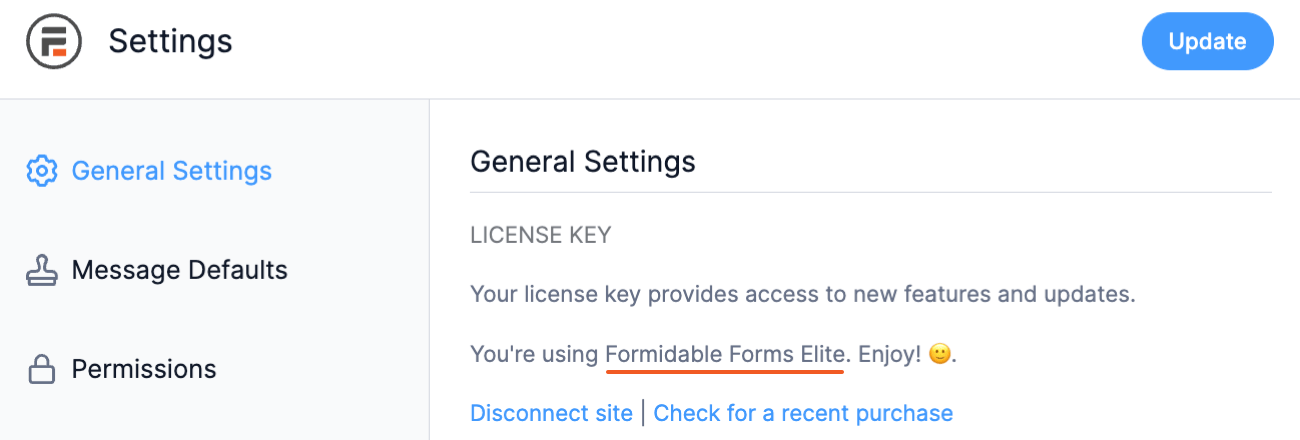
So, after that's activated, go to Formidable → Global Settings page and click the Connect an Account button.
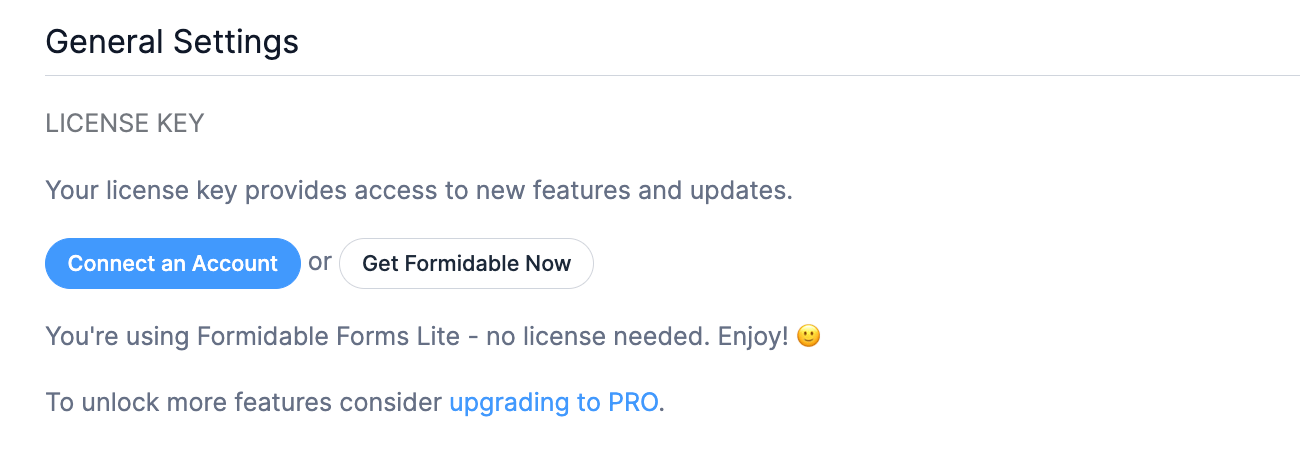
This will open a page that takes you to your Formidable Forms account, where it connects Formidable Pro and WordPress. Once finished, it'll return you to the WordPress dashboard and show your active license type.
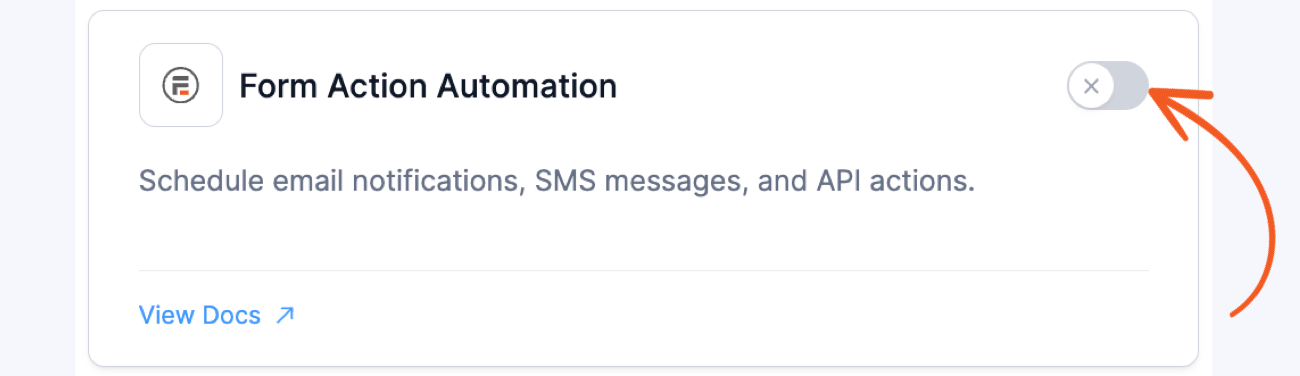
Once it's active, we need to activate the Form Action Automation add-on.
To do this, go to Formidable → Add-ons, find the Form Action Automation, and click the toggle to activate it.
Now that the primary tools are activated, let's create a form.
Step 2: Create your form
Now we need an order form for the customer's initial purchase.
To start the form, go to Formidable → Forms and click the Add New button.
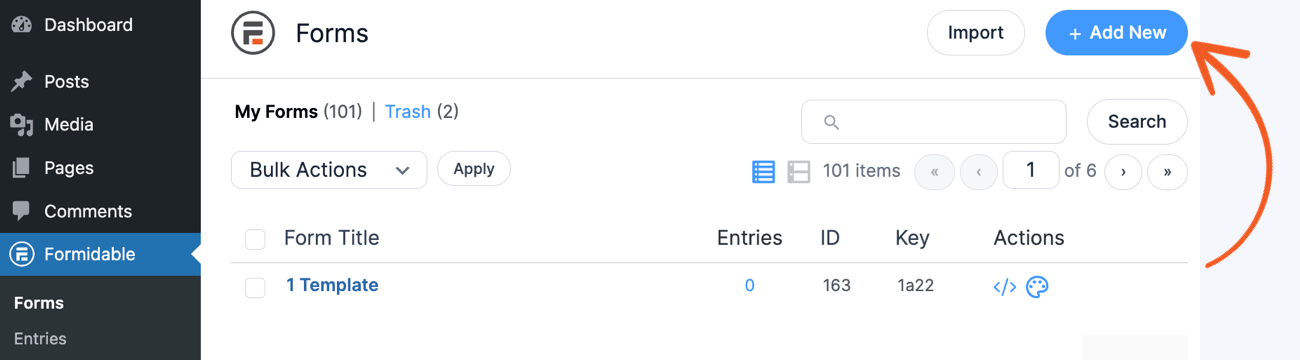
Next, you will have three options:
- Build a form from scratch
- Use a pre-built form template
- Use the AI form builder
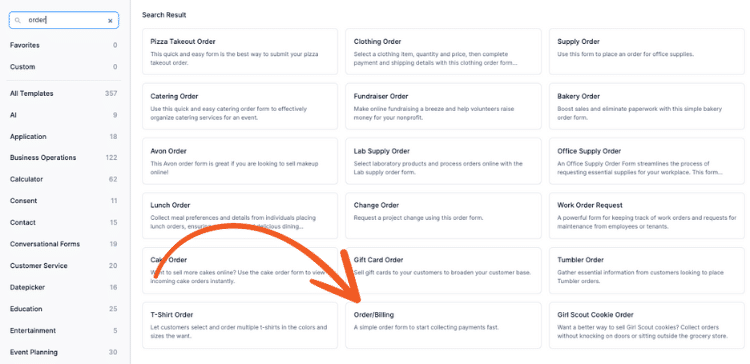
Since we're creating an order form, we'll use the Order/Billing Form Template to get us started. Then, we can adjust a few things to make it work for what we need.
Next, it will open the drag and drop form builder, which makes it easy to create any type of form in a few clicks. You can drag and drop the form fields or simply click them to add them.
While our order form has most of the fields we need, we must change a few things.
For example, customers can choose between two types of filters and how frequently they want the filter delivered — once or recurring. They can also choose how often to deliver it and how many they want.
And that means we'll need a total field to do advanced calculations. Formidable Forms Number field can handle this (and more).
So, after some adjustments, our form looks like this:
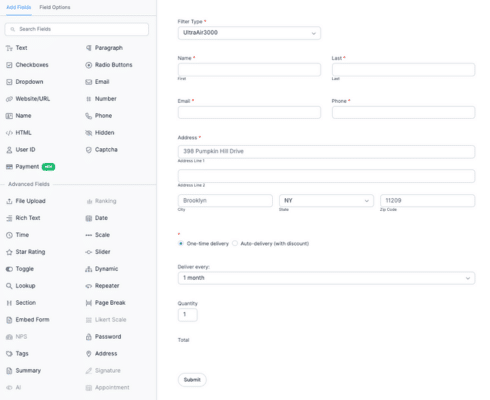
While it's out of the scope of this article (you can check out our guide on creating a custom calculator for more information on how to do this), here's a quick overview:
- We added a Dropdown for customers to pick an air filter
- The Order/Billing template comes with the Name, Email, Phone, and Address fields
- Changed the Radio buttons to be one-time or auto-delivery
- Added conditional logic to the Deliver every: field to only show when a customer chooses Auto-delivery
- Added a Number field for the quantity
- Used another Number field for the Total with the equation below (check out our docs on conditional calculations for more)
([336] == 1) ? (1 * [329]) : ([336] == 2) ? (2 * [329]) : ([336] == 3) ? (3 * [329]) : ([336] == 4) ? (4 * [329]) : ([336] == 5) ? (5 * [329]) : (5 * [329])This isn't necessary for every order form. But we wanted to show how much Formidable can help your business or site.
So here's what our form looks like on a page:
Now that it's set up (and the form uses PayPal for the order form payments), we can set up the autoresponder.
Step 3: Customize the form action
Now, it’s time to set up our autoresponder settings.
We want to remind people that changing their air filters every 3 months is a good idea if they don't choose the Auto-delivery option.
First, we’ll go to Settings and the Actions & Notifications tab and click the Send Email button to create an email.

Next, we’ll name the action (customers don’t see this). Then, we'll set the Trigger this action when field to Successful Payment so it doesn't send to incomplete orders.
Then, we'll customize the To section. We want it sent to the user’s provided email address, so we’ll click in the To field and select the three dots to the right.
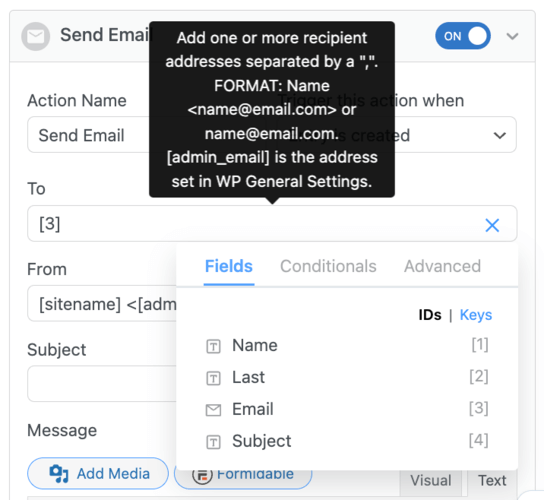
There’s a list of the fields you used in our form. So, we’ll choose the Email field [3].
Then, we’ll customize our email template with the Subject and Message fields to remind our customers.

But we want this sent only to certain customers, and we'll use conditional logic again to help us do this.
We can click the Add Conditional Logic button, then set up our parameters for when it shows:
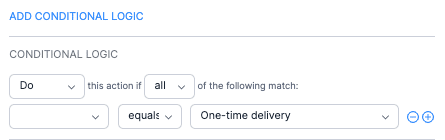
We didn't label the field where the customer chooses the frequency, so it appears blank before the equals. This automation we'll set up will only run for the target customer.
Now, all that’s left to do is set up our automation features. To do so, scroll down and select Setup Automation.
Here, we’ll customize our automation to Ignore the trigger action setting above (which would send immediately) and instead send the notification 90 days after the creation date.

That way, once the customer's payment goes through, the automation automatically sends their reminder email for 90 days.
So, the last thing we need to do is click Update to save our changes and display our form!
Step 4: Display your form
To show our form, we’ll head to our post or page where customers will land to complete the order.
Then, we’ll add a WordPress block and search Formidable to add the Formidable Forms WordPress block.

Next, we’ll choose our form from the dropdown menu, and that’s it! When we update our page, the order form will be live and ready!
We only need to change the autoresponder settings to update the automated email messaging or the time period it's set for. Otherwise, it's set-it-and-forget-it!
Ways to use an email autoresponder
The example above is only one way an autoresponder can help your website.
Whether you need a WordPress contact form autoresponder or something more advanced like our example, Formidable helps you create anything you can imagine.
Here are a few more examples that could help you:
- Schedule appointment reminders
- Deadline reminder on a to-do task
- Send out additional forms as necessary
- Send a failed payment email to offer an alternative payment method
- Email content submitters to let them know their content is posted
- Send a landing page to email list subscribers for free content
No matter what your use is, there may be a way where email autoresponders can benefit you.
And whether it’s a contact form for small businesses, lead generation for email marketing automation, or a simple blog — Formidable is the WordPress plugin for you.
From signup forms to email marketing, Formidable handles it all.
Are you ready to schedule your WordPress email autoresponder?
And that's all there is to it! In a few easy steps, you can have a custom autoresponder tailored to your website.
If you use an email service, Formidable integrates with the popular options. Constant Contact, ActiveCampaign, Mailchimp, and more are a few clicks away.
We hope this tutorial helped you, and we're excited to see what types of things you'll create. Contact us and let us know what you're working on. We love to hear from customers!
Follow us on Facebook, Twitter, LinkedIn, and YouTube for more WordPress tips & tricks, or join 50,000+ others in hearing about the latest from Formidable Forms each month!
 How To Send a WordPress Email Confirmation [Only 2 Steps!]
 How to Create Holiday Out of Office Messages for WordPress Forms
 10 Best WordPress Autoresponder Plugins [Free & Paid!]
Hi - these instructions are vague. Please direct me to more succinct documentation. For instance: if I set up a "Reminder Message" to people that have signed up on my website form. They get an immediate response to their submission. AND I want them to get my reminder message on a date that is at a later date (April 26, 2022), around noon time. My current settings are:
"Ignore"....... Send this notification 12 hours After 'Giving Challenge Date' (set to April 26 in a hidden date field in the form. My intent is for people to get an email at Noon on April 26th.
1. Are these setting correct?
2. How can i test this?
Hi Candee, This is just a blog post designed to provide basic information about this process. For more detailed information, you'd want to check out our documentation on the topic here: https://formidableformscom.bigscoots-staging.com/knowledgebase/schedule-autoresponder/
If you need additional help, our support team is standing by and ready to help.
Adding SMS is surely a next level service for my clients. Trying to understand the pricing structure from Twilio is a bit of a challenge 🙂
So far, I've used email as an autoresponder and it has worked well.
A very valuable add-on, thanks for the post.
This is pretty cool and I'm already thinking of new ways of working and giving our customers a better service!