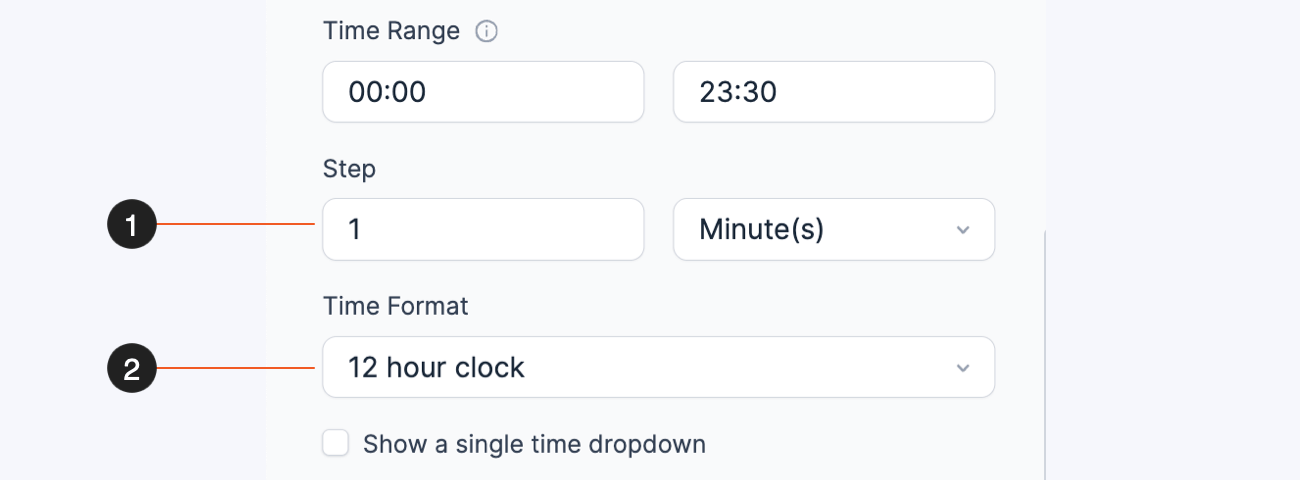
The Time field is used to select a time from a dropdown field. The start and end time can be adjusted as well as the minutes between each time option.

Standard field options
Time fields have the following standard options:


- Required
- Unique
- Read Only
- CSS Layout Classes
- Default Value
- Field Description
- Visibility
- Label position
- Field Key
- Field Type
- Validation Messages
- Conditional logic
Field-specific options
Time Range
Set a start time and end time to select a specific time range that will be available for your users. This will limit the options in the time field displayed on the form to ensure that only the times within your selected range will be offered to your users.

Step Unit
Choose how the step number will be shown in the time field. By default, the step interval is set to 30 minutes. Use the dropdown beside the step number to change the time field to minutes, seconds, or milliseconds.

Time Format
Choose between the 12-hour and 24-hour formats when displaying the time. The 12-hour configuration shows time from 12:00 AM to 12:00 PM. At the same time, the 24-hour format displays time from 0:00 to 23:00.

- You can select the Show a single time dropdown checkbox to show the time field in a single dropdown.
- Select the Automatic width checkbox to automatically set the width of the selected time field based on its data.
Default values and field icons
Set a dynamic default value in your Time field. If you would like to retrieve a value from an entry see the Get a Value From an Entry page. If you would like to set a default value, see the Default Values page.
Field action icons allows you to duplicate, delete, and/or move a field on the form builder page. See field action icons for more information.
Set default to the current time
Autopopulate a Time field with the current time by following the steps below.

- Set the clock settings step to 1 (min).
- Select the time format that you want to use for the current time.
- In your Time field Default value setting, insert the [time] shortcode. Depending on your selected Time Format, use one of these two default values:
- [time format='H:i'] - 13:09 - Use with 24 hour clock time format.
- [time format='g:i A'] - 1:09 PM - Use with 12 hour clock time format.
If you would like to round the value to the nearest 30 minutes and use a 30 minute step, use the following shortcode.
[time format='g:i A' round=30]
Display Time fields
Display the value submitted in a Time field in a form's confirmation message, email, or View.
Shortcode options
- Display value: Display the value submitted in a Time field.
[x]
Replace x with the ID or key of the Time field.
- Time Format: Change the format of the displayed time.
- Display as a 24-hr clock format, e.g. 18:30.
[x format='H:i']
- Display with a lower case am/pm like 6:30 pm
[x format='g:i a']
Replace x with the ID or key of the Time field.
For more format options click here, scroll down to the parameter section and look under 'Time'.
- Display as a 24-hr clock format, e.g. 18:30.
Limit form to one time slot per day
One of the most common scenario is a booking form. In the case where you want your users to book a time slot on different days, you can use the approach below.
- Add a Date field to your form.
- Add a Time field and mark it as unique. Set it to show a single time dropdown.

When a user fills out the form with a date and a time, that time slot would be unique and can only be selected by one user. When another user fills out the form, the previously selected time slot will be disabled and greyed out.

Calculate time difference
If you want to calculate the difference between two time fields, use this code example.
Related developer hooks
- Black out time blocks with the frm_allowed_times snippet.
- Calculate total time with the frm_validate_field_entry snippet.
- Calculate total time inside a repeater with the frm_validate_field_entry snippet.

