Views can be published on a page, post, widget, or even within another View. If you haven't created a View yet, follow the instructions to create a basic View.
Use the shortcode builder
- Go to a WordPress page or post.
- Click on the Formidable button above the content box.

- Select the view that you want to publish, then choose from the options below.

- Click the Insert into Post button.
Access the Embed View modal
When you create a new View or edit an existing View, you can see a new Embed button at the top menu. This button is available in the View Builder.

When you go to the Formidable → Views List page, click the <> icon under the Actions column to load the Embed View modal.
![]()
Embed View on existing page
- Go into your View and access the Embed View modal.
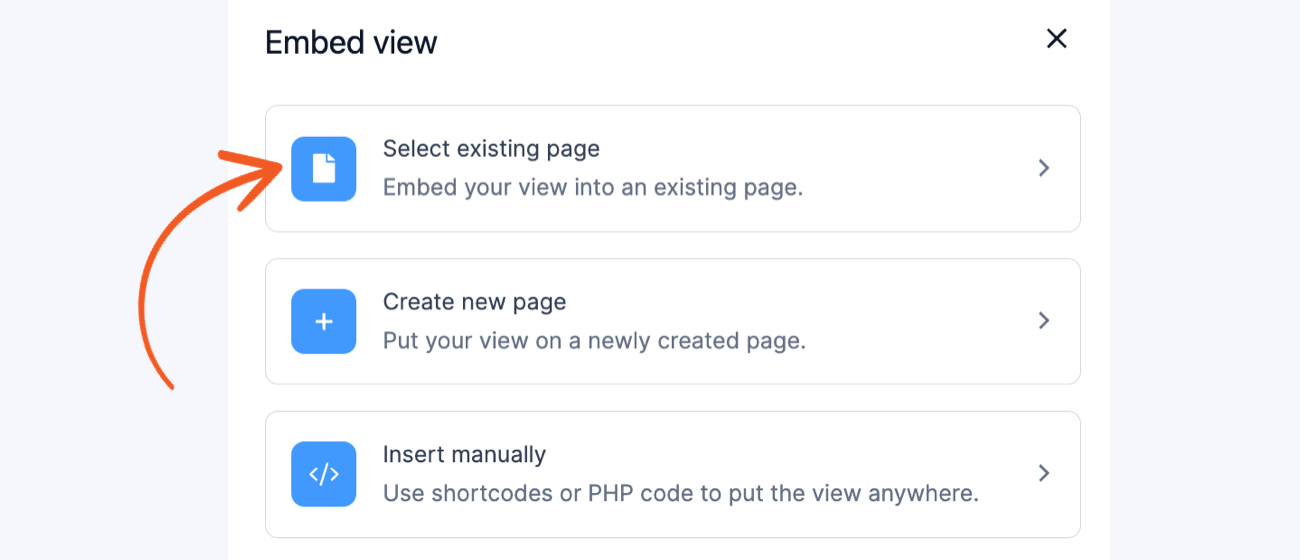
- Click Select existing page to embed your View into an existing page.

- Select the page where you want to embed your View from the dropdown selection.

- Click the Insert View button. It will redirect you to edit the page and automatically insert the new block with the embedded View.
- Click the Update button to save your changes. The newly embedded View will not save the new block right away. If you do not publish the page, it will be the same as before.
Embed View on new page
- Go into your View and access the Embed View modal.
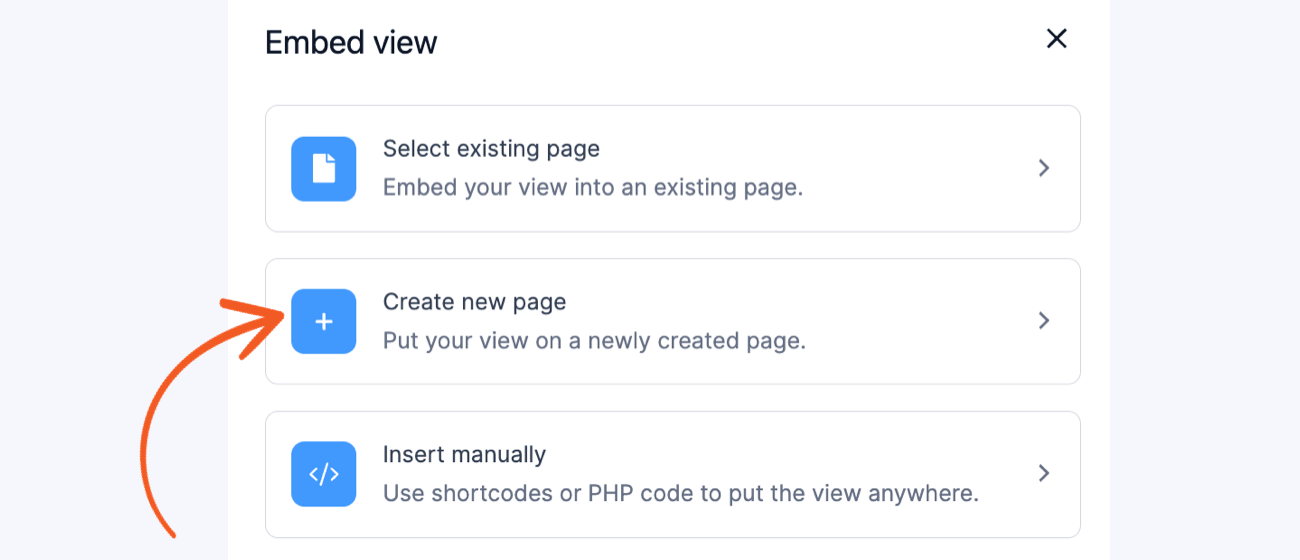
- Click Create new page to embed your View into a new page.

- Set a name for the new page and click the Create page button.

- It will redirect you to the newly created page with the embedded View as a block.
- Click the Publish button to publish the new page. The new page with the embedded View is saved as drafts and not published right away.
Embed View using shortcode
- Go into your View and access the Embed View modal.
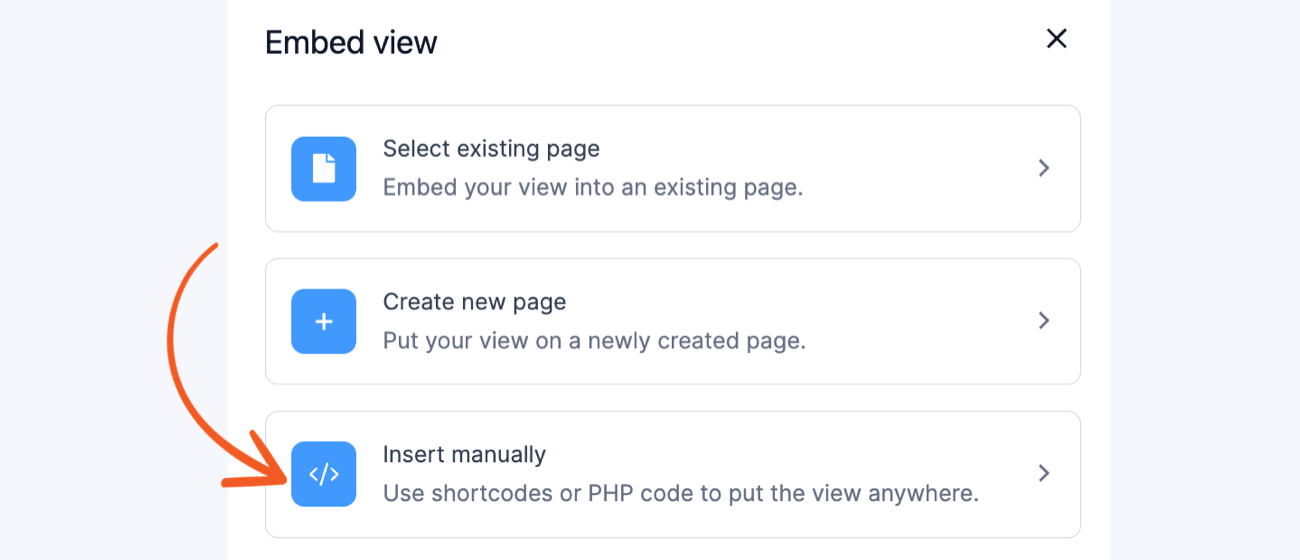
- Click Insert manually to get the WordPress shortcode or PHP code that you can use to embed your View in any place.

- You can insert the WordPress shortcode on a page, post, or text widget. If you want to embed the View into your page template, you may use PHP code.

- If you have the Formidable API add-on activated, it will show the API View script and API View shortcode.

If you would like to know more about the available shortcode parameters, follow the documentation to customize your View.
Insert the shortcode manually
You may insert the following shortcode on a page, post, or text widget to display your View.
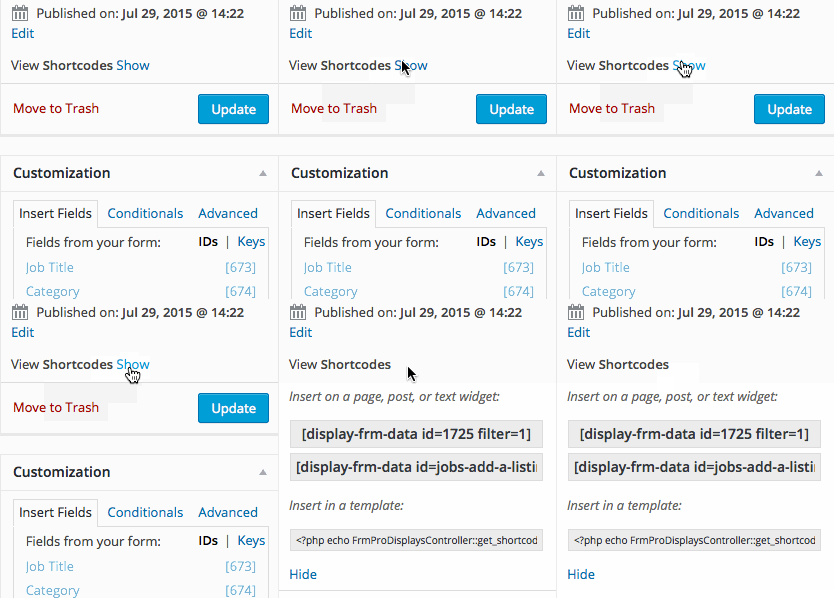
[display-frm-data id=x filter=limited]
Replace x with the ID or key of the View you would like to insert. You can find the ID or key by going into your View and clicking the 'View Shortcodes' link in the right sidebar.
Parameters
Required
- id - ID or key of the View.
[display-frm-data id=x filter=limited]
Recommended
- filter - Use filter=limited to send your View content through the WordPress content filters. You may see shortcodes on the page without this parameter. Using filter=limited also allows other plugins to interact with your view, enabling them to parse shortcodes specific to their functionality.
[display-frm-data id=x filter=limited]
If you need to run your view content through other plugins to process external shortcodes, then filter=limited will be necessary. Some very few plugins depend on the the_content PHP filter, and if you are using one of these plugins, then you should use filter=1. However, if you are not running one of these plugins, you should avoid using filter=1 as it can cause double filtering for plugins that don't need it.
The WordPress content filters add auto paragraphs and process shortcodes. Using filter=limited is recommended unless you have any of the following situations:
- Another plugin or your theme is already filtering your View.
- Your View is published inside of another View.
- Some plugins like PHP processing plugins filter differently. You may need filter=1 in order to cover these cases
- Your View is used to filter data. e.g., to set a default value in a field, add a list of emails in the To box of an email notification, or set the entry id in an API URL.
Optional
- entry_id - Display a specific entry in your View. This will override all other filters in your View. This accepts a comma-separated list of ids to show multiple entries.
[display-frm-data id=x filter=limited entry_id="123"]
- user_id - Display entries submitted by a specific user. This parameter accepts a user ID number, not a username, and it will override any UserID filters you have added to your View.
[display-frm-data id=x filter=limited user_id=12]
- limit - Limit the number of entries displayed in your View. This will override the Limit set in the Advanced Settings of your View.
[display-frm-data id=x filter=limited limit=10]
- page_size - Set a page size for your View. This will override the Page Size set in the Advanced Settings of your View.
[display-frm-data id=x filter=limited page_size=5]
- offset - Set an offset per shortcode, using different offset values for a single view. This will override the Offset configured in the Advanced Settings of your View.
[display-frm-data id=x filter=limited offset=1]
- order_by - Order the entries in your View by a field ID/key or set a random order by using order_by="rand". This will override the Order set in the Advanced Settings of your View. You must use the order parameter in your View shortcode.
[display-frm-data id=x filter=limited order_by=125 order="ASC"]
- order - Specify the direction of the ordered entries with order="ASC" or order="DESC". This will override the Order set in the Advanced Settings of your View.
[display-frm-data id=x filter=limited order_by="created_at" order="ASC"]
- drafts - By default, draft entries are not included in your views. If you'd like to only show the drafts, add drafts=1 to your shortcode. If you'd like to show drafts and non-drafts, use drafts=both.
[display-frm-data id=x filter=limited drafts=both]
- param_name - Pass a value to your View. You may use this value to show specific entries and avoid creating duplicate Views. Put [get param="param_name"] anywhere in your View to display the value. When you pass a value to your View, like this: [display-frm-data id=x my_param="value"], then you can add a filter to your View that sets a field equal to [get param="my_param"].
[display-frm-data id=x filter=limited my_param="value"]
- wpautop - Use wpautop=0 to prevent paragraph tags from being added to Views that include filter=limited. Use wpautop=1 to add paragraph tags to Views.
[display-frm-data id=x filter=limited wpautop=0]
Use a View block
The WordPress block editor gives you alternate ways of publishing a View. Please see how to add a view block.
Use a View widget
Elementor Views widget
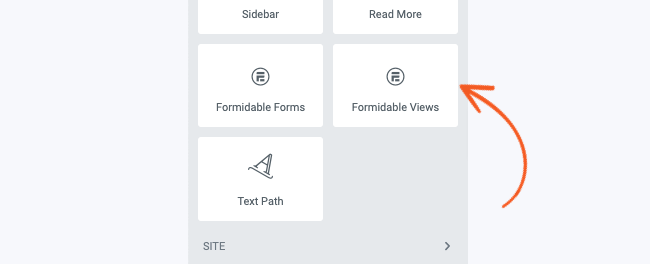
If you're using Elementor, you can use the Formidable View widget to add a View to your page.
- In your Elementor builder sidebar, go to Appearance → General.
- Look for the widget called Formidable Views and drag it to your page.

- Select a View to display and save your widget.

Limitations
Using params with multiple Views
If you are publishing multiple Views on a page, Views lower on the page take on the values of the params of the Views above them. To avoid the params from being overwritten, set a blank value for any params you don't want to copy.
Troubleshooting
AJAX Pagination shows undefined error
You might see an undefined error message if you have enabled AJAX as the pagination type in your View settings. Cloudflare's auto-minify feature most often causes this error. The Cloudflare proxy was stripping all HTML comments from the page, causing the AJAX pagination to show "undefined" pages instead of the expected page content. Try the following steps to resolve your issue.
- If your page is missing the comment starting with <!— FRM-VIEW, consider turning off Cloudflare's auto-minify feature.
- If you have another plugin or theme that minifies CSS, try turning off the minification temporarily.
- Use a non-AJAX pagination type.
- Clear all caching mechanisms on your site (plugins, hosting caches, etc.) and clear your browser's cache.
PHP Alternative
echo FrmViewsDisplaysController::get_shortcode( array( 'id' => x, 'filter' => 'limited' ) );
Replace x with ID or key of the View you would like to display. All optional parameters may be used in the PHP call as well.

