Send your Formidable Forms data to Google Sheets when a user submits the form on your site. Each form has its own Google Sheets, and the data is added to the selected sheet as a new row.

Download and Install
- If you haven't already, install and activate the current version of Formidable Forms Premium on your WordPress site.
- After confirming your Formidable Forms license, proceed to the Formidable → Add-Ons page and toggle on the WordPress Google Sheets plugin.

Set up Google API Integration
Step 1: Create Google API project
- Go to the Google Cloud Platform Console. Select an existing project or create a new project.
- After opening the project, it will redirect you to the APIs & Services dashboard. Or you can click the menu icon at the top left corner of the screen and select APIs & Services.

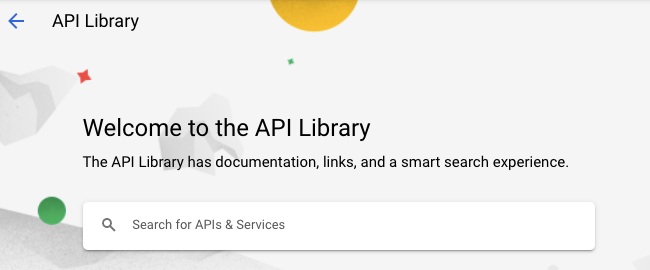
- Click + Enable APIS and Services.

- Search for the following APIs in the Library and enable each by clicking the Enable button.
- Google Sheets API
- Google Drive API

Step 2: Setup OAuth Consent Screen
- After enabling all the required APIs, go to APIs & Services → OAuth Consent Screen.

- Select External as the User type. Click the Create button.

- Under App information, add an Application Name and User support email.

- Under the App domain, add a Website URL as your Application home page.

- Add an Authorized Domain.

- Under Developer contact information, add an email address in the field. Click the Save and continue button at the bottom of the page.

- Under Scopes, click the Save and continue button at the bottom of the page.

- Under Test Users, click the Add Users button and insert the email address of the test user associated with a Google account. Your app will start in testing mode and will only be available to users you add to the list of test users. Click the Save and continue button at the bottom of the page.

- Under Summary, click the Back to Dashboard button at the bottom of the page to redirect you to the newly created app.

Step 3: Get OAuth Client ID
- Go to APIs & Services → Credentials. Click Create Credentials and select OAuth Client ID from the dropdown to generate the keys.

- Select the Web Application from the Application type dropdown.

- Use your website URL as the Authorized redirect URI in this field. Be sure to include the trailing slash at the end of your URL.

- Click the Create button.
- In the popup window, copy your Client ID and Client Secret keys.

Step 4: Save project keys in settings
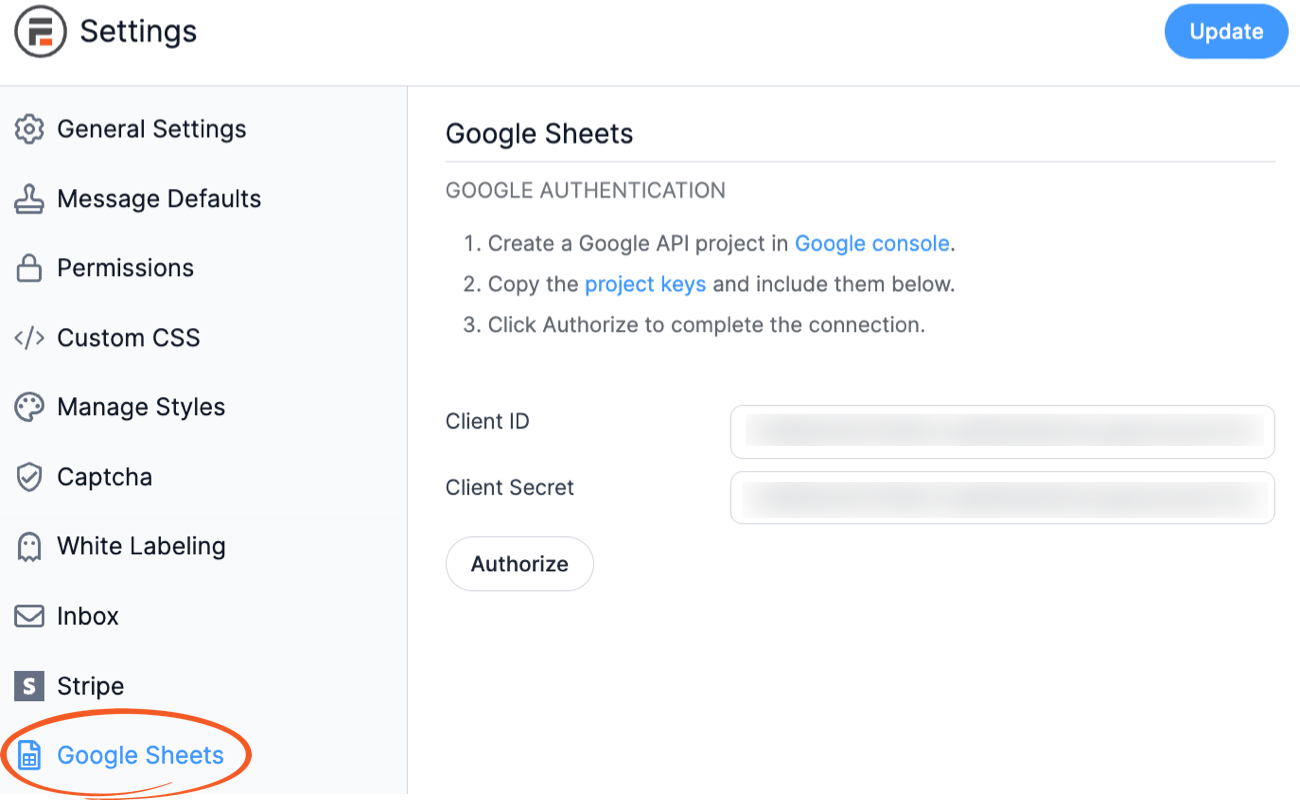
- After generating the project keys, go to Formidable → Global Settings → Google Sheets tab.
- Paste your Client ID and Client Secret ID on this page.

- Click the Authorize button to complete the connection.
Create a Google Sheets Form
Now that you have added the project keys to your Formidable settings, it is time to create your Google Sheets form.
- First, create a form in the same way as other Formidable Forms.

- Go to your form Settings → Actions & Notifications and click the Google Sheets icon.

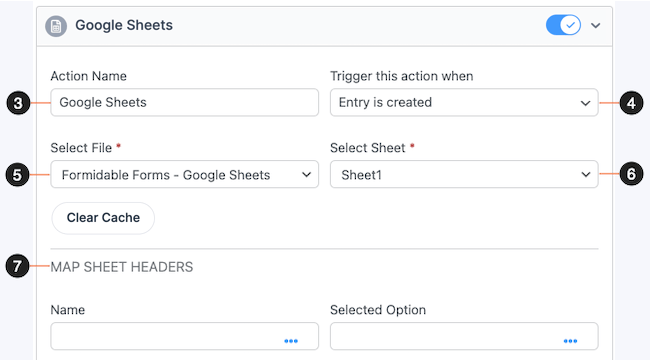
- Give your Google Sheets action an Action Name for easy reference. This name will only be seen in the back end.

- Choose when this action should be triggered: Entry is created, Entry is imported.
- In the Select File dropdown, choose the Google Sheets file where you want to send the form data. Add a column header in the selected Google Sheet to map your form fields to those headers.
- If you have multiple sheets in your file, you can choose which sheet the form data should go to in the Select Sheet dropdown.
- Under the Map Sheet Headers section, map your form fields to the sheet headers.
- Click the Update button to save your settings.
Send existing entries
If you have existing entries in your form, click the Send existing entries button to append all the existing form entries to the selected Google sheet. To avoid errors, remember to map the sheet headers to form fields before sending the data.

Limitations
- The Google Sheets add-on doesn't currently support two-way sync. The information is synced one way from Formidable to Google Sheets.
- The Google Sheets actions do not currently support Excel and Open Document spreadsheet files.
Troubleshooting
Missing sheet in form action
If you are experiencing issues where a specific sheet does not appear in your list, it may need the correct mime type. If you upload an Excel file to Google Drive or an Open Document spreadsheet file, the mime type must be changed to the Google Sheets mime type. To resolve this issue, follow the steps below.
- Identify if the file has the correct mime type. If you see a big green .XLSX tag next to the file name, it must be changed. If you select this tag, it will show it as an Office-formatted file.

- To change the mime type, go to File → Save as Google Sheets.

Redirect URI mismatch
If you see the error message Error 400: redirect_uri_mismatch, you might have incorrectly entered the redirect URI in your OAuth Client ID settings. Be sure to include the trailing slash at the end of your URI.

Google app verification error
If you see the error message Google hasn’t verified this app, you might have published the app, which can cause issues with the Google Sheets API. Publishing your app will require submitting it to Google for verification. If you do not verify your app, it will be identified to users by its redirect location or client data. To resolve this error, you can unpublish the app by following the steps below:
- Go back to APIs & Services → OAuth Consent Screen.
- Click the Back to Testing button, and it will prompt you to confirm this action.
- If you haven’t yet, ensure you have added the email address with access to the Google Sheet as a test user.

Unable to parse range
If you encounter the Unable to parse range error, this message often occurs when you have renamed a worksheet in your Google Sheets. To resolve the error, follow these steps:
- Clear your cache: Your browser might still hold the old references. Clearing your cache can help it recognize the updated worksheet name.
- Re-map the form action: If the error persists, you may need to re-map the Google Sheets form action referencing the renamed worksheet. It involves manually updating the Select Sheet dropdown within the form action.


 WordPress Forms for Zapier: The Ultimate Integration
 7 Best WordPress Google Sheets Plugins [Sheets Made Easy!]
 How To Send a WordPress Form to Google Sheets [The Easy Way]
 7 Best WordPress Table Plugins Compared
 How to Export Form Entries in WordPress