This plugin allows you to collect one-time Authorize.net AIM payments using Formidable Forms. You must have an Authorize.net plan in order to use this add-on. In order to take Authorize.net payments on your site, you will need an SSL connection.
Download and install
- If you haven't already, install and activate the current version of Formidable Forms Premium on your WordPress site.
- After confirming your Formidable Forms license, proceed to the Formidable → Add-Ons page and toggle on the Authorize.net WordPress plugin.

Sandbox or Merchant account
Developers information
Go to Authorize.net sandbox and sign up for a sandbox account. Once you receive your credentials via email sign in and follow the merchant account instructions below. Please make sure your environment is set to testing if you are going to use a sandbox account.
Merchant information
Sign up for an Authorize.net merchant account or login if you already have a merchant account. Please make sure your environment is set to Live before using your form.
Connect Authorize.net account
After the Authorize.net plugin is activated, you can set up Formidable Forms to integrate with your Authorize.net merchant account. To do this, follow the steps below.
- Log in to your Auth.net Merchant account.
- Select the Account tab from your Merchant account.

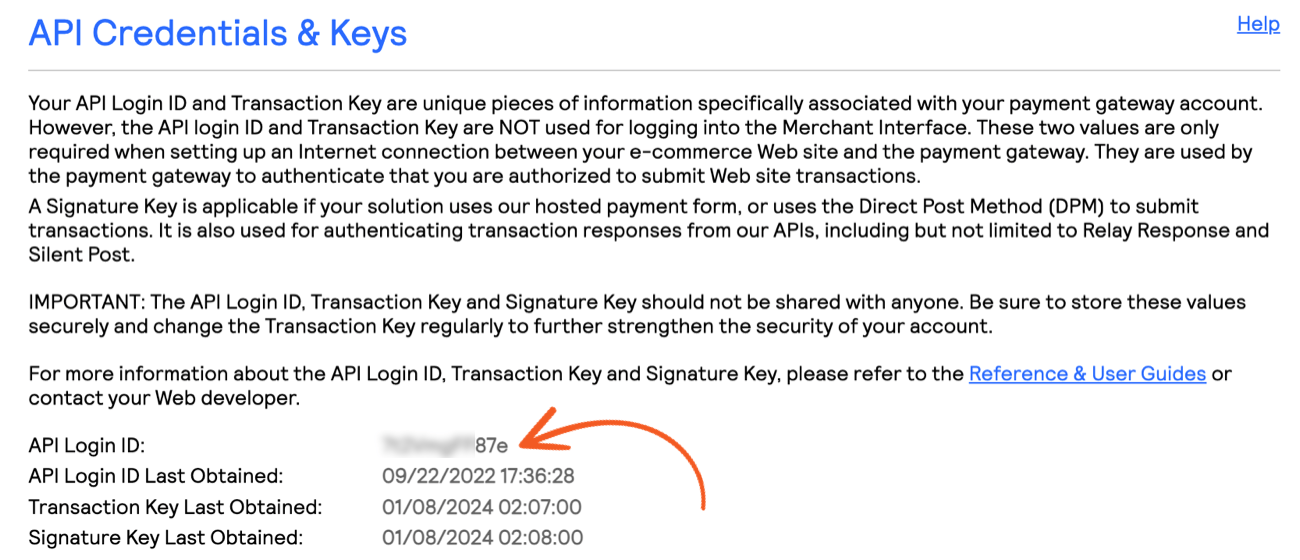
- In the Security Settings section, click the API Credentials & Keys option.

- Save a copy of your API Login ID.

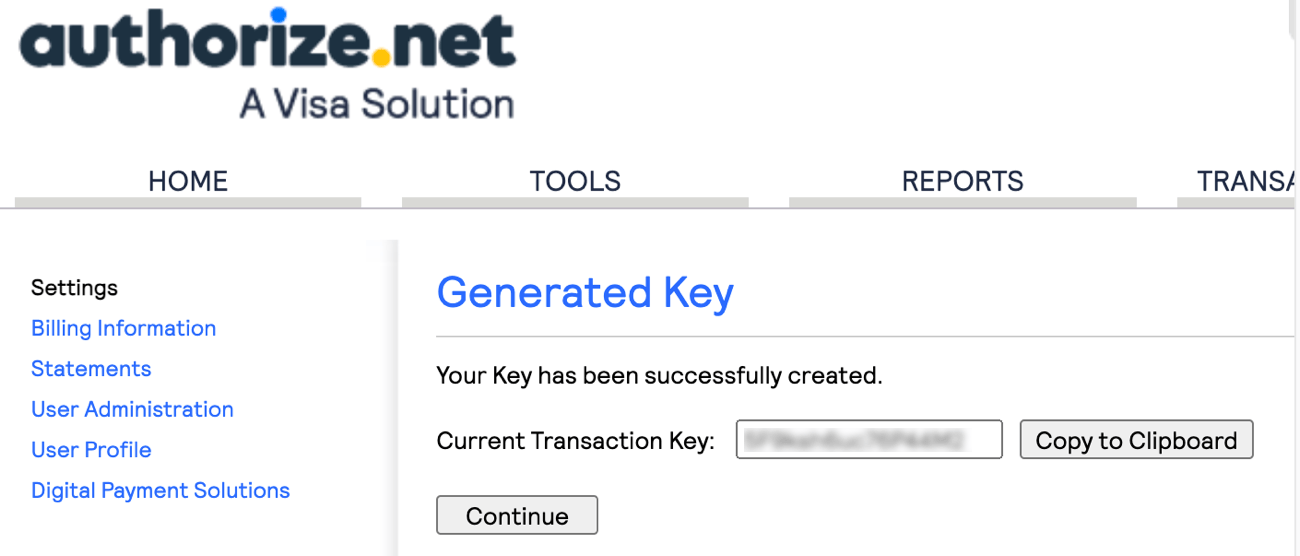
- Create a new transaction key by selecting the New Transaction Key option. Then click the Submit button to proceed.

- Save a copy of the generated Current Transaction Key.

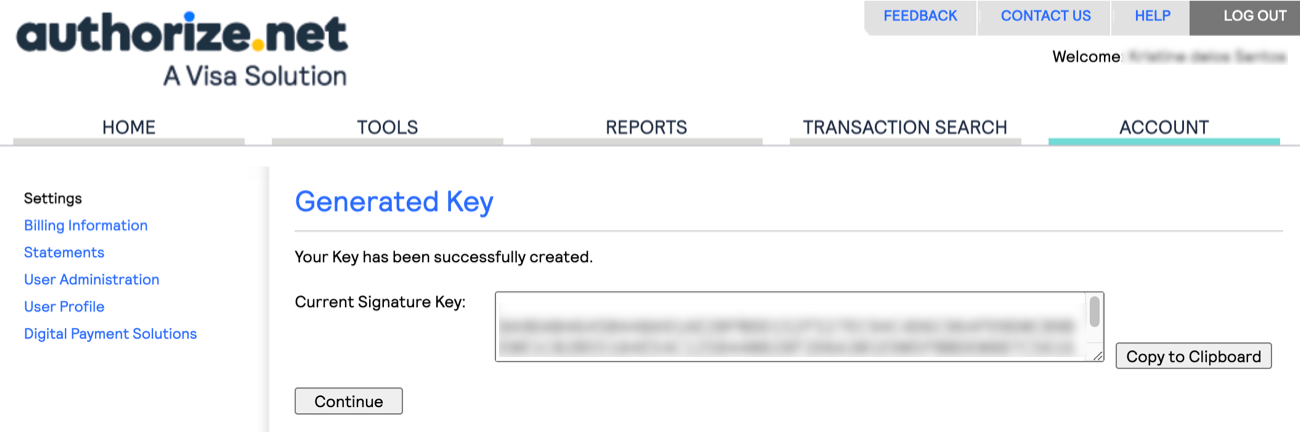
- Navigate to your Merchant account Security Settings → API Credentials & Keys page. Create a new signature key by selecting the New Signature Key option. Then click the Submit button to proceed.

- Save a copy of the generated Current Signature Key.

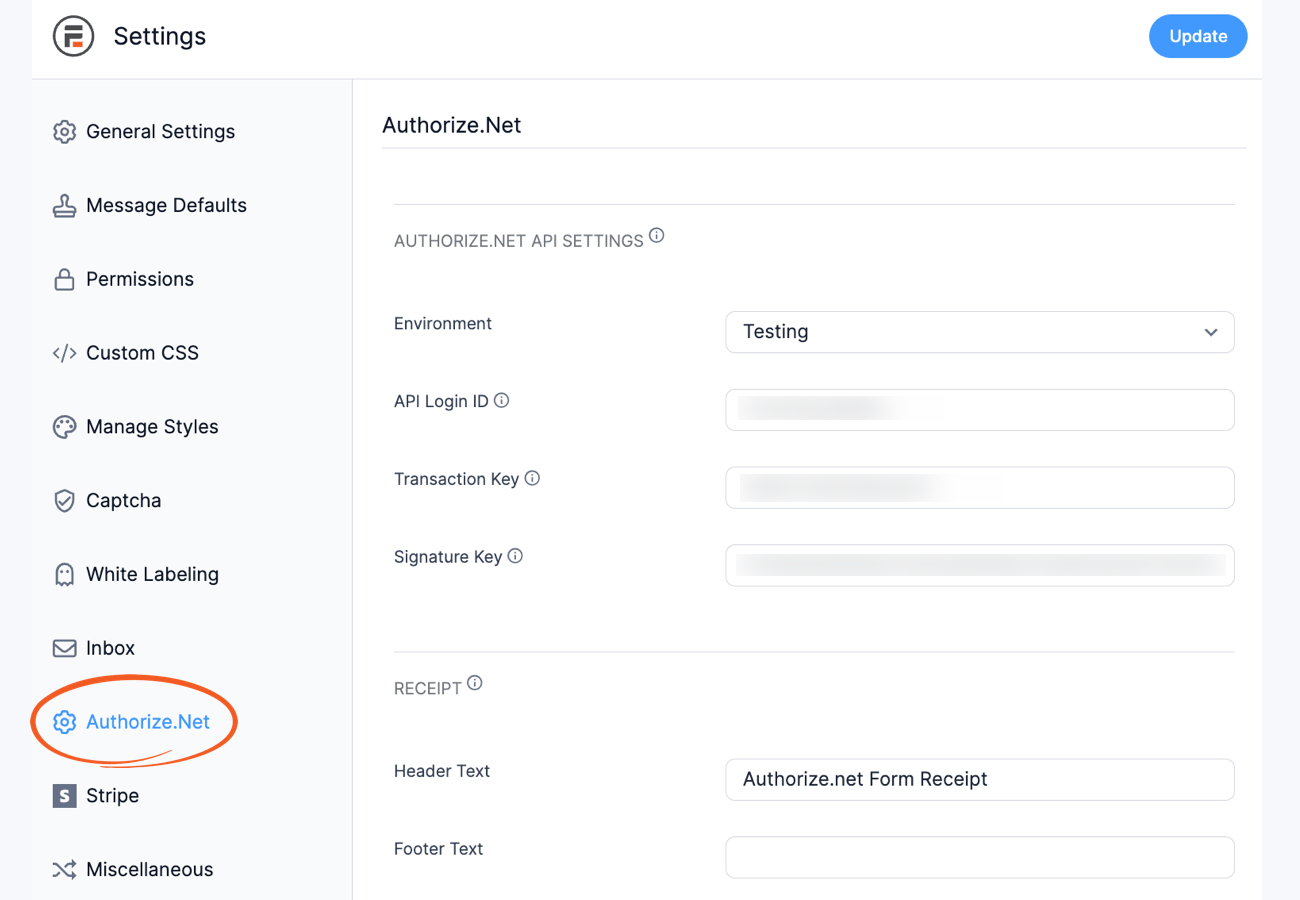
- Navigate back to your Formidable → Global Settings → Authorize.net settings. Insert the copied keys for the API Login ID, Transaction Key, and Signature Key to set up your Authorize.net API settings.

Set up an Authorize.net payment form
Collect payment info
If you would like to collect payment info via a credit card in your Authorize.net payment form, add a Credit Card field to your form. Learn more about on how to store credit card information.
Note: Recurring payments are not currently supported.
If you would like to collect e-checks, follow the instructions below.
- Add two Number fields to your form: one for a Routing number, and one for an Account number.
- Add a Single Line Text field to your form for the Bank Name.
- Follow the instructions below to link the above fields with your form action.
Please note the following security risks when collecting eCheck and credit card information. It is not recommended to collect and store full credit card or bank information as it comes with added liability. Whenever you are collecting sensitive information, you should use SSL on your site. Depending on your web host, you may be able to get free and easy SSL through Let's Encrypt. Please contact your web host for information on how to set up SSL on your site.
Create a Form Action
Once you have finished setting up the fields that allow a user to enter their payment information, you will want to set up a form action in your Authorize.net payment form. Use the following instructions to set up your form action.
- Go to the form's Settings → Actions & Notifications.
- Click on the Collect Payment shopping cart icon.

- In the first section, fill in necessary information such as the description of the payment, the payment amount, whether it will be one time or reoccurring, the currency of payment, and lastly if you want to use Authorize.net (credit card), an eCheck, or both.

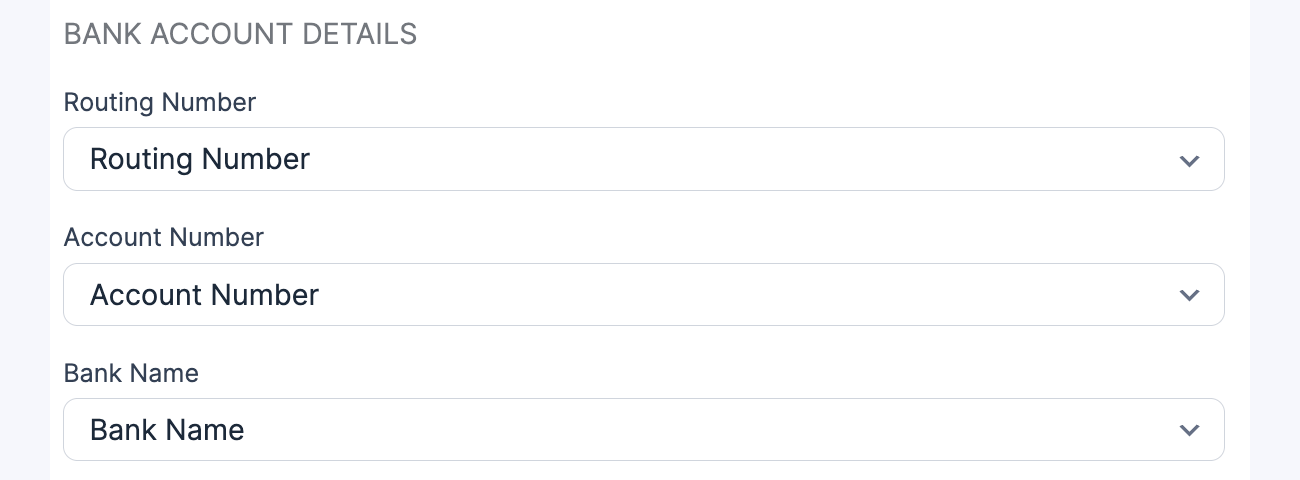
- If you are collecting eCheck info, let the form action know which fields hold the bank account info.

- Let the form action know which fields hold customer information.

- If you are collecting shipping information, then make sure this box is checked. Then, let the form action know which fields hold shipping information.

- If you want to change a field's value after payment is either completed, refunded, or fails, you can do so in the After Payment section.

As with nearly all form actions, you can add conditional logic for collecting payment.
Conditionally show payment fields
When you create a form action that has both Authorize.net and eCheck enabled, a Gateway field will appear in your form automatically. This field will have options for either credit card or eCheck.
 The purpose of this field is to allow the user to input which payment method they will be using. This allows you to either show the credit card field, or the fields for users entering eCheck information using conditional logic. You can follow the instructions below to conditionally show the payment fields.
- First, follow Steps 1-3 above to add a form action that allows both Authorize.net (credit card) and eCheck. After doing so, update the form.
- Next, follow the instructions above to add both a Credit Card field and fields for eCheck information if you haven't already.
- To set up conditional logic for the Credit Card field, click on the field options for the field and click "Use conditional logic", then choose the Payment Gateway equals "authnet_aim" without the quotes. It should look like the following screenshot.

- To set up conditional logic for fields associated with eCheck info, click on the field options for the field and click "Use conditional logic", then choose the Payment Gateway equals "authnet_echeck" without the quotes. It should look like the following screenshot. Repeat this step as necessary for each eCheck field (Account #, Routing # and Bank Name.)

Trigger actions after payment
There are several actions that can be triggered after a payment is complete or fails. Emails, Twilio (text messages), and MailChimp actions are currently setup to work this way. In each of these actions, you'll find now options in the Trigger this action when ____ setting. If you would like an email to be sent after the payment is complete, uncheck Entry is created and check Successful Payment.

Insert a receipt
If you would like to show a payment receipt, you may use this shortcode:
[frm_payment_receipt id="[id]"]
This shortcode may be placed in a View, email message or the success message.
Receipt settings
If you want to change the header or footer text displayed on the receipt, select Formidable → Global Settings → Authorize.Net.

Show receipt after payment
If you would like to show this payment receipt right after the user submits the form, you could follow the instructions here on how to show entry after form submission. Then in your View Content box, insert the [frm_payment_receipt id="[id]"] shortcode.
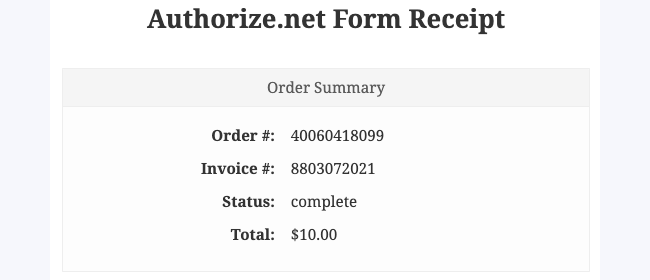
If you're displaying the payment receipt on a page/post, you may use:
[frm_payment_receipt id=25 layout=right]
Replace 25 with the ID of the entry you would like to show a receipt.
Troubleshooting
Check log file
If you run into issues when trying to complete a payment, start by checking your log file for clues. You can find this file in plugins/formidable-authorize-net/formidable-payments/log/results.log. Scroll to the bottom of this file for the most recent logs.
E00007 User authentication failed
If you're seeing this error message when completing a payment, start by checking if you have entered the correct Authorize.net API details. Here's what to do if you're seeing the error above:
- Follow the instructions here to set your Authorize.net API Login ID and Transaction Key.
- Make sure that you copy the correct API Login ID and Transaction Key.
- Select Formidable → Global Settings → Authorize.Net.
- Paste the Authorize.net API details and click the Update Options button.
Failed echeck notifications
Echeck success status is not instant and takes several days for the approval to come through from the account. After the echeck is no longer processing in your account, it should trigger the success email. Formidable checks in every 24 hours to see if the echeck has been completed.
Note: Authorize.net handles a credit card and an echeck differently since it takes more time to process and an echeck can still fail.
Related Customizations
See the code example to use a custom invoice number.







 Authorize.net vs PayPal: The Best Features, Pricing, and More
 Authorize.net vs Stripe: Which Is Right for Your Site?
 How To Accept Payments on WordPress [3 Options!]
 4 Best WordPress Credit Card Payment Plugins [Free & Paid]
 How To Create Authorize.Net Payment Forms in WordPress
 Authorize.net AIM Add-On for WordPress