A to do list isn't just a task organizer. It helps you prioritize, delegate, save time, & boost productivity too! Here's how to make a to do list in WordPress.

Approximate read time: 6.5 minutes
Interested in task management solutions? Do you use WordPress? Ever thought about creating a WordPress project management solution? The dream of collaboration, productivity, and organization is closer than you think.
There are a lot of WordPress to do list apps, but who wants to download another app? If you are already a WordPress user, all you need to create a to do list in a solid form plugin.
WordPress themes and even plugins allow users to create a front-end checklist. But think about what an online to-do list is. It's just a pre-built form!
And since every WordPress site needs a form builder plugin, adding a WordPress checklist plugin feels redundant. Why complicate your site with another management plugin?

You know what else? More WordPress plugins usually lead to slower load times. So, it's always best to avoid installing too many of them!
With all that in mind, why not build your front-end to-do list on your WordPress site? If you work with your website daily, this could be a great way to maximize productivity.
This guide will show you how to use Formidable Forms, the best WordPress form plugin, to build and manage a WordPress frontend to-do list. As you can see, a few steps are involved, but don't worry—each step is easy as pie.
With your new WordPress frontend to-do list, you'll be more organized and productive before you know it!
Step 1: Create a to do list form in WordPress
Log in to your WordPress admin panel and create a new form. Go to Formidable → Forms, click the Add New button, and click the Create a blank form button.
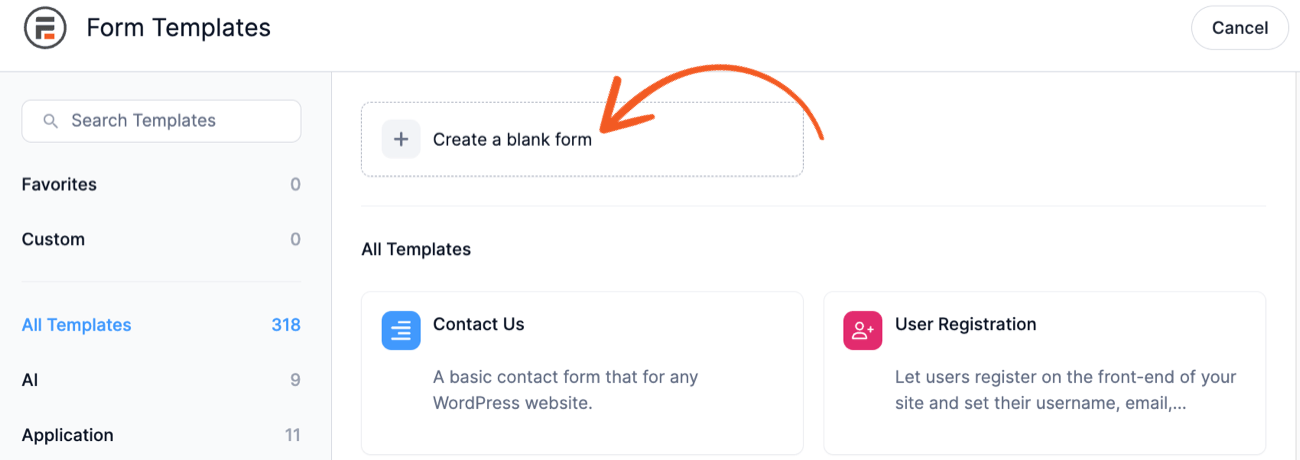
A pop-up window will open, asking for a Form Name and Description. If you want, you can give it a name and description.
Step 2: Add fields to your to do form
Only a handful of fields are needed for a basic to do form. All of these are added via the Add Fields menu on the left of your screen. Soon, you'll have a fully functional interactive checklist!
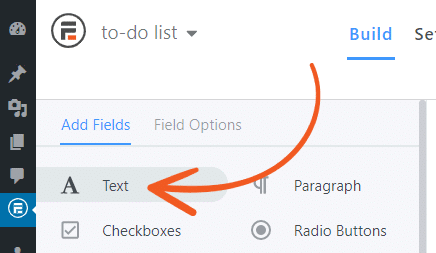
Go ahead and add the following fields to your to do list form. We recommend using the field keys mentioned below, so you can quickly copy and paste the View content later.
- Text Field: This field will be your to do list items. Set the field key to to-do-name.
- Paragraph Field: Here we can add notes or instructions to our to-do list items. Use to-do-notes for the field key.
- Date Field: This will be the due date field. Set the Year Range appropriately, and use to-do-date for the field key.
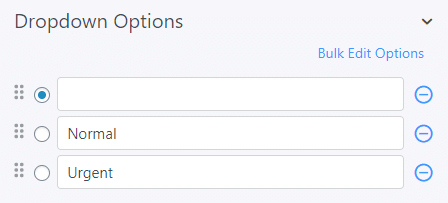
- Dropdown Field 1: This will serve as the priority field. Leave the first option blank, then Normal & Urgent as the next two options. Insert to-do-priority for the field key.

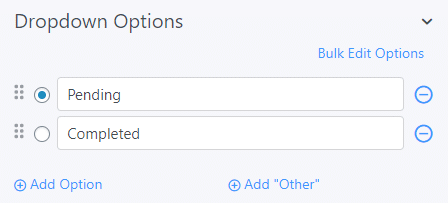
- Dropdown Field 2: This will serve as the status field. Enter Pending as the first option and Completed as the second. Set the field key to to-do-status.

- User ID field: This hidden field will capture the ID of a logged-in user to see who added the task to your to-do list.
And that's it! Your WordPress frontend to do list is finished...
Almost!
Your to do list form may be finished, but neither the form or the to do list itself is visible anywhere by default. There are two more steps needed to bring your to do list into the world.
Step 3: Publish your to do list
The first thing to do is publish the to do list entry form by adding it to a page or post. That's where you'll enter new tasks.
To do that, create a new page or post and add your to do list form. The easiest way to do this is by adding it with your shortcode manually.
Step 4: Create a view to list tasks
Then you'll create a view so you can see the list on your site.
Go to the Formidable → Views page and click Add New to get started. Choose Table for the View type and choose your to do list form as the data source.
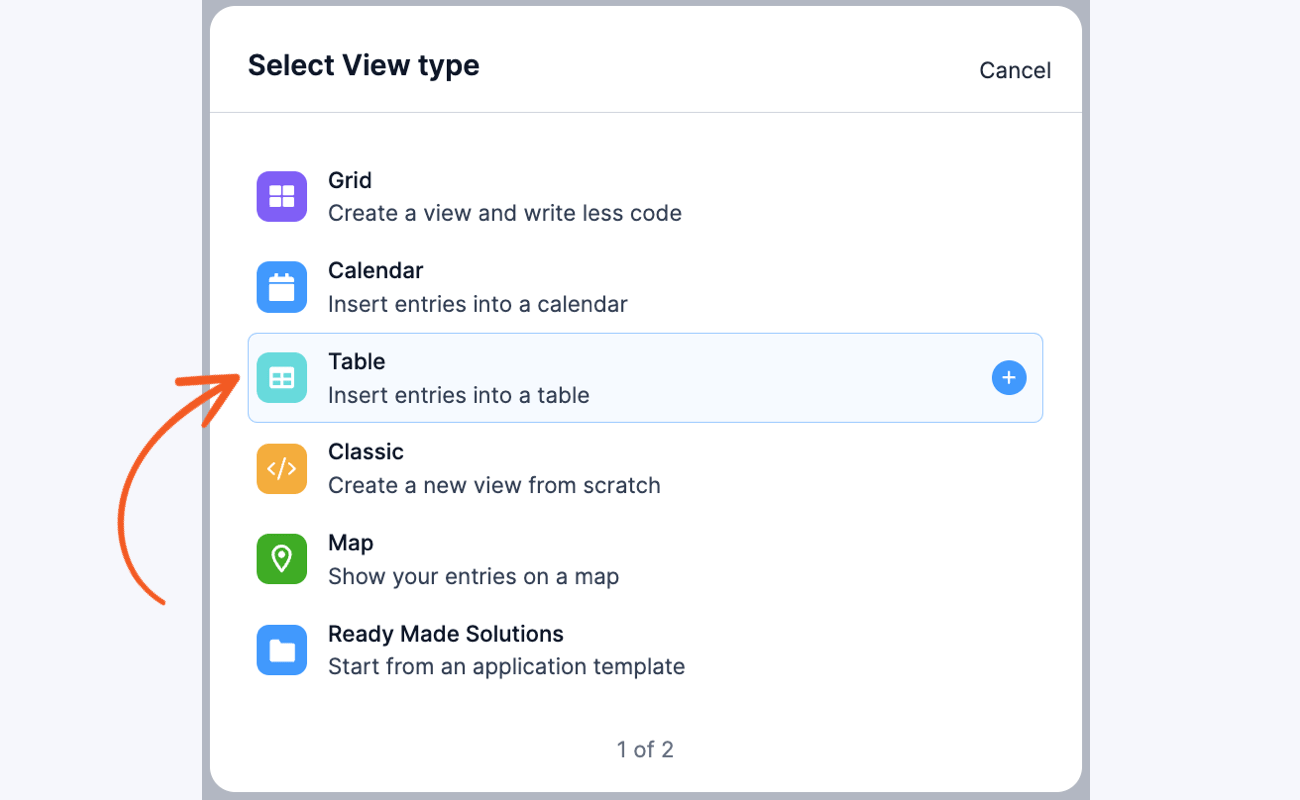
Next, select the fields you want to display in the table in the Customize View step. For this example, we'll use the Status, Item name, Due date, and Priority fields.
Check off to do items
Now, you've got a table created for you. But we're missing the option to check off a to do. So, let's add it.
You'll see a few content areas. Here's the code to add to each one. You can copy and paste:
Before content: (before the existing content)
<style type="text/css">.red_x a {color:red;} .red_x {color:green;} .green_check a {color:green;} .green_check {color:red;}
.todo_tr{border-bottom: solid 1px #E3E3E3;}</style>
Content:
Replace the first <td>[something]</td> with this:
<td>[if to-do-status equals="Pending"]<div class="red_x">[frm-entry-update-field id=[id] field_id=to-do-status value="Completed" label="✗" message="✔"]</div>[/if to-do-status]
[if to-do-status equals="Completed"]<div class="green_check">[frm-entry-update-field id=[id] field_id=to-do-status value="Pending" label="✔" message="✗"]</div>[/if to-do-status]</td>
Quick note: You need to allow front-editing of entries for the [frm-entry-update-field] shortcode to work. Only users who have the proper editing permissions will see the Update link.
With those bits of code inserted, add some tasks into the form you should see something that looks like this:
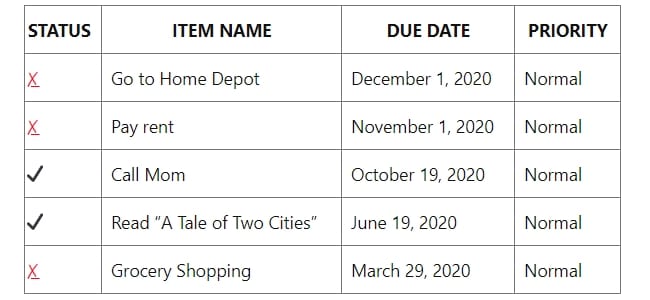
Finishing up your WordPress to do list
Now you're truly finished and ready to use your new organizational tool. Aren't you glad you skipped the checklist plugin?
 The Best Low-Code Web App Builder for WordPress [For Anyone]
 Calendar Views in Formidable Forms Just Got a BIG Upgrade!
 The Ultimate WordPress Table Plugin for Your Site
It seems to me that your example is not complete. The view code, I believe, refers to field codes that have not been explicitly named in the build steps.
How about providing a downloadable form that can be imported to my site?
Thanks for the feedback. Sorry we missed it! This article has been updated to clear this up. Also, we're planning on releasing a downloadable version of this sometime this year.
Is the downloadable option available?
Hey Lee,
I'm afraid it is not available yet. This is still on our backlog.
Having said this, we'll be happy to guide you in setting up the form and view to accomplish the to-do list. Just create a ticket on the following link, and we'll be happy to help.
https://formidableformscom.bigscoots-staging.com/new-topic/
This doesn't help if you are trying to figure out how to create a view. My data form isn't a todo list. Your code doesn't help.
"If you are new to views, this is where things can become a bit complex. Worry not! This time, we'll give you the code so all you'll need to do is copy & paste it in the appropriate boxes."
This example is like a tutorial how to open combination locks. It doesn't work for any lock, just this one.
Hi Christopher,
Thanks for your comment. You are right that this tutorial won't be helpful in creating any type of view, and is intended to only describe how to create a to-do list in WordPress. If you would like to create other views, you should check out our documentation on how to create views found here: https://formidableformscom.bigscoots-staging.com/knowledgebase/create-a-view/
You can also contact our support for assistance with your project.
I have followed the instructions, but the icons don't appear.
Before Content:
.red_x a {color:red;} .red_x {color:green;} .green_check a {color:green;} .green_check {color:red;}
.todo_tr{border-bottom: solid 1px #E3E3E3;}
For the Content Section, you wrote:
Replace the first [something] with this:
I don't see [something] anywhere. There is nothing in the first cell of the table. Are you just referring to the cell itself?
In the Status cell I have:
[if to-do-status equals="Pending"][frm-entry-update-field id=[id] field_id=to-do-status value="Completed" label="✗" message="✔"][/if to-do-status]
[if to-do-status equals="Completed"][frm-entry-update-field id=[id] field_id=to-do-status value="Pending" label="✔" message="✗"][/if to-do-status]
If I only enter [to-do-status] the view displays the value correctly. When I enter your content code, the view field is blank. I realize this is an old post. Is there something I am missing?