Learn how to create maps from form entries with our easy guide. For real estate or business listings, turn form data into fun and interactive maps in no time.
Approximate read time: 6 minutes
Imagine turning form entries into interactive maps with a few clicks.
Sounds pretty cool, right? This is perfect for real estate, business listings, or showing a simple set of locations. And it can make a HUGE difference for a website.
But creating a map in WordPress usually involves complex code, which can be difficult and time-consuming. Setting up APIs, entering information, mapping out points — it's a lot. But there is an easier way to set up maps in WordPress.
And that's why this post is here. This step-by-step tutorial will show you how to create a map from form entries in WordPress in a few steps. That way, you can start impressing website visitors today.
And, best of all, there's no coding knowledge necessary.
So, let's get started.
How to create maps from form entries
Step 1: Install Formidable Forms
First, set up Formidable Forms on the WordPress site.
Formidable Forms is the best WordPress form plugin. It easily creates contact forms, calculators, quizzes, and every other type of form. But it also has powerful features that help it go beyond being a simple form builder.
And its Geolocation and Views add-ons are great examples of that.
The Geolocation add-on powers the address field and pulls location information. Formidable Views displays the map with the form entries without any code.

You get both in the Business plan of Formidable Forms Pro. So grab Formidable Forms and get started with easy map-making.
If there's any trouble, check out our support docs for help installing and activating Formidable Forms.
Step 2: Install the Geolocation and Views add-ons
Once installed, go to Formidable → Add-Ons in the WordPress dashboard.
Next, find the Visual Views add-on and click Install and wait for it to say Active. And that's it for Views.
Then, find the Geolocation add-on and click Install. This pulls in the Google Maps location information. But, you'll need a Google Maps API key (which you can get for free).
Once you have the key, enter it in the Google Maps API Key field under Geolocation under Global Settings.

Check out our Geolocation support docs for a more in-depth explanation of how to get a key and setting it up.
Step 3. Create a form
Next, let's create the form for the map entries.
First, go to Formidable → Forms and click Add New. Then, click the Create a blank form to start from scratch. Or, choose one of the pre-built WordPress form templates to get a head start.
This opens the drag and drop form builder, where it's easy to configure the form.
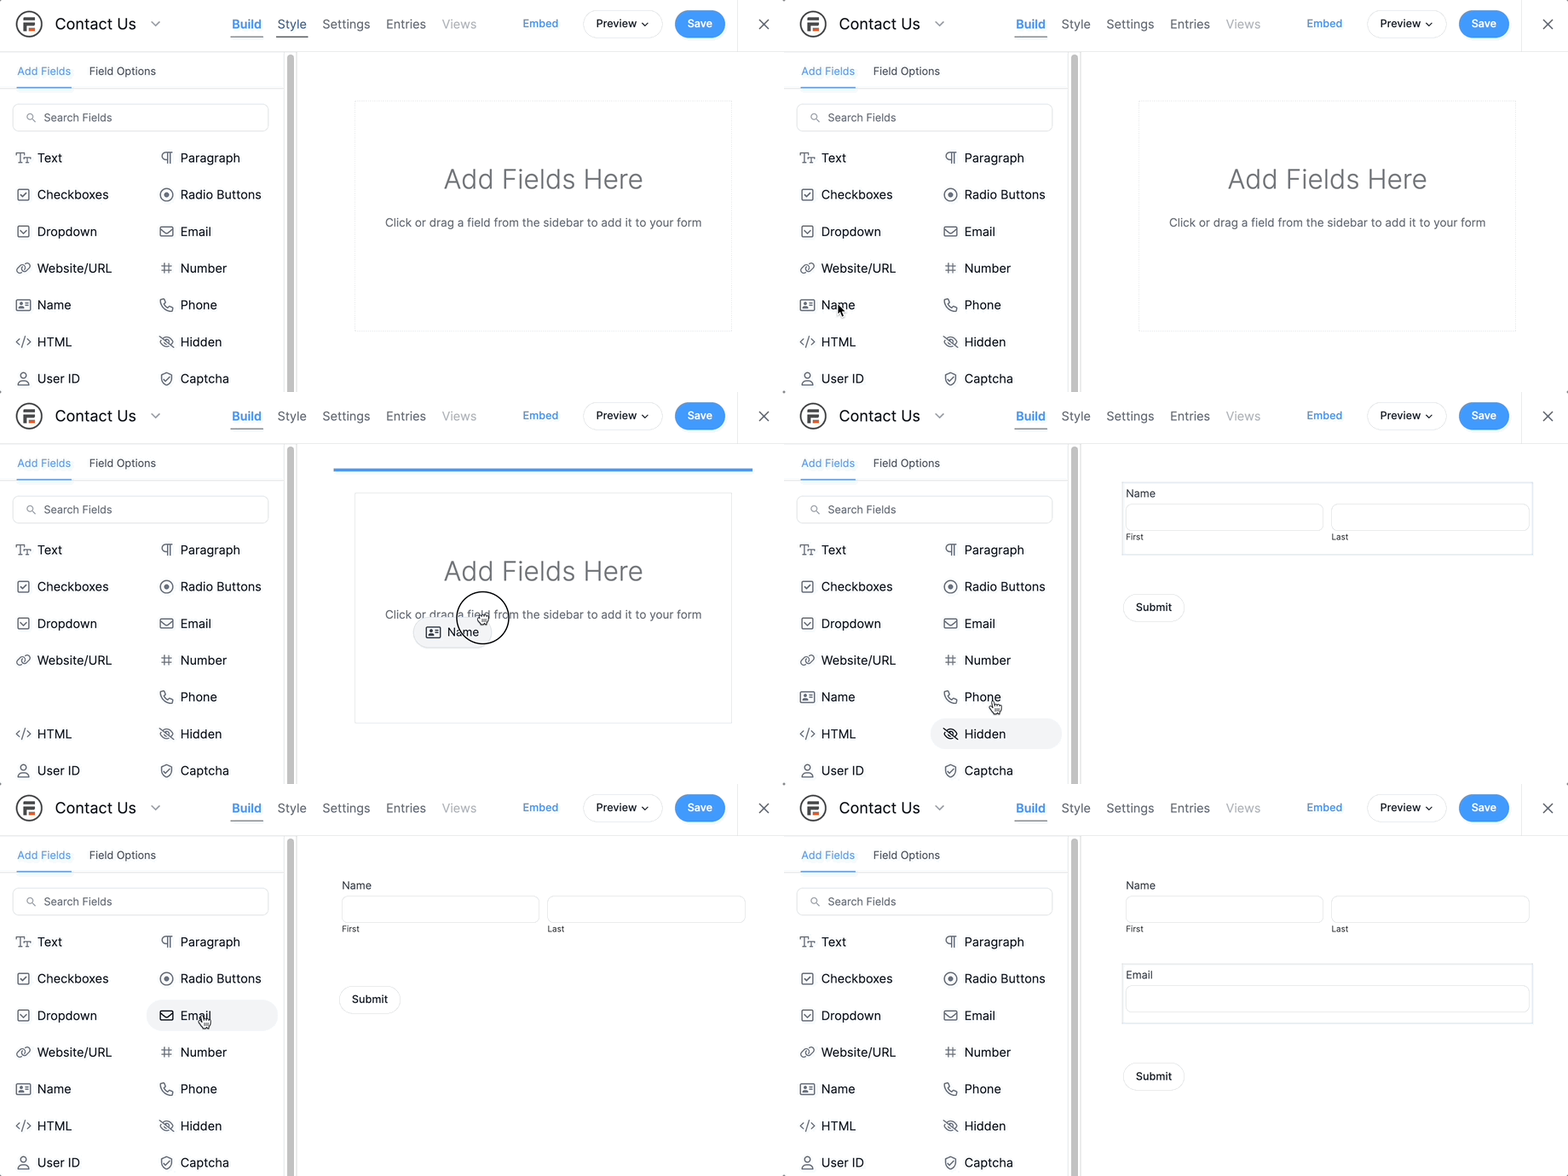
Formidable has many form field types. These include text (single-line text), paragraph (multi-line text), checkboxes, and a phone field. Simply click it and drag it onto the form canvas to add a field.
But make sure to add an Address field for the map.
This collects the address information to show on the map. Then, click the Add address autocomplete box in the field settings.

This controls all the address entries you'll need for future steps.
Step 4: Enter a form entry
Without a form entry, nothing will show on the map we'll create in the next step. So, whether it's real or just a test, let's create a form entry.
First, go to the Entries tab in the form builder and click Add New. Then, fill out the form, including the address field. If there's more than one entry, return to the Entries screen and click Add New again.
You will be able to display all of these on one map.
Step 5: Create a map view
To start, head to Formidable → Views.
A View is how Formidable shows the data users enter. It's a way for users to customize how they show their data in a way that works for them. And, best of all, it's super customizable.
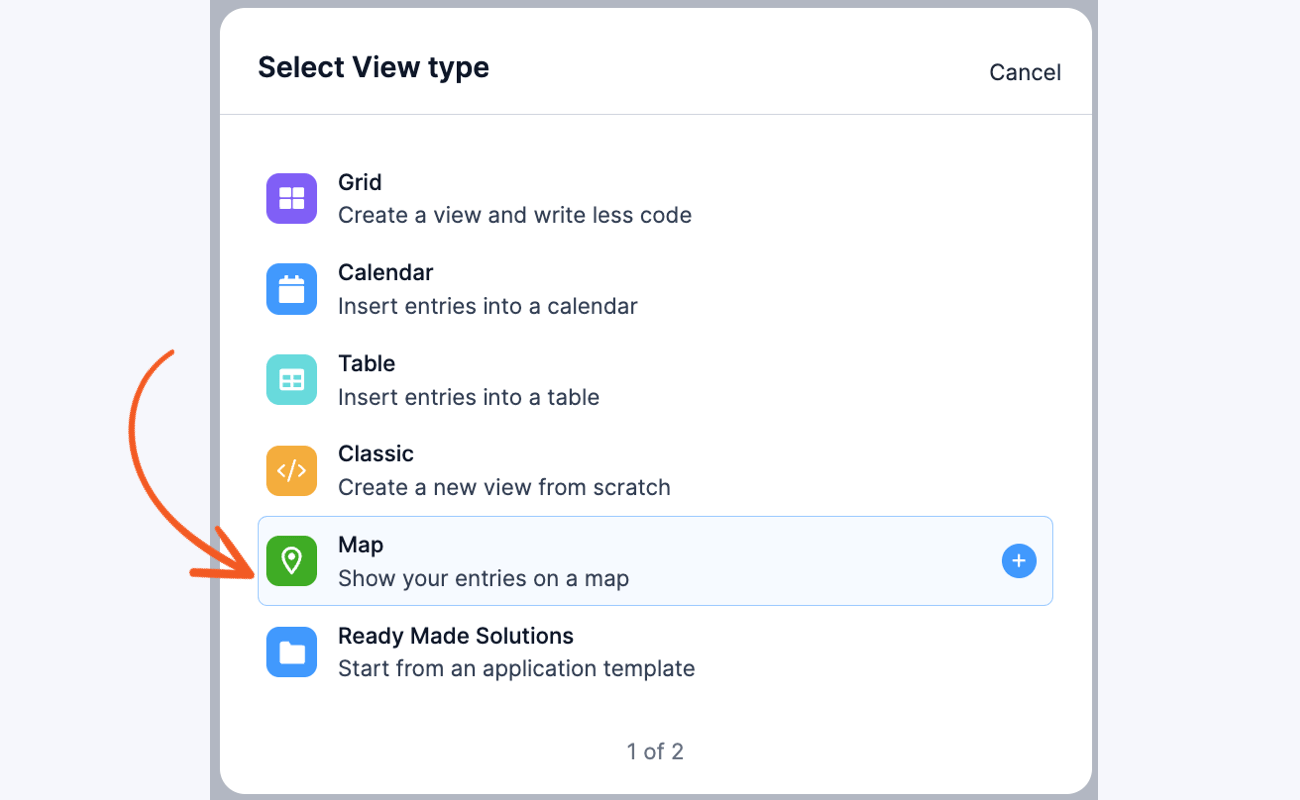
Click the Add New button at the top right, then choose Map.
Next, enter a View name (only you see this). Then, choose the data source from the Use Entries from Form (the form you created), and click Create a view.
The plugin opens the View editor and displays the map in the map viewer. It opens the Listing Page, where you can see the different point(s) from the form entries.
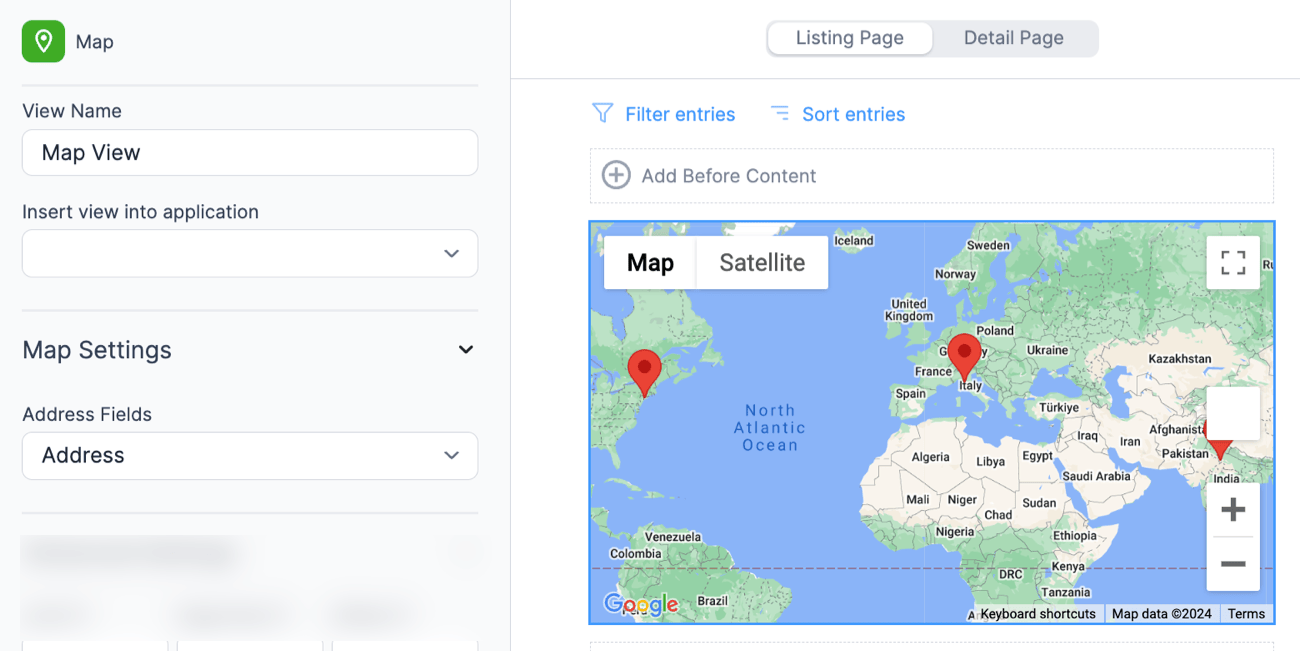
To customize it, click the map to open and edit the Listing Page content. Here, you can add extra information from the form. For example, our form has two fields: Business Name and Address.
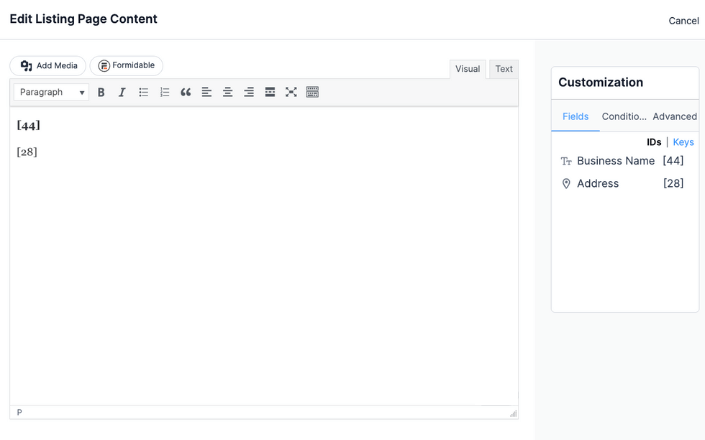
Here, insert the data using the shortcode or click the field name in the right tab titled Customization. On the map, it looks something like this:
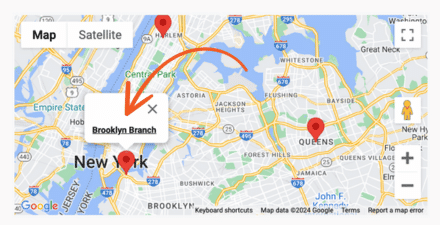
Step 6: Add a link to a details page (optional)
Adding a link to more information is easy.
To do this, we must add some code to the Listing Page. Go to the editor first, then click the Text tab at the top right and enter this code:
<a href="[detaillink]">[(insert shortcode here)]</a>This code will only work if it's entered into the Text editor. Then, insert the shortcode or text in the area where it says Insert shortcode here. This will be the text where the link is attached.
![A screenshot of a webpage editor interface for editing listing page content. The editor shows HTML code with a link tag: <a href="[detaillink]"><strong>[44]</strong></a>. On the right side, there is a "Customization" panel listing two fields: "Business Name [44]" and "Address [28]".](https://formidableforms.com/wp-content/uploads/2024/07/listing-page-detail-link-example.png)
Next, return to the View editor and choose the Detail Page tab at the top. On the detail page, enter any information relevant to users/customers. This can be things like address information, hours of operation, or even prices, depending on your needs.

Step 7: Publish the view
The last thing is to publish the view on the WordPress site.
Go to the post/page where you want to display the map, then add a new WordPress block. Next, find the Formidable Views block and add it to the page. Then, choose the view from the dropdown menu.
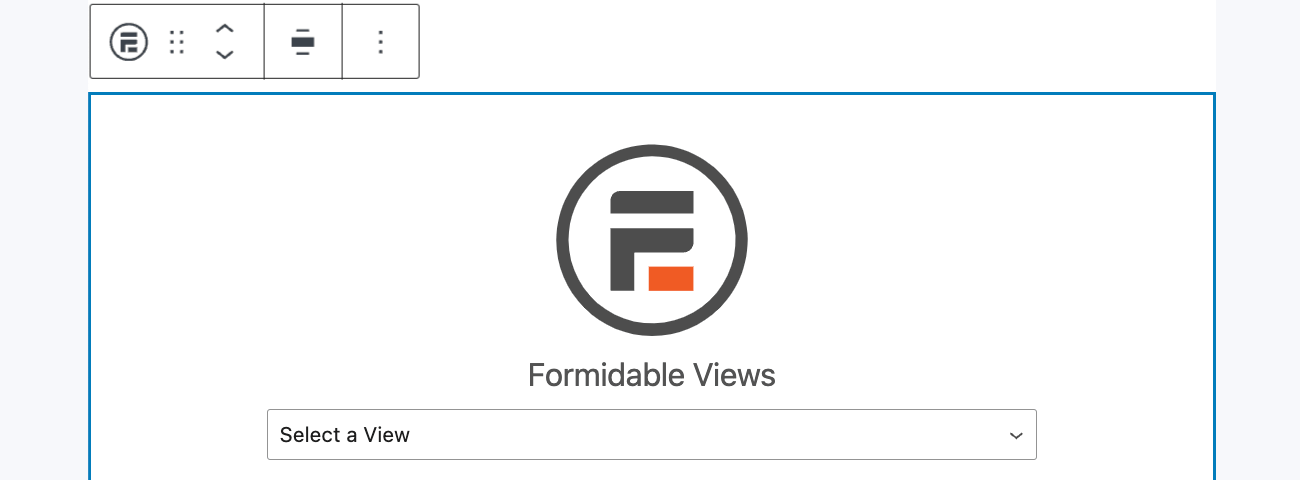
The map will automatically load, and then you have to publish/update the page, and the map is live!
Find the best WordPress map plugins
And that's it! Creating maps from form entries using Formidable Forms is simple. And it's huge for websites with many locations to show.
And that's why we say it's the best WordPress map plugin. And if you'd like to compare, check out our post on the best WordPress map plugins! We break down the best plugins and their pros and cons so you can decide which fits the WordPress site.
But if you're ready to start today, grab Formidable Forms Pro using the button below! Try it out for 14 days. And if you don't like it, get your money back, no questions asked.
And be sure to join our community on Facebook, Twitter, and YouTube for more WordPress map tips & tricks!
 How To Embed Google Maps in WordPress [2 Methods!]
 How To Add a Google Map to a WordPress Contact Form [Free!]
 How To Add Google Address Autocomplete Fields in WordPress
Thanks a lot for this post!
I´ve tried to display more than one marker and already extended the functions.php.
Unfortunately only one marker is being displayed. On the individual display I placed the following:
Before the content:
[form_to_mappress
Content:
address1= "[81] [82],[84], [85]" title="[83]" body="testing 1-2-3 id=[id]"
After the content:
width=600 directions="google"]
Questions:
- What am I doing wrong? Maybe add a counter so variables address1, address2, address3 are being generated independent from [id], because when deleting an entry this display might be lost?
- can I set individual titles and bodys for every entry?
- I´d like to have different icons for some entries... 😉
Hope this can be done with this solution - it´s my goal to display up to 100 entries on one map. Also contacted Chris (developer of MapPress) for extending the plugin.
Deeluxe and others wanting a global/or map mashup,
Here is the link for my feature request with Chris Richardson, the developer of MapPress. http://wphostreviews.com/forums/topic/mappress-and-formidableforms-pro-pre-purchase-question.
Maybe if we all ask nicely and promise to support his premium plugin, he'll move it to the top of the 'to do' list? Add your request to my forum request at the link above.
Stephanie,
The Pro version of MapPress includes a Map Mashup. Yeah! Just what I've been waiting/looking for! Do you see any reason why the mashup feature wouldn't work with FormidablePro? Would it be possible to get a demo of how to do that? Is the plugin code any different than shown above?
I am currently using GoogleShortcode with my forms, as previously suggested, as the mashup/global feature is not nearly as straighforward as this one, I'd like to change it. Any tips, shortcuts or things to watch out for when making the switch?
@lynn, We are not MapPress experts and have not used their pro version. You're welcome to try it out and let us know how it goes.
@Stephanie- Working on it with Christopher (MapPress), but as you know my coding skills, although gaining daily, are still at a novice stage. If I can get it to work, I will post it back here. Stubborn is a quality, right?
Wouldn't this be an awesome 'Add-on' for FormidablePro? 🙂 Thanks and stay tuned...
is there anyone who has a demo on how the mash-up will work with mapress?
Where exactly do you put the shortcode for this feature? (see below) How do you copy the code into a new plugin? And/or where exactly does it go inside the functions.php file (between what brackets, etc.). Tiny HTML experience here...
Add a new shortcode. Copy and paste the following code into a new plugin or your theme functions.php file. This doesn’t need any modification or changes.
Thanks!
Instructions updated above with a little more detail.
OK, great thanks. It looks like I got it, but now it's not reading the addresses from the form and I'm getting a blank blue google map. 350=address, 349=city, 348=state, 351=zip.
[form_to_mappress address1="[350], [349], [348], [351]“]
I also tried just doing one field for the whole address but got the same blue google map.
[form_to_mappress address1="[344]“]
I have this is in the Dynamic Content of the Custom Display. Am I missing a connection somehow?
Thanks!
I took out the brackets from the code but it still did not work.
Please try adding the shortcode directly on a page without the custom display for starters. Some addresses may not be recognized without the exact formatting that MapPress is expecting.
[form_to_mappress address1="500 chestnut st, phildelphia“]
(Replace the address with the one you are trying to create a map for.)
After less than an hour I found this plugin "Walk Score" http://wordpress.org/extend/plugins/walk-score/ and it's working great with the formidable pro, It has a mash-up functionality.
Hi Stephanie,
The shortcode appears to work for me on a page without the custom display (ie using the format [form_to_mappress address1="500 chestnut st, phildelphia“]), but if I copy and paste the same shortcode with the hardcoded address (or address made from shorcodes of my form address fields) in the custom display.
Am I doing something wrong?
Thanks!
*but it does not work if I copy and paste the same shortcode with the hardcoded address (or address made from shorcodes of my form address fields) in the custom display.
It just shows the form_to_mapress shortcode on the post using the dynamic display
Please add filter=1 to your custom display shortcode (not the form_to_mapress shortcode). This should tell your custom display to interpret [ ] as a shortcode rather than just text. For example: [display-frm-data id=x filter=1]
i bought F.Pro yesterday, great product, bought mappress pro last night, seems good (although not got it working yet.
ok, so in my CF of my CT i have:
id 96 = address (street), 97 = town, 98 = region, 99= country and 100 = postcode.
i have set Mappress settings to include my CT, BUT, in the mappress settings it says "which field to use for address, well, i have 5, but can only select one, do i need to create a new field that contains a merge of the address fields for mappress to use then in its sidebar widget? thoughts? (also not sure how to create a merged hidden field, ideas?
also, i then have this shortcode in my post (hard coded for now):
[form_to_mappress address1="[99]" title="Nice map"] - just get blue map of death
also tried
[form_to_mappress address1="[96],[97],[99][100]" title="Nice map"]
no joy, and that isnt working as when i see the map title it shows the ids so the comma is screwing around with it.
i am really stumped now. I just want a dynamic shortocde on my posts that a user creates front end 🙂
boo hoo
anyone got this working
Thanks
Darren
When using the shortcode with ids, it MUST be inside a custom display, not on a post page.