Ready to start selling products and receiving payments? Look no further! Learn how to create an order form in WordPress with this easy-to-follow guide.
Approximate read time: 7 minutes
Making it easy for your customers to buy from you means they buy more.
And one way to do that is by using an order form for WordPress. WordPress order forms simplify how you sell your products, from gathering customer information to accepting payments.
If that’s what you want, this step-by-step guide is for you.
This post will show you how to add an order form in WordPress with a plugin so you can start accepting orders today. Let’s dive into it.
Why use a plugin for your order form in WordPress?
WordPress plugins are small extensions for your website.
Plugins make it easier for you to do things you couldn't before. They add extra functionality to your website. And, most of all, they save you tons of time.
So, you get an easy solution instead of spending time and money to create one yourself or pay a developer. You can focus on what you're good at, and the plugin can focus on what it's good at. A form plugin is excellent at creating all forms — from contact forms to surveys to order forms.
With one plugin, you can create a contact form for customers, a survey for employees, and an online order form for customers. Pretty neat, right?
So, let's learn how to create one.
How to create an order form in WordPress
The best way to create your customer order form is using Formidable Forms.
With its simple form builder and payment integrations, you’ll have your order form on your website in minutes using the best form builder plugin.
Plus, it only takes a few steps to have it up and running:
Step 1: Install Formidable Forms
Formidable Forms is the best form plugin for WordPress, making it perfect for order forms.
Why is that exactly? Because Formidable has Stripe integration in its free plugin! You don't need to pay to start taking payments (with a 3% transaction fee). But if you want to avoid the costs, you can upgrade your Formidable Forms license (and get tons of other great things, like form templates!).
If that sounds good, click the button below to install and activate Formidable Forms.
If you want to move forward on the free version, head to your WordPress admin, go to Plugins → Add New, and search for Formidable Forms. Once you find it, click Install, then Activate.

The plugin is ready to use, and everything related to it can be found under the Formidable tab in your WordPress dashboard.
Step 2: Connect Stripe with Formidable Forms
In the Formidable tab, go to Global Settings → Stripe.
First, choose whether you want to start in Stripe's live mode or test mode first. Then click the Connect to Stripe button. Next, Formidable's Stripe integration wizard starts and guides you through the process.
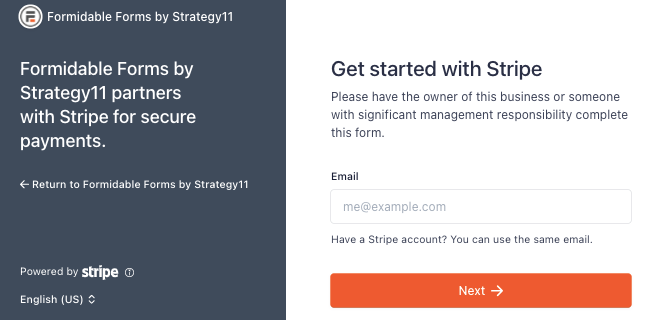
Once logged into your Stripe account, go to Settings → Payment Methods on your Stripe dashboard.
From here, you must click the Turn on button next to the payment method you want to accept.

You can also turn on Stripe Link for faster checkouts and to accept recurring payments with Stripe — all through Formidable.
Step 3: Create an order form in WordPress
To start building your form, go to your WordPress dashboard and go to Formidable → Forms.
Next, click the Add New button in the top left to create your form. Here, you have two options:
- Use a Blank Form
- Use one of Formidable’s pre-built templates
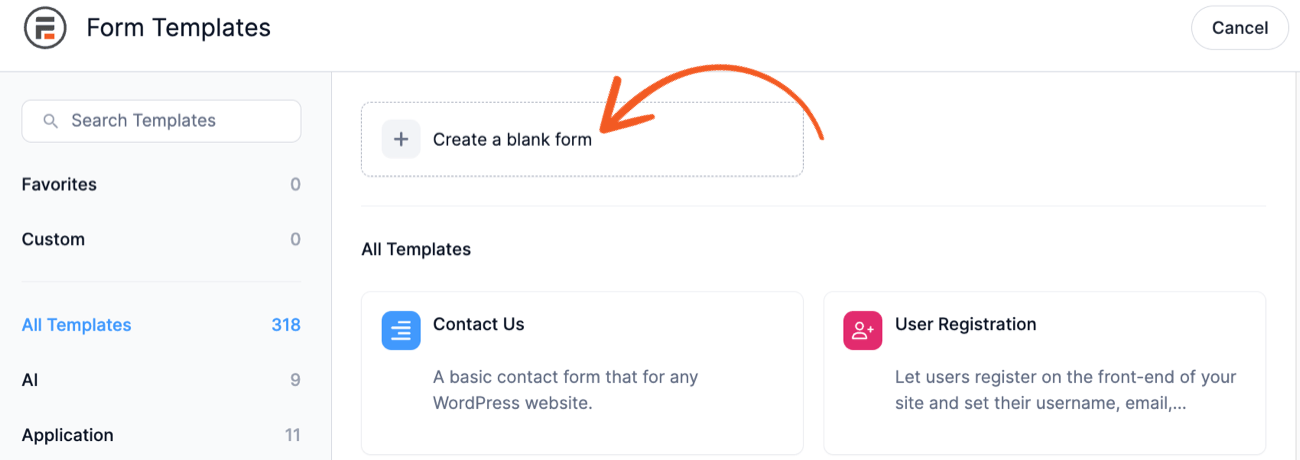
For our example, we’ll build a bakery order form and use a Blank Form to see all the customization options Formidable offers, but you can also use a template.
Then, give your form a name and click Create. Now, we’ll want to drag some fields to our form.
Step 4: Add fields to your form
After you give your form a name, the plugin will take you to the drag and drop form builder.
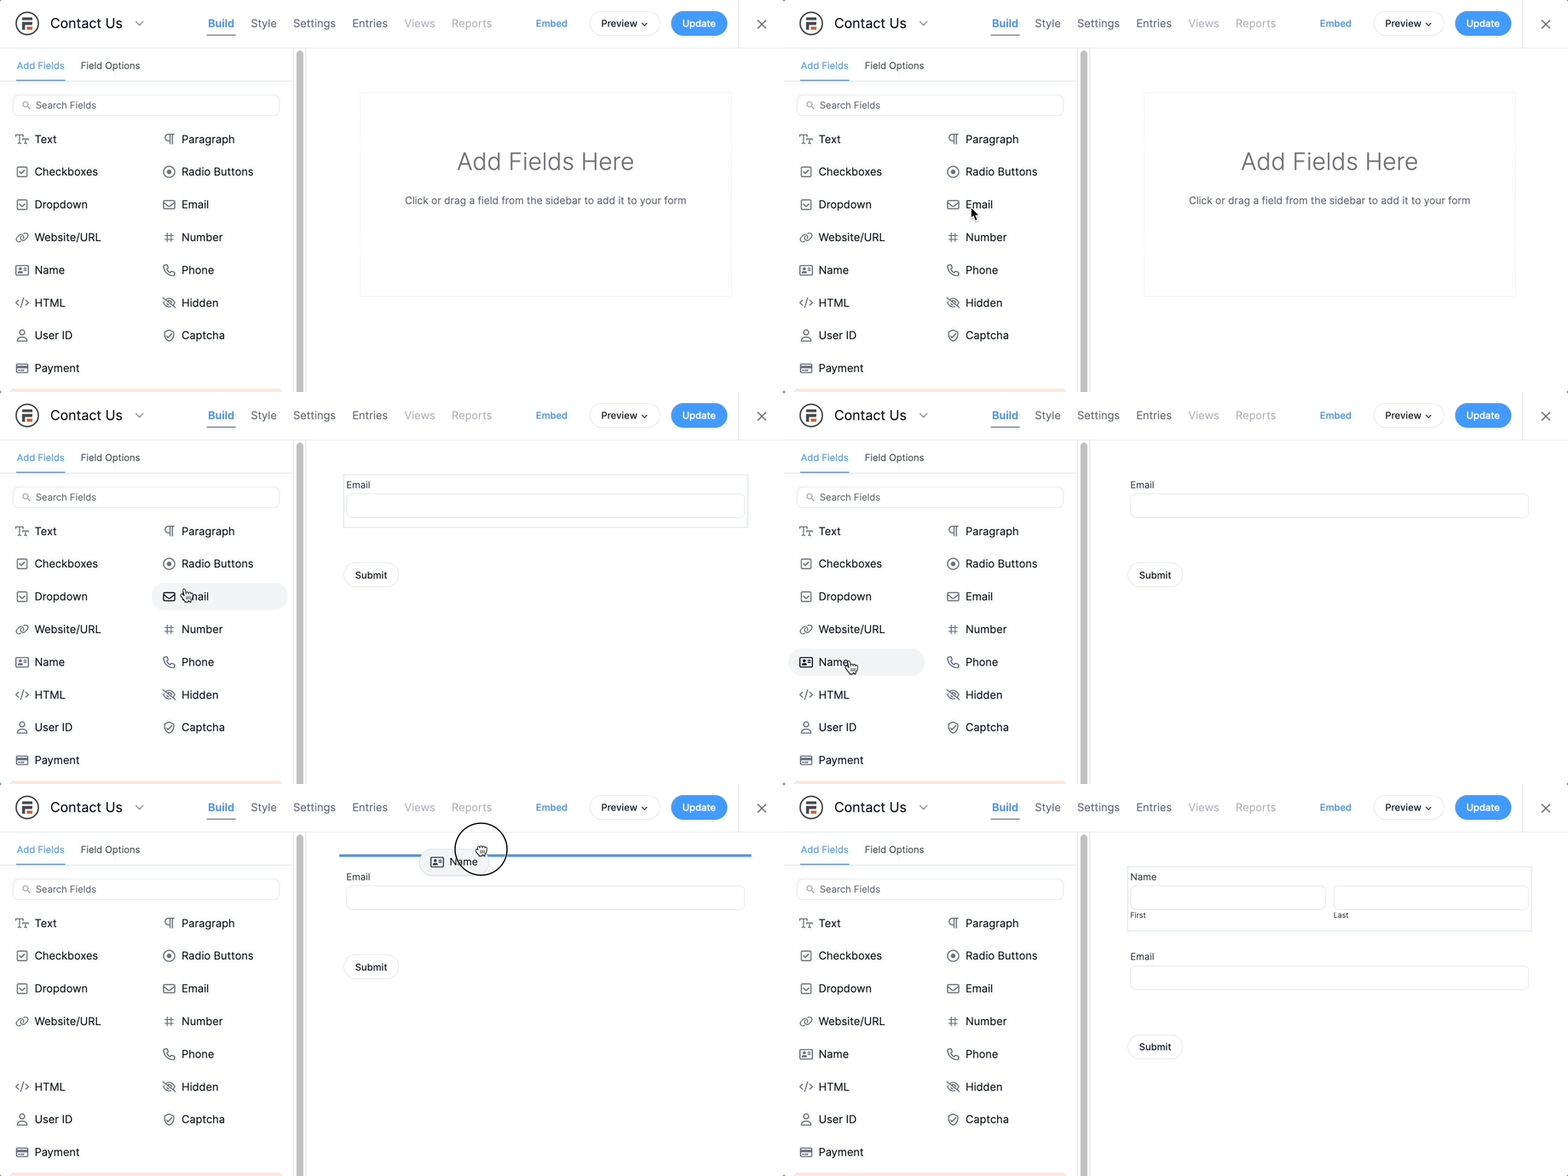
So, this part is super easy, and you need only a few fields.
Most importantly, the Payment field allows you to accept payments! But we also recommend adding other fields, like a Repeater field so customers can choose multiple products, a Section field for customer details, and a Summary field for an automatic summary.

Now, our form looks like this:
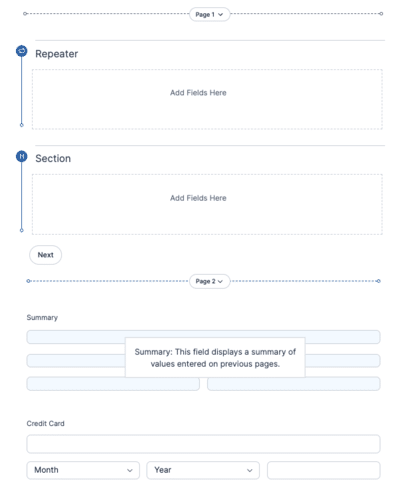
You’ll notice it says Page 1 and Page 2. When we add the Summary field, the form automatically splits your form into two pages to make it easier for the reader to understand. Pretty cool, right?
So, we need to add some fields to the repeater form so customers can choose their products.
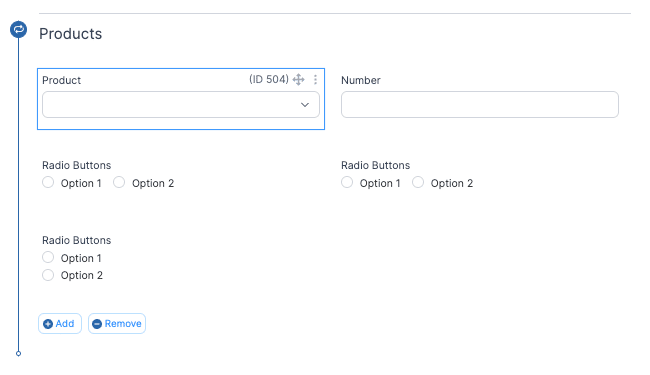
Luckily, this part is easy, too! You need only two fields: Product and Quantity.
For our example, we’ll use four Product fields: Product, Flavor, Icing, and Size. Then we use the quantity field to, well, get the quantity! This way, the Total field (which we’ll add later) will know how to multiply the totals.
Step 5: Customize field settings
Next, we’ll adjust the labels and settings in the Field Options sidebar on the left.
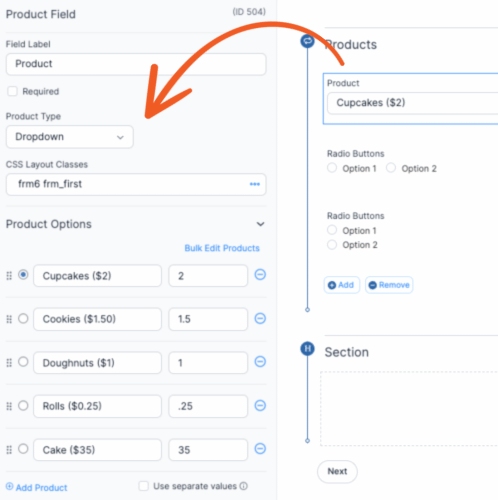
We added the products and their values so you can enter your own. The values will be used in the Total field, which we will add briefly.
First, we want to customize the rest of our fields to match what we need from the customer.
So we’ll adjust the labels and options for the customers to choose from.
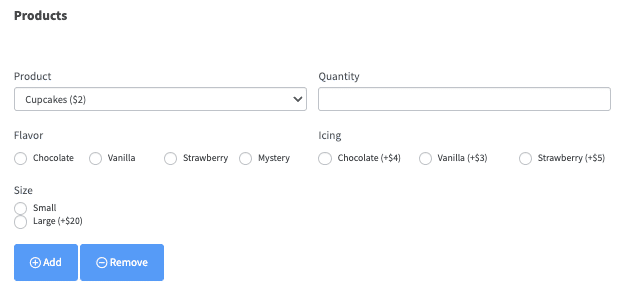
Now that those are set up, let’s add our Total field so customers can get an exact amount before they order.
Luckily, Formidable’s calculator abilities will do the hard work for you. All you have to do is add the Total field, and it’ll recognize the values from your product and quantity fields.
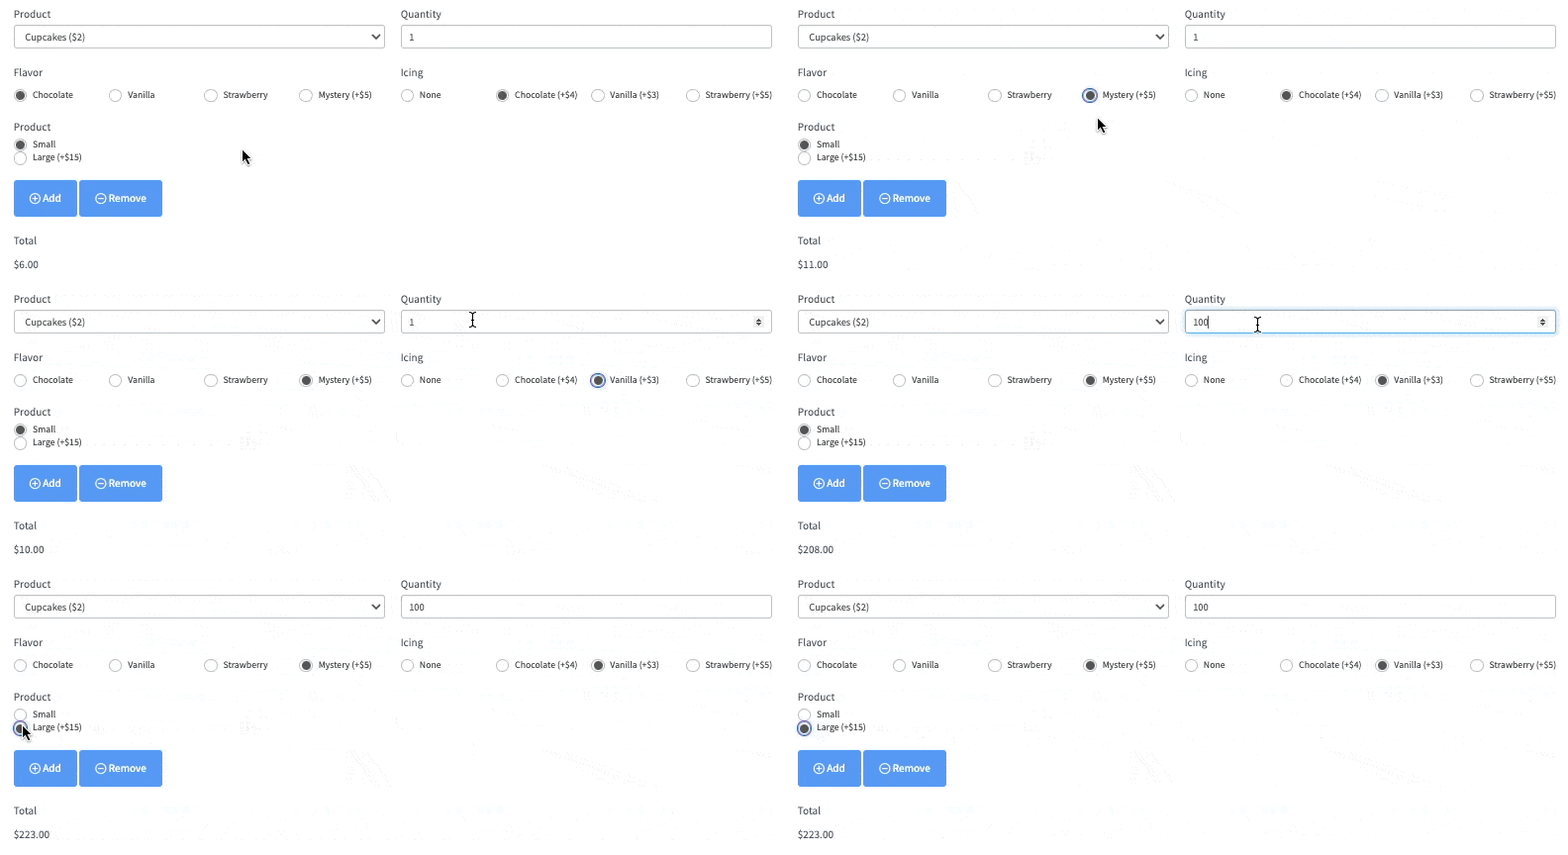
Just make sure you place the Total field outside of your Repeater field. That way, any additional products customers add will also be added to the total.
So now we need to fill out the Section field to customize the customer details section.
We’ll add seven form fields to this section:
- 2 Text fields (for first and last name)
- Email field
- Phone field
- Radio field (for pickup or delivery)
- Date (for pickup/delivery date)
- Address
Once we adjust the labels and options for these, our customer details section now looks like this:
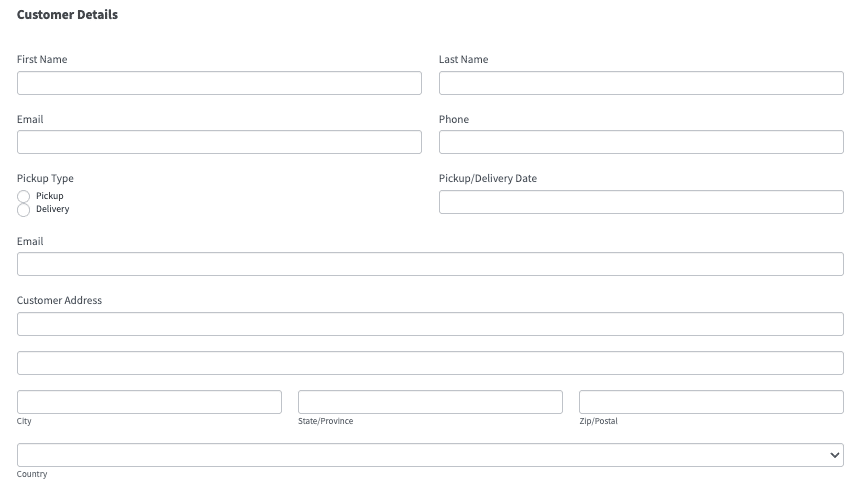
Perfect. This form is starting to come together! Be sure to click Update to save your changes.
Now, let’s set up your payments so you can start making some money!
Step 6: Add payment gateways
Now, go to Settings → Actions & Notifications in the form builder.

Select Collect a Payment and scroll down to adjust your payment settings. You can change things like Payment Amount, Currency, and Payment Type.
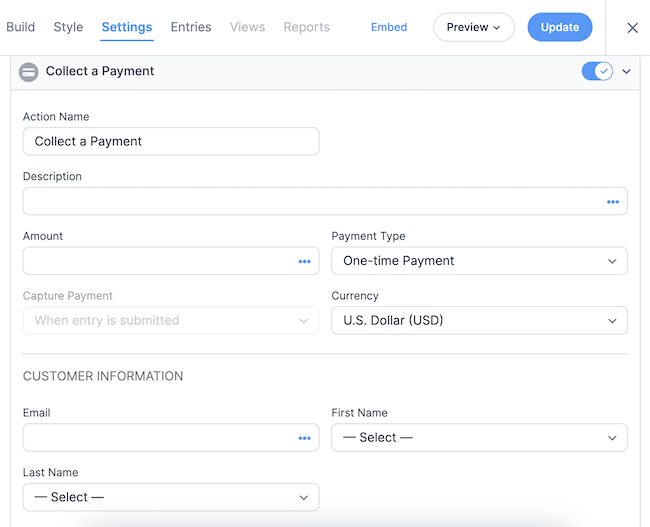
Okay, your payment systems are connected, and your form is ready!
Did you know?
Formidable Forms integrates with WooCommerce, too! Learn how to create a WooCommerce order form easily with Formidable!
When customers are checking out on your website, they'll see something like this:

Step 7: Display your order form
Now, displaying your form is simple. Go to the post or page where you want to show the form and add a WordPress block. Then, search Formidable.
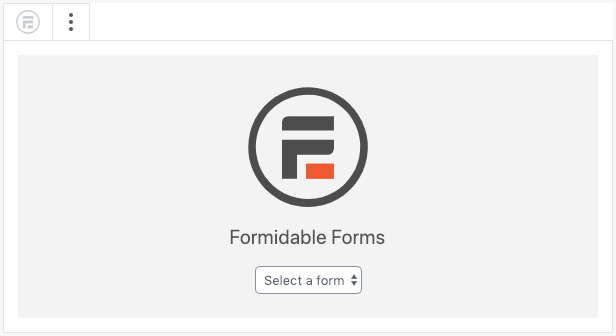
Choose the Formidable block and select the form you created from the dropdown menu.
Update the post/page, and that’s it! Your form is now visible to your website visitors.
We said it was simple, didn't we?
Step 8: Send PDF receipts (optional)
Whether selling single products or in bulk, you need an easy way to send a receipt.
You can use its Forms to PDF feature to convert your order form straight to a PDF. You can even customize how it looks using Formidable’s PDF generator, so it matches your brand perfectly.
To enable Forms to PDF, go to Formidable → Add-ons and find the PDFs add-on to install and activate.
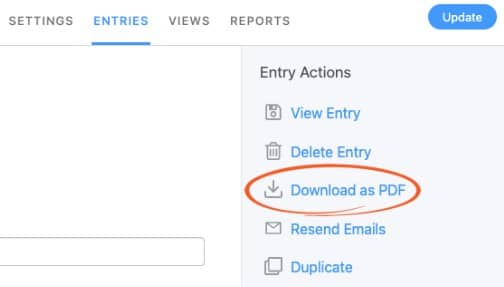
Now, head to Forms → Entries and choose one of the entries to your form. Then, you can click Download as PDF and have the entries in a simple PDF.
You can also attach it to an email notification and have it sent when you submit the form!
Go to your form and go to Settings → Actions & Notifications. Next, click the Send Email action so the form will automatically be sent to their email address.
Scroll down and toggle the switch for Attach PDF of entry to email.

Last, customize the rest of your email settings, and you’re ready to go!
Step 9: Track your customer journey (optional)
How cool would it be to see how your customer got to your order form?
You could improve your customer journey, make your form more visible, and help increase orders with one report. And that’s exactly what Formidable’s User Flow feature gives you.
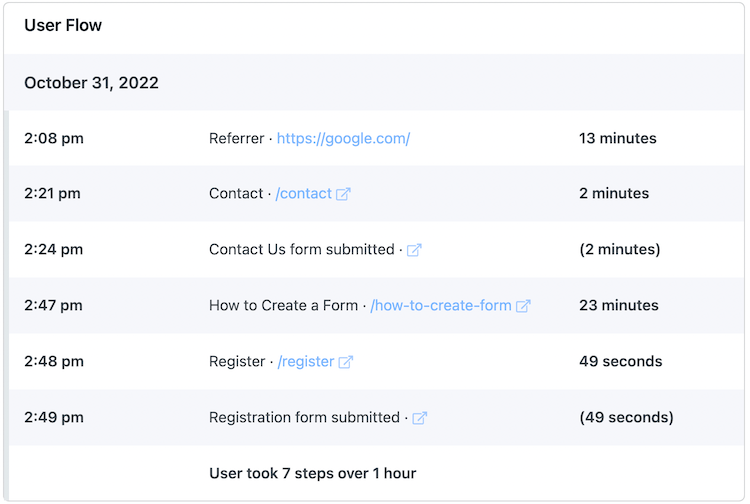
You can see exactly what pages your customer visited and for how long. It even shows you any actions they took on the pages!
You can install and activate the User Tracking add-on by going to Formidable → Add-ons, finding it, and then installing and activating it.
Now, go to your forms entries in Formidable → Entries and choose a form entry. You’ll see an entire report like the one above for each individual submission.
Now, you can use this information to help improve your marketing campaigns for your entire website!
Ready to create a custom order form in WordPress?
We don’t know about you, but we’re excited! We love teaching people everything Formidable Forms can do, and this is just one of many possibilities.
Today’s post taught you how to create a WordPress order form (with payment) for your WordPress site. However, you can also create a WordPress order form without payment. You can also display simple confirmation messages for customers.
That’s the power of Formidable Forms, the best WordPress order form plugin.
But we bet that order forms aren’t the only thing on your mind. If you’re looking to create order forms, you probably want a way to keep track of the orders themselves.
And there’s no better way to do that than by converting your form entries to PDF.
Last, if you’re on social media, follow us on Twitter, Facebook, and YouTube for more WordPress tips!
 How To Create a Custom WooCommerce Order Form [4 Easy Steps]
 How To Create a WordPress Price Calculator for a Website
 6 Best WordPress Order Form Plugins for eCommerce Websites
 How to Make a PayPal Order Form in WordPress
 How to Build a Restaurant Take-Out Order Form in WordPress
 How to Add WordPress Product Options in an Order Form
 The Best Online Order Form Creator for WordPress
 How to Use Pricing Fields in WordPress eCommerce Forms
 How to Make a Pizza Order Form in WordPress
Leave a Reply