Looking to display a success message in WordPress? This guide will show you how to easily display a WordPress success message that you create!

Approximate read time: 3.5 minutes
Do you want to display an excellent custom success message when someone fills out your form?
But you don’t know PHP or how to code. How can you change the message?
You’ve come to the right place!
This guide will show you exactly how to customize your success message in WordPress that’s as unique as your website.
Let’s get started.
Why display a success message in WordPress?
Custom success messages are valuable additions to any form submission for various reasons.

A custom success message can do multiple things, from order to contact forms. Here are a few that will help you immediately:
- Leads to a better user experience. No one knows your website visitors better than you. And a custom success message allows you to tailor it to your users to increase engagement and conversion rates.
- Customization. Part of owning a website is creating a consistent message and theme. And what better way than adding a personal touch, even to the message after they submit a form?
- Communication. You may need to provide important information in the success message, like a link to a download or a next step. So easily edit it to tell them what to do.
- Branding. Ever heard of the term ‘brand identity’? Using your brand’s fonts, colors, and messaging only reinforces your brand identity.
- Feedback. You may want to give immediate feedback to your users. Tell them you received their message and you’ll get back to them soon.
You can also take advantage of this chance to quickly ask users how they discovered your website by adding a short "How did you hear about us" survey.
These are just a few ways custom success messages can improve your user experience, give important info, and reinforce your brand message.
Whether running a huge eCommerce platform or just having a simple contact form, creating a seamless user experience is essential.
And Formidable is there to help you through it all.

How to display a success message in WordPress
To get started, you need to download Formidable Forms.
Formidable Forms is the most advanced form builder for WordPress. But what does that mean exactly?
That means everything is simple for you from start to finish. If you can use a mouse, you can create a form and customize its success message.
And you know what else? With Formidable's 6.0 update, you don’t even have to pay to do it! You can use Formidable’s free plugin!
Although the paid version offers tons of fantastic features for your WordPress forms, so we recommend checking it out.
Make Your Success Message Now!
But, once you get Formidable installed and activated, it’s only two easy steps:
- Create your form
- Customize your success message
- Display your form

Step 1: Create your form
In your WordPress dashboard, head to Formidable → Forms, and click Add New in the top left.

You can type in your email for free templates if you're using our free version. Otherwise, you’ll have to use a Blank Form.
If you’re using our premium version, you get access to many unique templates to get the tedious work done and over with! Contact forms, payment forms, and registration forms — you name it, it’s here.
After you choose the type of form you want, give it a name and click Create.
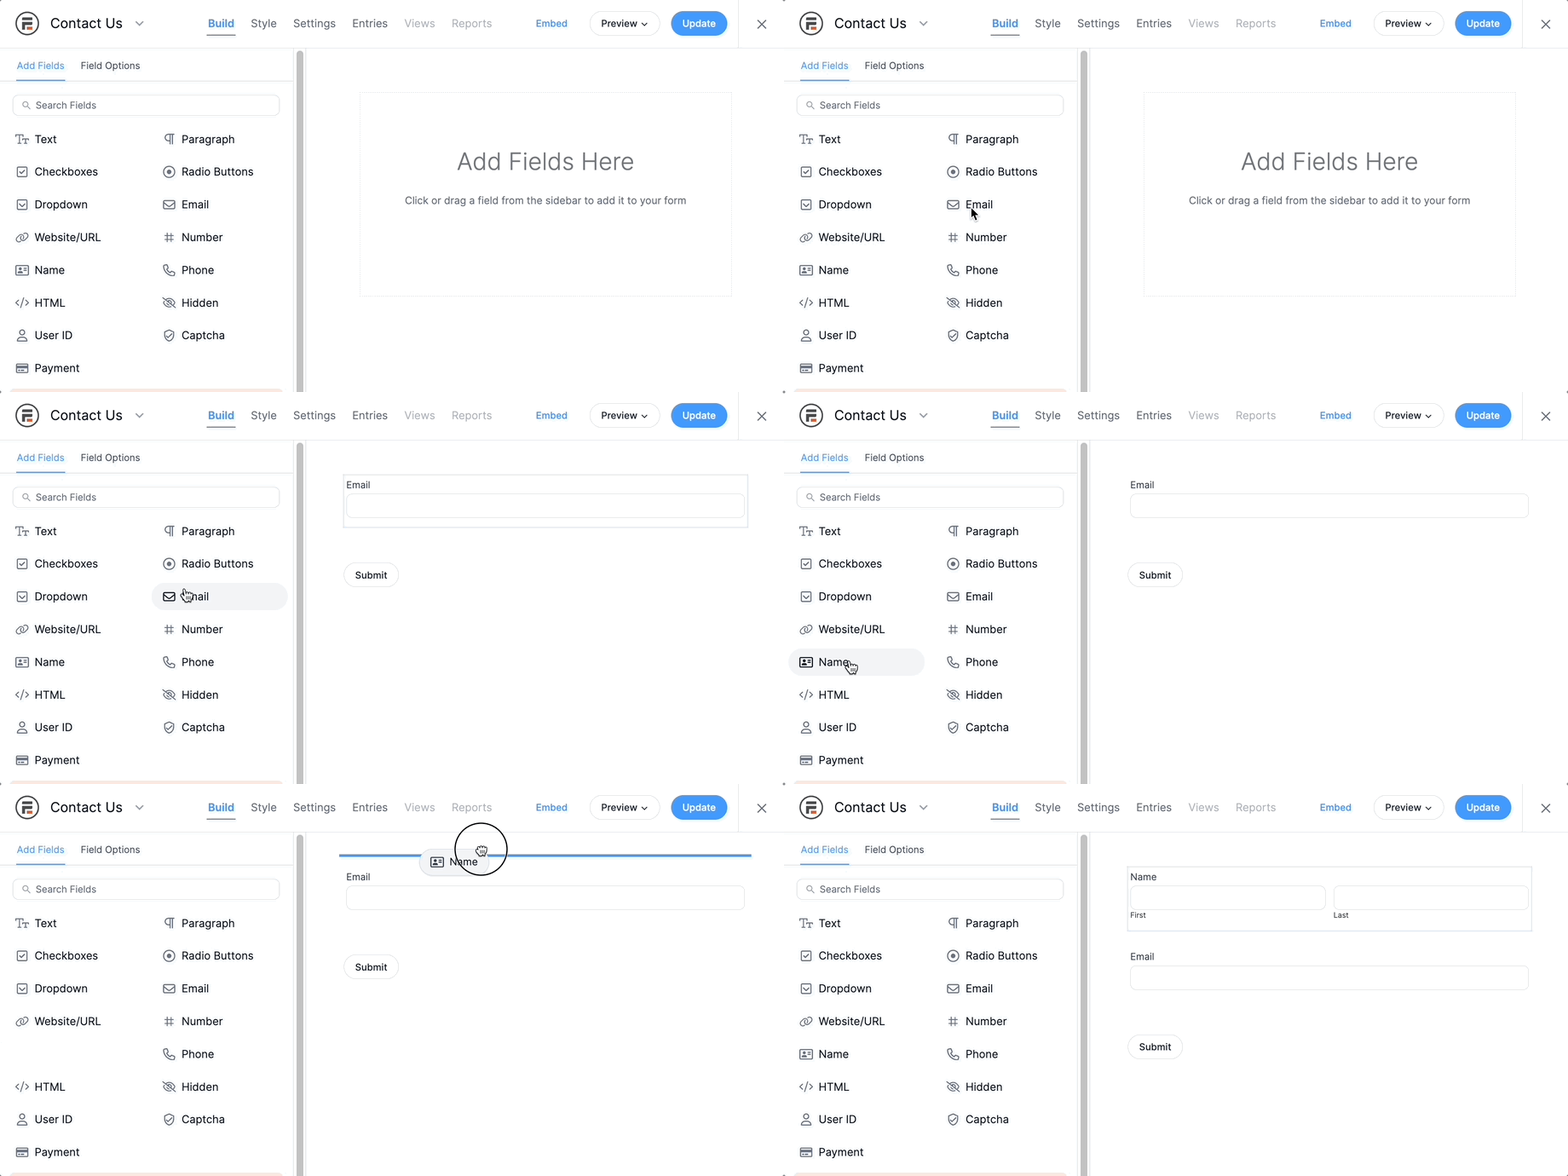
The plugin will take you to its drag-and-drop form builder, where you can customize your form to your needs. Add a Name field, remove a Paragraph field, and play around to see what works for you.

Once you’re finished, click Update to save your changes.
Next, we’ll head to the Settings tab at the top of the page to customize our form success message.
Step 2: Customize your success message
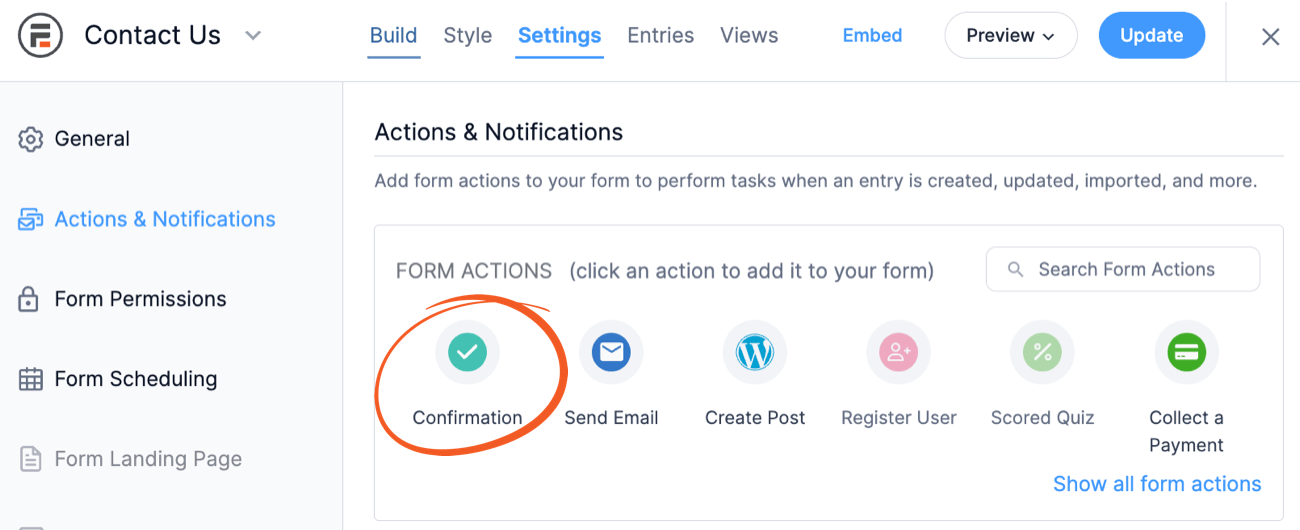
First, choose Actions & Notifications from the left sidebar in your form's Settings.

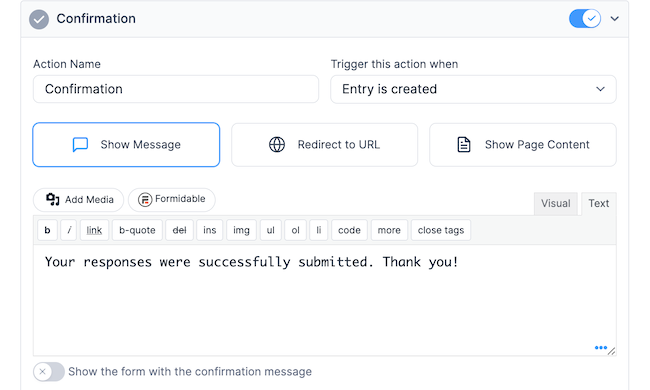
Next, under FORM ACTIONS, choose Confirmation. Then, you have four options, but we want to focus on the Show Message tab.
Under the Message on submit, you can enter any response into the text box. Make it a Thank You message for contact form submits, show a coupon code or promo code to subscribers, or just show a simple confirmation message after user registration.

Regardless of what you choose, give your action an Action Name (only you will see this), then select how long you want it to show before it redirects.
If you prefer, choose the Visual editor to customize it another way.
Once you customize it, simply click Update again to save your changes.
Step 3: Display your form
Last, we just need to show your form to visitors so they can see that great message!
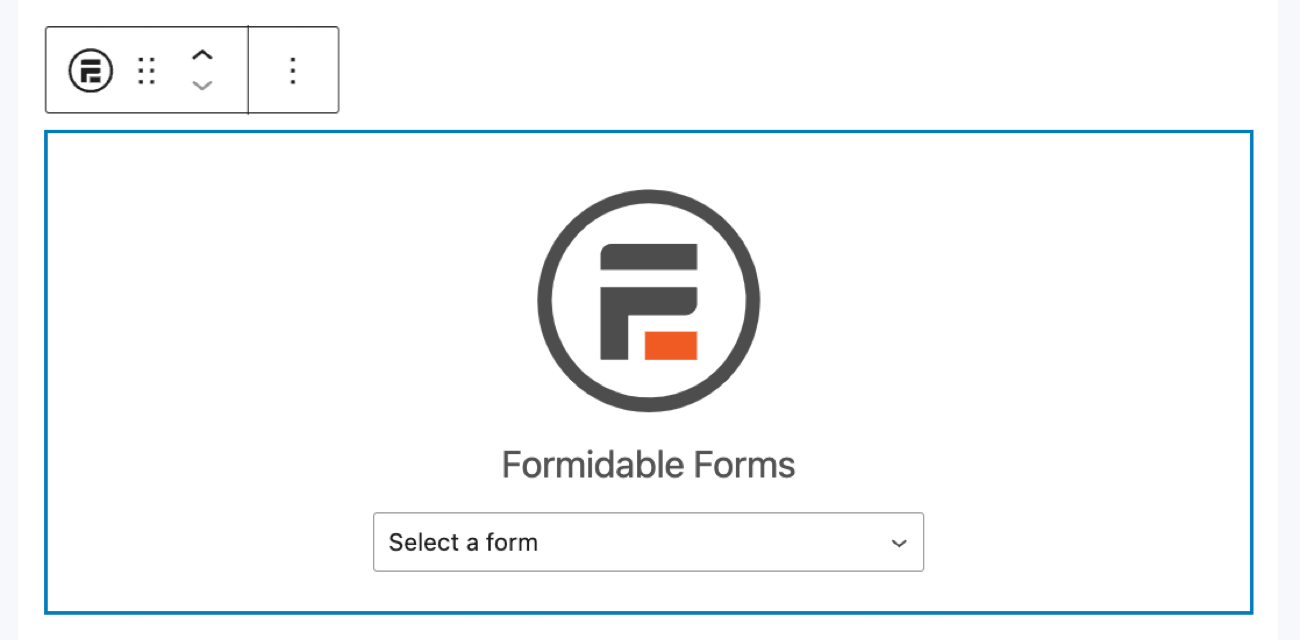
So, head to the post or page where you want to show your form and add a new WordPress block. Next, search for the Formidable Forms WordPress block and add it.

Then, choose your form from the dropdown menu, and the block will show your form!
Last, update your post or page; you’re good to go! Visitors will see your custom success message every time a user submits your form.

If you want to change your success message on your WordPress site (or set up an alert), head to your WP admin and go to the form. That’s it.
We told you it was easy!
Make Your Success Message Now!
What will you put in your custom success message?
And there you have it!
It’s just a few simple steps to display a custom message on form submission with one simple WordPress plugin — Formidable Forms.
So, now that you’ve learned how to add a success message to an online form, learn how to redirect after form submit with this guide.
And be sure to comment below to let us know how you'll customize success messages on your site!
Last, follow us on Facebook, Twitter, and YouTube for more incredible WordPress tips & tricks!
Read more from the Formidable blog
Did you know that Formidable Forms is one of the fastest WordPress form builder plugins available today? If you're not already using it, get started with our free plugin or the full-featured pro version!
 Formidable Forms Currency Fields Update Incoming!
 How To Use WordPress to Redirect to a Page After 10 Seconds
 Formidable Forms Anniversary 2025: The Most Advanced Form Builder Turns 15!
Nice feature update with the conditional success messages. And of course Mike's video tutorial was spot on. Especially his revised message for lower expectations!
Creating a dedicated Confirmation action for displaying form success messages really opens up a world of options for Formidable Forms users. This gives us the flexibility to accommodate even more specific use cases.